
When your Chefman air fryer starts producing unevenly cooked food or emits strange odors, the culprit is almost always hidden grease buildup and food debris. That once-reliable kitchen companion that crisped your wings to perfection now leaves behind burnt flavors and stubborn stains that seem impossible to remove. Most Chefman owners make the critical mistake of only cleaning the obvious parts—the basket and pan—while neglecting the hidden areas where grease and food particles accumulate over time.
The truth is, a thorough cleaning routine takes less than 15 minutes when done correctly, yet prevents costly repairs and extends your air fryer’s lifespan by years. This guide delivers proven techniques specifically tailored for Chefman models that tackle everything from daily maintenance to deep cleaning of hard-to-reach areas. You’ll discover exactly where grease hides, how to safely clean delicate components, and why certain “quick fixes” actually damage your appliance over time.
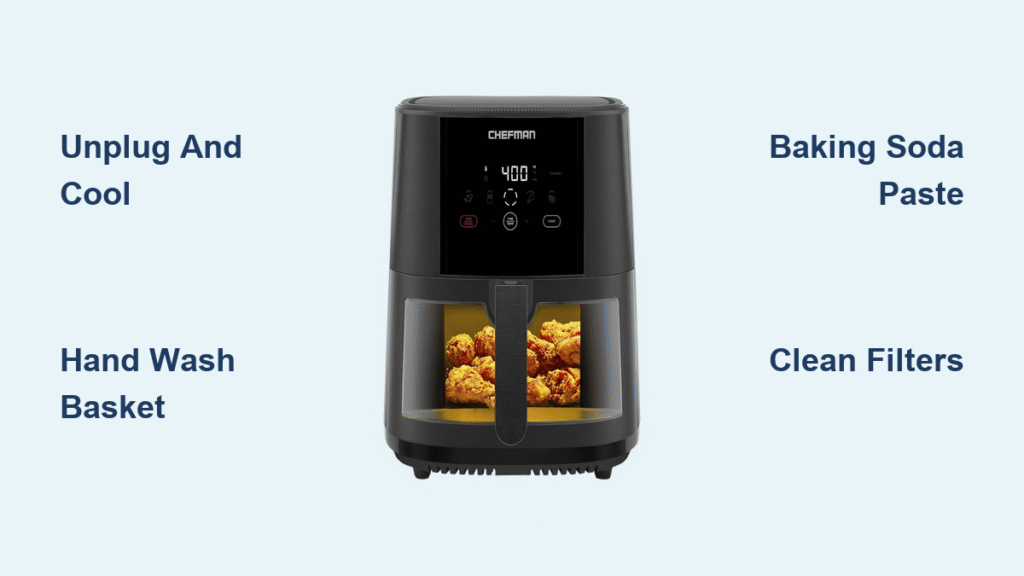
Unplug and Cool Down Before Any Cleaning Attempt
Ignoring proper cooling time is the #1 cause of accidental burns and appliance damage during air fryer cleaning. Your Chefman’s heating elements retain dangerous temperatures long after cooking ends—sometimes up to 60 minutes depending on usage intensity.
Verify Complete Cooling with the Back-of-Hand Test
After unplugging your Chefman air fryer, set a timer for 30 minutes minimum before attempting any cleaning. Test readiness by lightly touching the outer shell with the back of your hand—not your fingertips. If you detect even slight warmth, wait another 15 minutes. This waiting period serves a dual purpose: it prevents burns while allowing grease to solidify slightly, making it easier to remove without smearing throughout the appliance.
Prepare Your Cleaning Station Near the Sink
Clear a 2-foot square workspace adjacent to your sink with adequate lighting. Place a silicone mat or soft towel on the counter to protect your air fryer’s non-stick surfaces from scratches during disassembly. Gather these essential tools before starting: mild dish soap (free of citrus oils), warm water, soft microfiber cloths, non-abrasive brush, and cotton swabs. Having everything within arm’s reach prevents you from leaving components soaking too long or improvising with inappropriate tools.
Daily Cleaning: Remove Hidden Grease Before It Hardens
Most users focus only on visible basket grime while ignoring the sneaky grease pools that form beneath components—a recipe for permanent staining and unpleasant odors within weeks.
Disassemble Components Completely Before Washing
Press the basket release button firmly and lift straight up to separate the cooking basket from the pan—don’t wiggle it sideways. These components often trap grease in the connection point that becomes baked-on if left uncleaned. Shake out crumbs over your trash can before washing to prevent creating a wet mess. Check the pan’s bottom for oil pooling—dab it with paper towels first to avoid spreading grease throughout your sink.
Hand Wash Technique That Preserves Non-Stick Coating
Fill your sink with warm water and 2-3 drops of mild dish soap. Soak the basket for 5 minutes, then use a soft sponge to clean both interior and exterior surfaces, applying gentle circular motions to the mesh bottom where food particles embed themselves. Rinse under warm running water until completely clear—soap residue creates chemical flavors in your next meal. For the pan, remove excess grease with paper towels first, then wash thoroughly. Hand-dry both components immediately; air-drying leaves water spots that eventually etch the non-stick surface.
Interior Wipe-Down That Prevents Odor Buildup
While components soak, dampen a microfiber cloth with warm soapy water and wipe the interior cavity, focusing on the area directly beneath the heating element where grease splatters accumulate. Use a soft toothbrush to gently dislodge food particles from the heating coil housing—never press against the coils themselves. Finish with a clean damp cloth to remove soap residue, then dry thoroughly. Skipping this daily step causes the most common Chefman complaint: “Why does everything taste like yesterday’s fried chicken?”
Weekly Deep Cleaning: Eliminate Hidden Residue That Ruins Food
:max_bytes(150000):strip_icc()/faw-toaster-ovens-air-fryers-test-chefman-3-qt-turbofry-rkilgore-111-487d903950824b019a89d671ec68e254.jpg)
After just 7-10 uses, microscopic grease layers build up in areas you can’t see—causing uneven cooking and that dreaded burnt smell during preheating.
Baking Soda Paste Method for Baked-On Messes
Mix three tablespoons of baking soda with one tablespoon of water to create a thick paste. Apply this to stubborn residue spots on the basket and pan, letting it sit for 15-20 minutes—the alkaline reaction breaks down grease without damaging non-stick coatings. Use a soft brush in gentle circular motions to lift residue, then rinse thoroughly. For particularly tough spots near the heating element, apply white vinegar with a cloth and let sit for 10 minutes before wiping—this natural degreaser works without harsh chemicals.
Deep Interior Cleaning That Targets Odor Sources
Remove all components and use a flashlight to inspect the interior cavity. You’ll likely find grease accumulation along the upper walls and near the fan housing—prime locations for odor development. Wrap a damp cloth around a chopstick or long-handled brush to reach these areas safely. Clean the fan blades carefully with a soft brush, ensuring no liquid drips into electrical components. This targeted cleaning eliminates the mysterious “burnt plastic” smell many users report.
Critical Component Inspection During Deep Cleaning
Examine the non-stick coating for hairline cracks or peeling—these spots accelerate food sticking and become impossible to clean. Check the basket handle mechanism for food buildup that causes the release button to stick. Inspect rubber seals for deterioration, cleaning them separately with warm soapy water. Catching these issues during weekly cleaning prevents major problems that require expensive part replacements.
Monthly Maintenance: Prevent Costly Damage Before It Happens
Once monthly, dedicate 20 minutes to comprehensive maintenance that extends your Chefman’s lifespan by 2-3 years. This prevents the #1 reason for premature air fryer failure: internal grease buildup causing electrical component damage.
Complete Disassembly Cleaning That Targets Hidden Areas

Remove every detachable piece, including rarely used accessories. Soak components in warm soapy water for 30 minutes if heavily soiled. Use a toothpick or soft brush to clean tiny crevices—pay special attention to the basket’s handle joints and pan rim edges where debris accumulates unseen. This thorough approach eliminates hidden grime that affects cooking performance and causes uneven crisping.
Filter and Vent Cleaning That Maintains Optimal Performance
Check for air intake filters on your specific Chefman model (located near the base on most units). Remove these according to your manual and rinse under warm water. Use a soft brush to remove accumulated dust and grease, then air-dry completely before reinstalling. Clean exhaust vents using your vacuum’s brush attachment to remove internal dust buildup that reduces cooking efficiency by up to 30%.
Electrical Safety Verification That Prevents Hazards
Inspect the power cord for damage, fraying, or kinks that could create fire hazards. Clean the plug connections with a dry cloth to ensure proper electrical contact. Test all safety mechanisms by running a short cooking cycle after cleaning—this confirms everything works correctly and burns off any cleaning residue. This simple monthly check prevents dangerous electrical issues that cause 15% of air fryer failures.
Eliminate Lingering Odors with Chefman-Specific Methods
Persistent cooking smells indicate hidden residue you haven’t addressed—usually in the heating element housing or fan area.
Overnight Deodorizing That Actually Works
Remove all components and place a small bowl of white vinegar inside the empty air fryer. Let it sit overnight to absorb stubborn odors. In the morning, run the air fryer empty at 350°F for 10-15 minutes with windows open—this burns off remaining residue. Clean the heating element area more thoroughly, as odors often originate from invisible grease buildup on the coil housing.
Steam Cleaning Technique for Extreme Buildup
For severely baked-on messes, add one cup water and two tablespoons white vinegar to the pan. Run at 350°F for 10 minutes, then cool completely. The steam loosens residue, making it wipe away easily with your normal cleaning routine. Never use this method with electrical components exposed—always keep the basket and pan in place during steaming.
Smart Storage Solutions That Prevent Future Messes
Proper storage prevents moisture accumulation and keeps your Chefman ready for flawless performance.
Storage Preparation That Prevents Mold
Ensure every component is bone-dry before storing—use a hairdryer on cool setting for hard-to-reach areas if needed. Store the basket and pan nested with a paper towel between them to prevent scratching. Keep your Chefman in a dry location away from heat sources, and leave the basket slightly ajar to allow air circulation. Moisture trapped inside causes 40% of premature non-stick coating failures.
Prevention Techniques That Save Daily Cleaning Time
Line the pan with perforated parchment paper during cooking for easier cleanup while maintaining proper airflow. After light uses, a quick wipe-down with a damp cloth often suffices instead of full washing. Empty and clean the crumb tray after each use, and perform a 30-second visual inspection before cooking to catch issues early. These small habits prevent the overwhelming cleaning sessions that make owners abandon maintenance altogether.
Maintaining your Chefman air fryer isn’t just about appearances—it’s the key to consistent cooking performance and appliance longevity. By following these specific cleaning techniques tailored to Chefman models, you’ll enjoy perfectly crispy results without lingering flavors from previous meals. Remember, the 10 minutes you invest in proper daily maintenance saves you hours of difficult scrubbing later, while protecting your investment for years of reliable service. Start implementing these steps today, and your Chefman will reward you with restaurant-quality results meal after meal.


