
Your Ninja Air Fryer 9-in-1 should deliver crispy perfection every time, but yesterday’s bacon grease and invisible crumbs sabotage today’s meals. That lingering burnt smell? It’s not your cooking—it’s residue baking onto neglected components. When performance dips or odors emerge, your appliance is screaming for a deep clean. This guide delivers the exact steps Ninja engineers recommend to restore factory-fresh results without voiding your warranty. You’ll master component-specific techniques, banish stubborn grease in 20 minutes, and establish a foolproof routine that keeps your air fryer running like new. Let’s reclaim your crispy chicken wings and golden fries—starting right now.
Cleaning isn’t just about appearance; it directly impacts cooking performance and safety. Residue on heating elements causes smoke, uneven cooking, and even fire hazards. Left unchecked, grease buildup reduces airflow by up to 30%, turning “air frying” into “steaming.” But don’t panic—you won’t need harsh chemicals or specialty tools. Using only items from your kitchen, you’ll achieve professional results in under 45 minutes. Follow this guide to extend your appliance’s lifespan and guarantee every meal tastes exactly as it should.
Unplug and Cool Down: Critical Safety Steps Before Cleaning
Never skip the 15-20 minute cool-down period. The air fryer basket and internal components retain scorching heat long after cooking ends, risking severe burns. Always unplug the unit immediately after use—this isn’t optional. Water contacting live electrical components could cause permanent damage or shock hazards. Treat your air fryer like a hot stove: no cleaning attempts until it’s room temperature.
Keep the main housing bone dry. Unlike removable trays, the core unit contains sensitive electronics beneath its sleek exterior. Submerging it or spraying liquids inside is the #1 cause of premature failure. Use only a slightly damp cloth for exterior wiping—never pour water directly into the cavity. Remember: if your laptop survived a spilled coffee, your air fryer won’t.
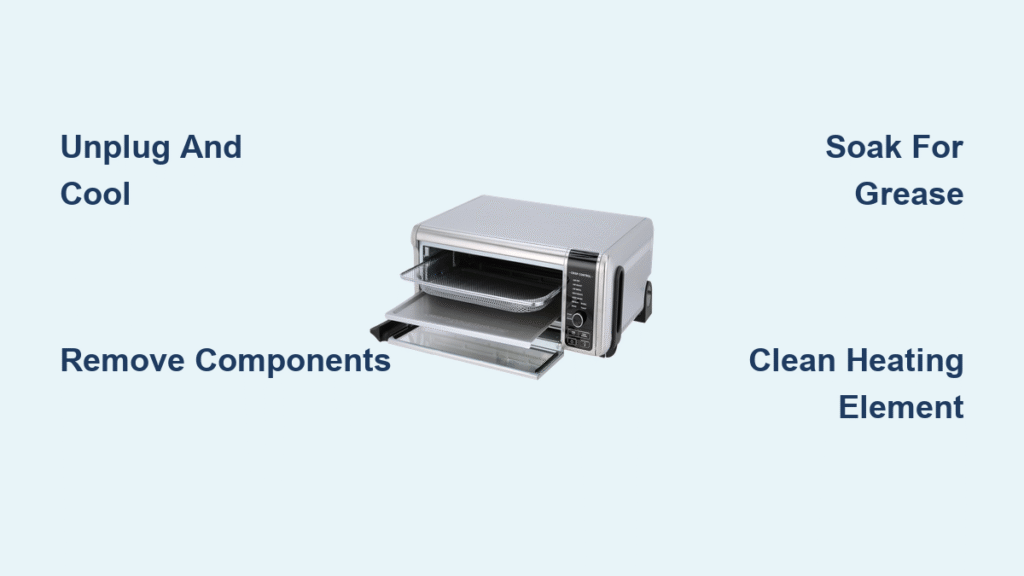
Remove Ninja Air Fryer Components in 60 Seconds Flat
Flip your unit into storage position to access the hidden interior cavity. Press the back-door release button firmly—you’ll hear a distinct click signaling full access. Now extract parts in this order:
- Air fry basket (holds your food)
- Crumb tray (catches drips and crumbs)
- Crisper tray (for extra-crispy results)
- Additional racks (if used)
- Silicone sealing ring (pressure-cooker models only)
Place components on a clean towel. Missing even one piece traps residue that creates tomorrow’s smoke alarms. Check the crumb tray especially—it’s the grease graveyard most users forget.
Dishwasher or Hand Wash? The Ninja Basket Lifespan Secret
Top-rack dishwasher cleaning works for most parts—but verify your model first. Consult page 3 of your manual: newer 2-basket models explicitly warn against dishwashers to preserve non-stick coatings. For compatible parts, place them on the top rack only and run a normal cycle. The gentle water pressure removes grease without warping.
Hand-washing extends basket life by 2+ years. Fill your sink with warm water, 3 pumps of dish soap, and a non-scratch sponge. Focus on mesh zones where grease hides—work the sponge in tight circles to force soap through every opening. Rinse under running water until it flows completely clear; any soap residue creates bitter-tasting food later. Always air-dry parts upright for 30+ minutes before reassembly.
Remove Baked-On Grease: Deep Cleaning Methods That Work

The 20-Minute Soak Method for Effortless Cleaning
Fill your sink with warm water and 3 pumps of dish soap. Submerge removable parts for exactly 20 minutes—no longer. Extended soaking weakens non-stick coatings. After soaking, use a soft-bristled brush to lift residue with zero pressure. The grease should slough off like wet sand. For mesh areas, wiggle the brush vertically to dislodge trapped particles.
Baking Soda Power Paste for Stubborn Spots
Mix equal parts baking soda and water into a thick paste. Apply it directly to grease hotspots using an old toothbrush, concentrating on corners and mesh intersections. Let it sit for 20 minutes while you tackle other tasks—the paste chemically breaks down residue without scratching. For extra power, spray white vinegar onto the paste: the bubbling reaction lifts grease from microscopic pores. Rinse thoroughly to avoid gritty leftovers.
Steam Cleaning Hacks: Refresh Without Scrubbing
Lemon Juice Steam Method for Odor Removal
Combine 1 cup hot water and 1 cup lemon juice in the basket. Close the lid and let it sit for 5-10 minutes—the citric acid steam loosens grease while neutralizing odors. Wipe interior surfaces with a cloth dipped in the same solution for a streak-free finish. Critical check: Only use this if your manual confirms liquid-safe operation (most 9-in-1 models allow it).
Boiling Water Technique for Combo Models Only
Add 1 inch of warm soapy water to the basket bottom. Run your air fryer at the lowest temperature setting for 5 minutes until water simmers. The steam penetrates hardened grease on the heating element. Never skip cool-down: Wait 20 minutes before wiping to avoid burns. This method is strictly for pressure-cooker/air fryer combos—standard models lack the necessary seals.
Clean the Heating Element Without Voiding Warranty
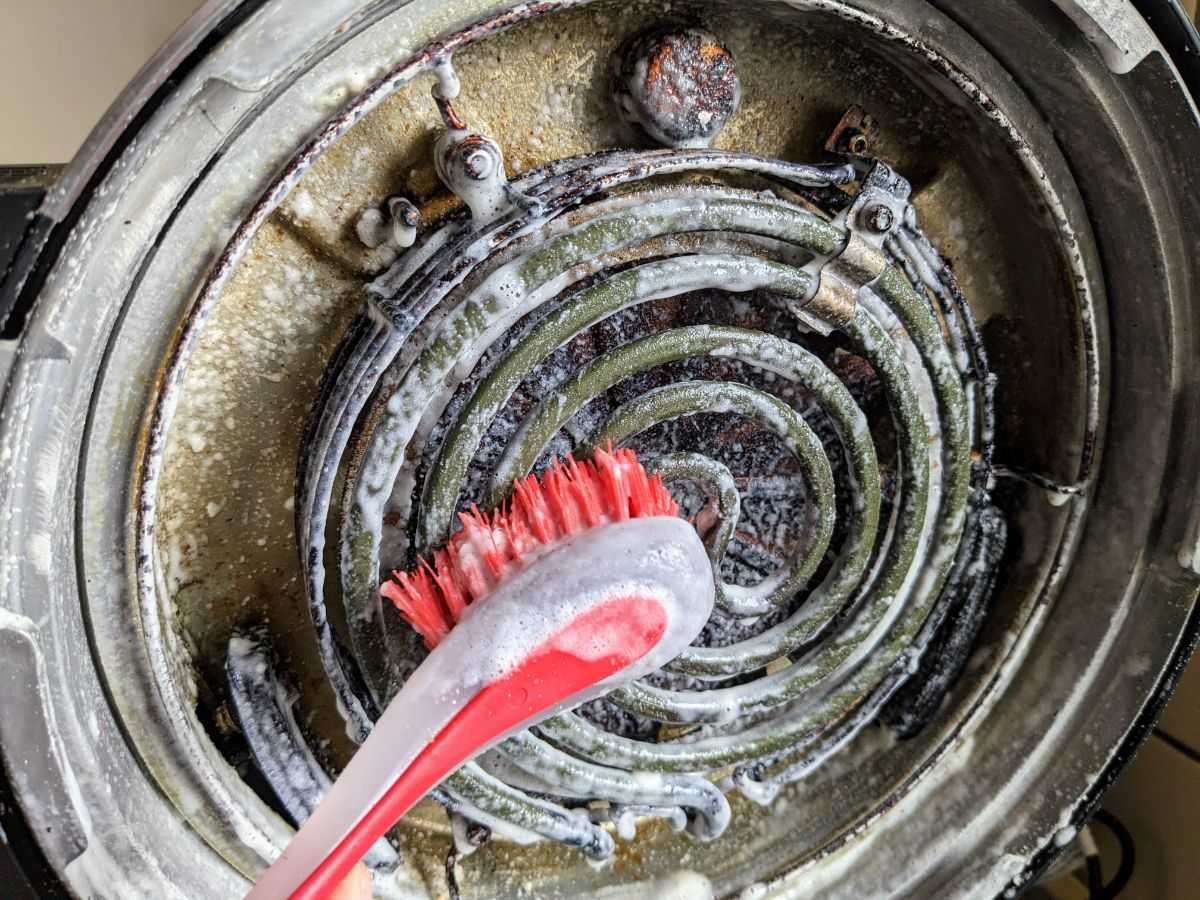
Never pry off the metal grate covering the coils—it’s your warranty’s lifeline. Instead, dip a soft-bristled brush in hot soapy water and gently scrub around the grate. Focus on visible coil surfaces, working bristles in small circles to dislodge debris. Finish with a damp microfiber cloth to catch loosened particles.
Spot-check for success: Clean coils gleam silver. Brown or black residue means repeat the baking soda paste treatment—it’s causing smoke and uneven cooking. If grime persists after two attempts, contact Ninja support; forcing removal risks $200+ coil replacements.
Wipe Down the Exterior: Avoid Electrical Damage
Start with a cloth dampened in warm water for general surfaces. For greasy control panels, add one drop of dish soap to the cloth—never spray directly! Finger oils attract dust and cause buttons to stick over time. Use a soft toothbrush on textured surfaces where grime hides, like the handle grooves.
Dry immediately and thoroughly. Residual moisture around buttons causes electrical shorts. First towel-dry, then air-dry upright for 20 minutes. Skip this step, and you’ll face intermittent power failures within weeks.
Fix These Common Ninja Air Fryer Cleaning Problems

Eliminate Polymerized Grease (The “Plastic-Like” Residue)
Standard methods fail against polymerized grease—it’s literally transformed into plastic. Research “Simple Green how to clean an air fryer” for Ninja-approved instructions. Users report 80% removal with minimal scrubbing when using this specialized cleaner. Apply with an old toothbrush, wait 10 minutes, then rinse. Never use oven cleaners—they destroy coatings.
Remove Lingering Odors from Pressure Cooker Models
Odors hide in the silicone sealing ring. Remove it during every deep clean, soak in warm soapy water for 15 minutes, then air-dry completely. Reinstall only when bone dry—a damp ring causes pressure leaks. Replace rings every 6 months; cracked seals create cooking disasters.
Your Ninja Air Fryer Cleaning Schedule: After Every Use, Weekly, Monthly
After every cook: Wash basket and crumb tray with soapy water. Takes 3 minutes, prevents 30-minute deep cleans later. Dry immediately to avoid water spots.
Weekly deep clean: When residue resists regular washing or you smell burning during preheating. Perfect for Sunday mornings—components dry while you sip coffee.
Monthly inspection: Check heating elements for discoloration, test door seals by closing on a dollar bill (it should grip firmly), and verify all parts click into place securely.
5 Things That Will Destroy Your Ninja Air Fryer (Avoid These!)
- Steel wool or abrasive pads: They scratch non-stick coatings permanently
- Chemical oven cleaners: Create toxic fumes when heated next time
- Dishwashing the main unit: Guaranteed electrical failure
- Forced grate removal: Instantly voids warranty
- Rushing cool-down: Causes burns and warps components
Ninja Air Fryer 9-in-1 Cleaning Cheat Sheet
Emergency support: Call Ninja Customer Care at 1-866-826-6941
– Mon-Fri: 9 a.m.-9 p.m. ET | Sat: 9 a.m.-6 p.m. ET
Time savings: Routine clean = 15 mins | Deep clean = 45 mins
Best practice: Clean every Sunday—parts dry completely before Monday’s meals
Clean your Ninja Air Fryer 9-in-1 today, and tomorrow’s chicken wings will taste exactly as they should: crispy, fresh, and free from last week’s fish residue. That first bite of perfectly golden fries after a deep clean? It’s not magic—it’s science. Now stop dreaming about restaurant-quality results and start making them. Your spotless air fryer awaits.


