
Your Ninja air fryer sits on the counter, ready to transform frozen fries into crispy perfection. You press random buttons, but nothing happens. Sound familiar? Whether you’re unboxing your first Ninja or troubleshooting a stubborn unit, mastering the power-on process takes just seconds once you know the exact steps. This guide walks you through every model’s startup sequence, from that first button press to your first successful cook cycle.
Knowing how to turn Ninja air fryer on properly prevents frustration and ensures your appliance works safely and efficiently. Many users waste precious cooking time pressing random controls when the solution is remarkably simple. Let’s get your Ninja humming and ready to cook in under a minute.
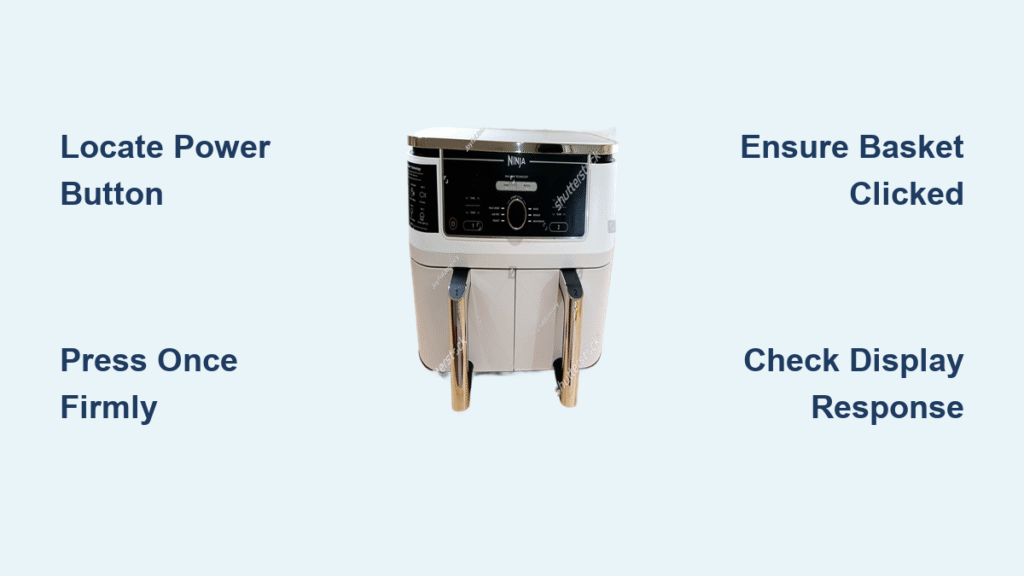
Locate Your Ninja’s Power Button in Seconds
Every Ninja air fryer positions the power button prominently on the front control panel where it can’t be missed. Look for the universal power symbol (⏻) on a circular button—this is your gateway to crispy cooking. On most single-basket models like the Ninja AF101, the power button sits directly below the digital display as the leftmost control.
Quick identification tips by model:
– Single basket models: Find the power button immediately beneath the display screen
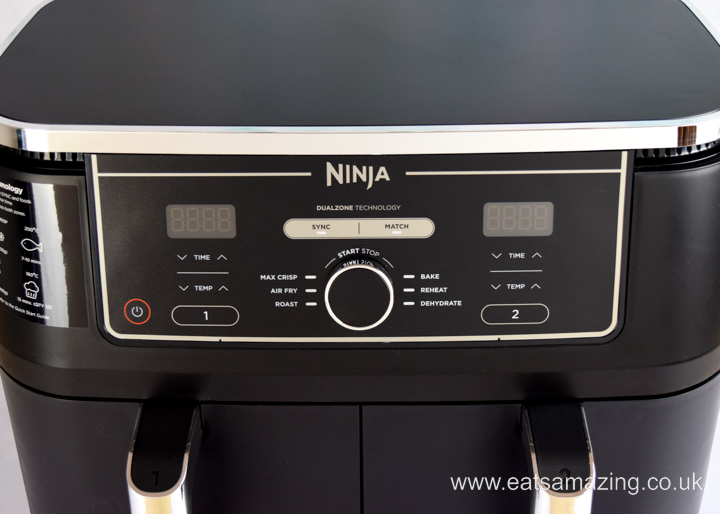
– Dual-zone Foodi Max models: Identify the larger central power button between the two display panels
– Compact 4-Quart models: Spot the smaller power button integrated into the main control dial
If you’re struggling to find it, run your finger along the control strip from left to right—Ninja consistently places the power button as the first control you’ll encounter. This deliberate placement ensures you always power on before programming, preventing accidental cooking cycles.
Execute the Perfect Power-On Sequence
Single press activation that works every time:
1. Firm press: Tap the power button once with your fingertip—no need to hold
2. Watch for response: The digital display should illuminate within 2 seconds
3. Listen for confirmation: A brief fan activation confirms system startup
When a single press fails:
– Hold the button for 3-5 seconds (some newer models require this)
– Check both ends of the power cord for secure connections
– Ensure the basket clicks fully into place (safety interlock prevents startup)
Most power-on failures stem from the basket not seating properly. Give it a firm downward push until you hear a distinct click—this engages the safety mechanism that allows power activation. If the display still doesn’t light up, test the outlet with another appliance to rule out electrical issues.
Program Your First Cooking Cycle Successfully
Once powered on, your Ninja displays either previous settings or factory defaults. The unit won’t start cooking until you program it with specific parameters. This two-step process transforms your powered-on unit into an active cooking appliance.
Essential startup programming sequence:
– Select cooking mode: Press mode button to cycle through Air Fry, Roast, Bake, Dehydrate, Reheat
– Set temperature: Use +/- buttons to adjust between 40°C-240°C in 5-degree increments
– Program time: Set duration from 1-60 minutes using time adjustment buttons
– Start cooking: Press Start/Pause to begin your cycle (display shows countdown)
The default settings typically show “180°C” and “15:00” for air frying. For your first test run, keep these defaults and press Start to verify full functionality. You’ll hear the fan activate and see the heating elements glow red within 30 seconds.
Activate Dual-Zone Models Without Confusion
Ninja Dual Air Fryer startup procedure:
1. Power on: Press the main power button (center of control panel)
2. Select basket: Press “Basket 1” or “Basket 2” to activate your chosen cooking zone
3. Program independently: Set temperature and time for each basket separately
4. Coordinate finish times: Press “Sync” to have both baskets complete simultaneously
Dual-zone models like the Foodi Max display two separate timer readouts. Each basket operates completely independently until you engage the Sync function. For example, you can air fry chicken in Basket 1 at 200°C for 20 minutes while reheating pizza in Basket 2 at 160°C for 8 minutes—then sync them to finish together.
Pro tip: When cooking identical foods in both baskets, activate Sync before programming to apply settings to both zones simultaneously, saving valuable setup time.
Interpret Display Signals for Successful Startup

Positive startup indicators to watch for:
– Digital display: Shows “0:00” and default temperature (usually 180°C)
– Mode lights: Illuminated LED indicates your selected cooking function
– Basket indicators: On dual models, lights confirm which zones are active
– Fan test: Brief 2-second fan spin confirms system readiness
Warning signs requiring immediate attention:
– No display illumination: Double-check power connections at both ends
– Flashing lights: Unit is cooling down from previous use (wait 5 minutes)
– Error codes: Consult your manual for specific troubleshooting steps
The display provides instant feedback about your Ninja’s status. If you see “HI” on the display, the unit is too hot to restart—allow 15 minutes for cooling. A “CL” display indicates the unit is in cleaning mode and needs resetting.
Pre-Heat Only When It Actually Matters
Most Ninja air fryers skip pre-heating entirely, but two specific scenarios benefit from a quick warm-up:
When pre-heating makes a difference:
– Lightweight toppings: Pre-heat 3 minutes to prevent cheese from blowing around
– Maximum crispiness: 2-minute pre-heat for frozen foods using Max Crisp mode
Correct pre-heat procedure:
1. Set desired cooking temperature
2. Program timer for 2-3 minutes
3. Press Start to begin pre-heat cycle
4. Add food immediately when timer beeps
For most everyday cooking—from frozen fries to roasted vegetables—skip pre-heating to save time. The rapid air technology heats up so quickly that pre-heating often wastes energy without improving results.
Fix Common Power-On Failures in Under 2 Minutes
Unit completely unresponsive:
– Check connections: Power cord firmly seated at both wall outlet and unit
– Test outlet: Plug in phone charger or lamp to verify power source
– Basket placement: Ensure basket clicks down completely with audible confirmation
– Cool-down period: Wait 15 minutes if unit recently overheated
Display lights but no cooking response:
– Reset unit: Unplug for 30 seconds, then reconnect power
– Clean control panel: Wipe with slightly damp cloth to restore button responsiveness
– Factory reset: Consult manual for model-specific reset procedure
Over 80% of “broken” air fryers simply need the basket reseated properly. Give it a firm downward push until you hear the safety mechanism engage—this solves most power-on issues instantly.
Recognize Safety Features That Affect Power-On
Your Ninja incorporates multiple protections that directly impact startup:
Automatic safety mechanisms:
– Overheat shutoff: Prevents restart until cooled (wait 15 minutes)
– Basket detection: Won’t power without proper insertion (listen for click)
– 60-minute auto-off: Resets after continuous operation
– Cool-touch housing: Safe to touch during power-on sequence
Essential pre-startup safety check:
– Confirm basket clicked fully into position
– Verify interior free from debris or obstructions
– Inspect power cord for damage before plugging in
– Ensure 5 inches of clearance around unit for proper ventilation
These safety features mean your Ninja might appear unresponsive when actually protecting itself from damage. Understanding these mechanisms prevents unnecessary panic when your unit doesn’t behave as expected.
Master the 7-Step Power-On Checklist
Before each cooking session, run through this verified startup sequence:
– [ ] Unit plugged into working outlet (test with other appliance)
– [ ] Basket properly inserted with audible click confirmation
– [ ] Power button pressed once (no need to hold)
– [ ] Display shows active screen with temperature readout
– [ ] Desired cooking mode selected (Air Fry, Roast, etc.)
– [ ] Temperature and time programmed to recipe requirements
– [ ] Start/Pause button pressed to initiate cooking cycle
Time benchmark: From power-on to active cooking takes just 30-45 seconds once you’ve memorized the sequence. Practice this routine three times to build muscle memory that makes startup second nature.
Pro tip: Save your most-used settings by programming them before powering off. The Ninja remembers your last configuration, making tomorrow’s startup even faster—no reprogramming needed for your go-to recipes.
Your Ninja air fryer now responds reliably to every command. That perfectly crispy batch of fries is just minutes away—no more button-mashing required. With this precise startup knowledge, you’ve eliminated the most common frustration point for new air fryer users. The next time you want a quick meal, you’ll power up with confidence knowing exactly how to turn Ninja air fryer on and get cooking immediately.


