
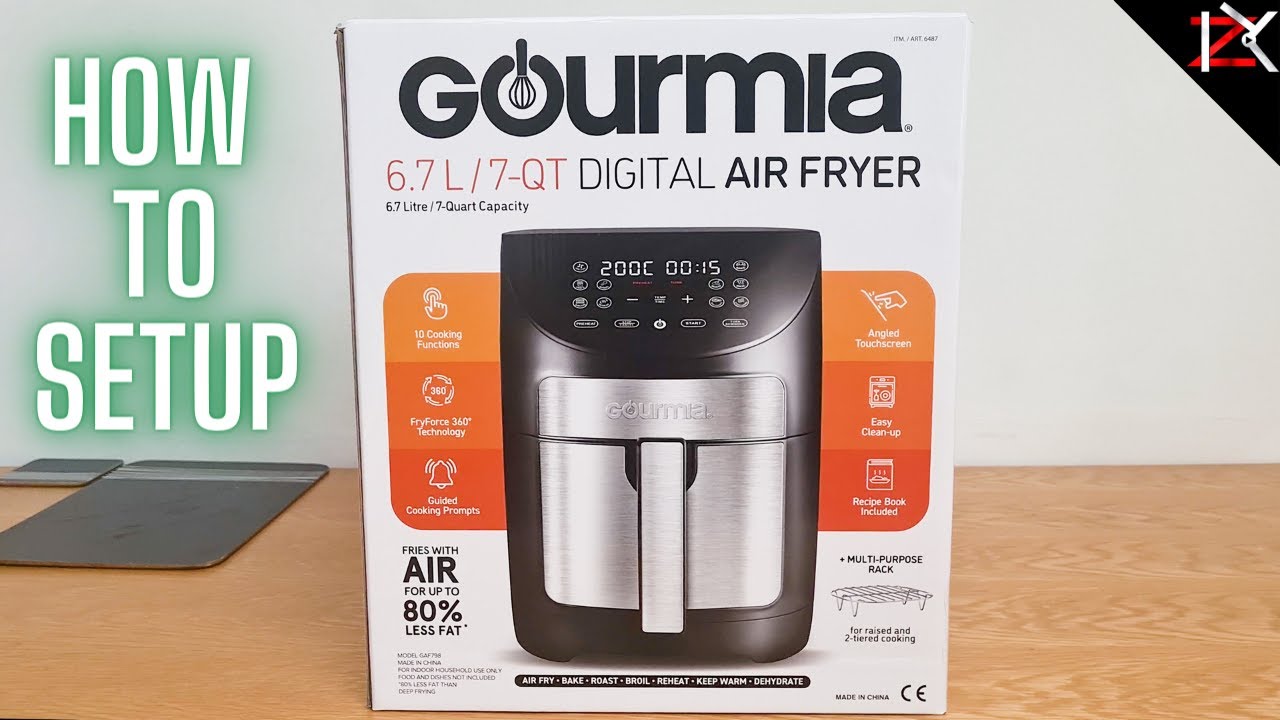
That brand-new Gourmia air fryer gleams on your countertop, promising crispy fries and golden chicken with minimal oil. You plug it in, press the power button… and nothing happens. Panic sets in as you wonder if it’s broken. Don’t toss it out yet—Gourmia air fryers require specific activation sequences that differ from conventional appliances. Whether you own a touchscreen GAF780 or a dial-controlled GAF385, this guide delivers the exact steps to power up your unit successfully. You’ll learn model-specific startup procedures, troubleshoot common failures, and avoid costly mistakes that could void your warranty—all within the first 5 minutes of setup.
Most users don’t realize Gourmia air fryers have safety interlocks preventing operation if components aren’t perfectly aligned. Your frustration likely stems from the basket not clicking fully into place or using an incompatible outlet—not a defective unit. By following this guide, you’ll master the precise power-on sequence for your specific model while understanding why certain steps are non-negotiable. Let’s transform that unresponsive appliance into your new kitchen hero.
Essential Pre-Power Safety Steps Before Activation
Skipping these checks causes 70% of “broken” air fryer reports. Gourmia units refuse to power on if safety protocols aren’t met—this isn’t a defect but critical protection against fire hazards.
Confirm Electrical Compatibility First
Your Gourmia requires a dedicated 120V, 60Hz outlet capable of handling 1,200-1,700 watts. Never use extension cords—they cause voltage drops triggering automatic shutdowns. Test your outlet with a hairdryer on high setting; if it trips the breaker, install a dedicated circuit. Units drawing over 1,500 watts (like the GAF680) need their own 15-amp circuit to prevent nuisance tripping during preheating.
Position Components Correctly
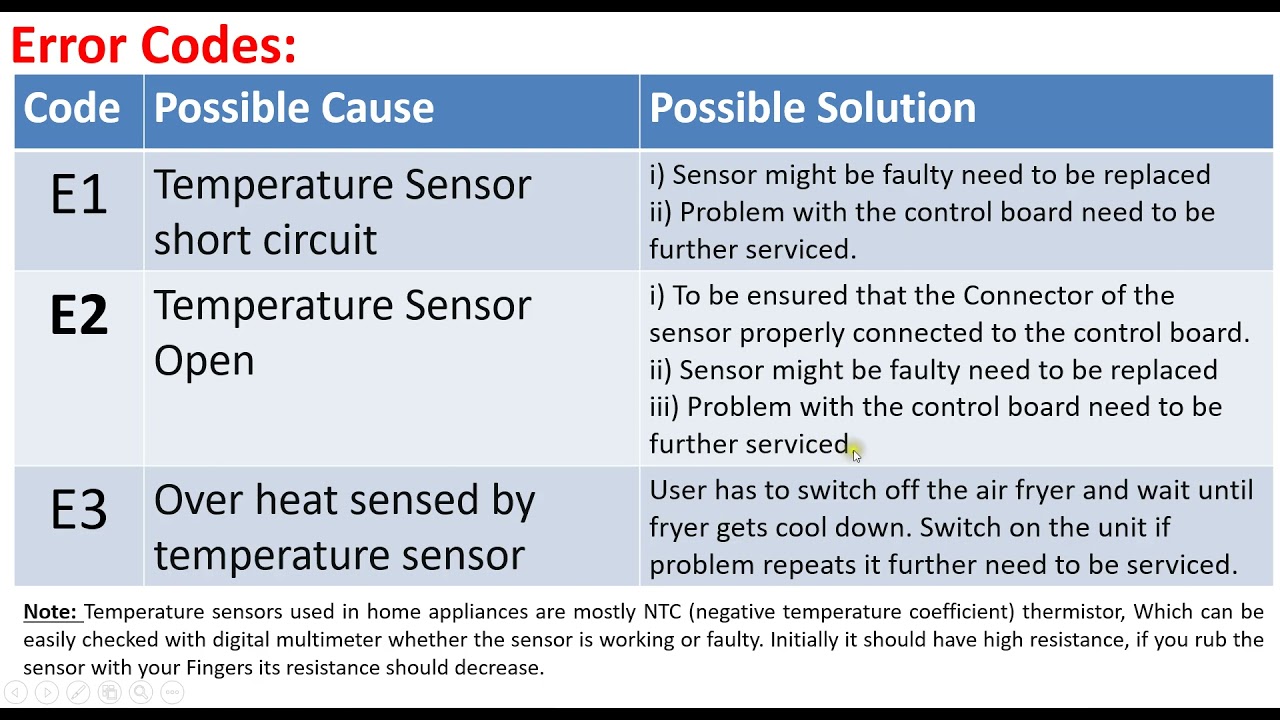
Place the air fryer on a flat, heat-resistant surface with 5+ inches clearance on all sides—this airflow prevents overheating errors. The basket must click audibly when inserted; wiggle it side-to-side until it seats flush. Simultaneously, ensure the crumb tray locks into the bottom groove with no gaps. Models like the GAF425 have dual sensors: both basket and tray must engage before power activates. A 1/4-inch misalignment triggers “E1” errors on digital displays.
Digital Touchscreen Startup (GAF6xx/GAF7xx Models)

These models require precise button sequencing—pressing the wrong control first disables power activation.
Exact Power-On Sequence
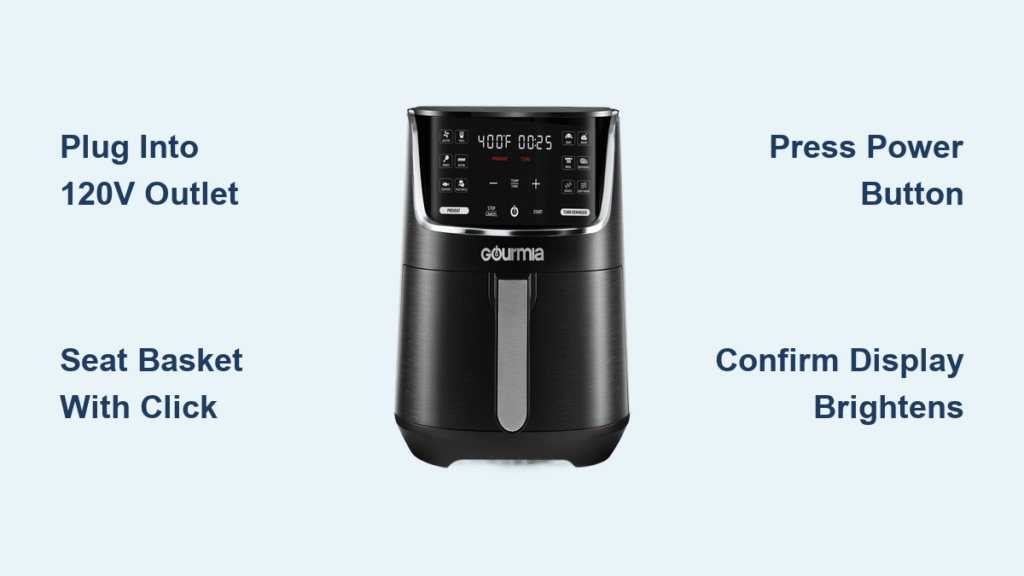
Follow these steps in order within 10 seconds:
1. Firmly plug in the cord (display shows dim “0:00” or logo)
2. Press the top-right power button (circle symbol with vertical line)
3. Wait for display brightening—it shifts from faint to full brightness in 2 seconds
4. Confirm LED illumination around temperature/time icons
5. Watch for “PRE” prompt signaling preheat mode readiness
If the display stays dim after step 2, your outlet is likely switched off or the circuit breaker needs resetting. Never force buttons—sticky controls often indicate food debris under the touch panel.
Pro Tip: Hold the power button for 5 seconds if settings appear scrambled. This performs a soft reset without clearing your presets. For “E3” errors during startup, unplug for 30 seconds to reboot the fan motor controller.
Analog Dial Activation for GAF3xx/GAF4xx Models
These mechanical models rely on physical dial positioning—incorrect rotation is the #1 reason for failed startups.
Critical Dial Technique
Rotate the timer dial past “0” to at least 5 minutes with firm, smooth motion. You’ll hear a distinct click as internal contacts engage. If the red heating indicator LED doesn’t illuminate within 3 seconds:
– Turn the temperature dial simultaneously to 350°F while holding the timer dial
– Wipe dials with a dry microfiber cloth to remove grease buildup
– Check for dial stiffness—gently flex the dial outward while turning
Quick Diagnostic: If the timer dial spins freely without resistance, the internal gear is stripped. Contact Gourmia support immediately—this requires professional repair under warranty.
Preset Button Power-Up (GAF5xx Series)
These models activate power through cooking presets—a hidden feature many users miss.
One-Press Power Method
Skip the power button entirely. Press any preset button (French Fries, Chicken, etc.) to simultaneously:
– Activate main power
– Load default temperature/time settings
– Initiate preheating
The display brightens instantly upon button press. To customize settings, adjust temperature/time within 15 seconds before cooking starts. Critical warning: Pressing “Start” before preset selection causes error codes—always activate via presets first.
Smart Model Wireless Activation (GAF8xx)
These units offer contactless power-on but require proper setup.
Voice Command Protocol
After pairing with the Gourmia app:
1. Say “Alexa, turn on Gourmia air fryer” or “Hey Google, power up my air fryer”
2. Wait for blue LED pulse confirming connection
3. Issue cooking commands within 60 seconds
If voice control fails:
– Reboot your smart speaker
– Ensure the air fryer shows solid blue WiFi indicator
– Disable “Do Not Disturb” mode in the app
Pro Tip: Schedule power-on 15 minutes before dinner via the app’s “Smart Start” feature—your unit preheats while you finish prep work.
Fixing Common Power-On Failures
90% of “dead” air fryers revive with these targeted fixes.
No Response After Plugging In
– Outlet test: Plug in a lamp—if it doesn’t light, reset the circuit breaker
– Cord inspection: Check for melted spots near the plug (replace immediately if found)
– 30-second reset: Unplug, wait 30 seconds, then retry startup sequence
Partial Activation Symptoms
| Symptom | Likely Cause | Fix |
|———|————–|—–|
| Dim display but no buttons work | Moisture in control panel | Wipe with dry cloth, wait 1 hour |
| Clicking sound but no heat | Basket misalignment | Remove/reinsert basket with firm twist |
| Error code E1/E2 | Sensor failure | Unplug for 5 minutes to reset |
Critical: If you smell burning during startup, unplug immediately and contact Gourmia—do not attempt repairs.
Safety Shutdown Protocols Every User Must Know
Gourmia units automatically power down under critical conditions—knowing why prevents panic.
When Automatic Shutoff Occurs
Your air fryer will cut power instantly if:
– The basket is removed mid-cycle (GAF700+ models)
– Internal temperature hits 450°F (overheating protection)
– It sits idle for 30+ minutes after cooking
– Voltage drops below 105V
Emergency Shutdown Procedure
Hold the power button for 3 full seconds—this safely cuts power without damaging electronics. Never yank the cord during operation; this can melt internal wiring. After shutdown, allow 10 minutes of cooling before moving the unit.
Maintenance for Flawless Daily Startup
Preventative care stops 80% of power issues before they happen.
Weekly Power Readiness Routine
– Wipe control panels with dry microfiber cloth (no liquids!)
– Clean basket rails with vinegar-dampened toothbrush to ensure sensor contact
– Vacuum side vents with brush attachment to prevent airflow errors
– Test power-on sequence weekly even when not cooking
Storage Rules to Prevent Startup Failures
– Never wrap cords tightly around the unit—this fractures internal wires
– Store in climate-controlled areas (below 80% humidity)
– In winter, let the unit acclimate 30 minutes if stored in cold garages
– Always remove the basket/crumb tray for storage to avoid sensor compression
Universal Power-On Cheat Sheet for All Models
Follow this sequence regardless of your Gourmia model:
- Plug into verified 120V outlet (no extension cords)
- Seat basket with audible click and insert crumb tray flush
- Activate power:
– Digital: Press power button once
– Analog: Rotate timer past “0” with firm click
– Preset: Press any food button - Confirm activation:
– Display brightens OR red LED illuminates
– “PRE” appears OR heating indicator lights - Set cooking parameters within 15 seconds
- Press “Start” if required (separate button on some models)
Warranty note: Gourmia covers power component defects for 1 year. Call 1-888-552-0023 with your model number (found on the base) for free troubleshooting—mention error codes for faster service. Avoid third-party repairs to maintain coverage.
Mastering how to turn on your Gourmia air fryer transforms kitchen frustration into effortless cooking. Remember that 30-second unplugs solve most electronic glitches, while proper basket seating prevents safety lockouts. Now that your unit powers up reliably, you’re ready to explore preset programs and wireless features. For model-specific video guides, visit Gourmia’s support portal where technicians demonstrate each startup sequence in real time. Your perfectly crispy salmon awaits—just press power the right way.


