

That sleek new Kalorik air fryer box sits on your counter, promising crispy fries and juicy chicken wings with little to no oil. But where do you start? Whether you’re unboxing your first air fryer or upgrading to a digital Kalorik model, this guide walks you through everything from safety setup to cooking perfect meals every time. You’ll learn the exact steps, temperatures, and timing for flawless results, plus troubleshooting tips when things don’t go as planned—all based on Kalorik’s official specifications and best practices.
Kalorik Air Fryer Safety Setup Checklist
Removing Hidden Packaging Safeguards
Your Kalorik arrives protected by multiple layers of packaging that must be completely removed before operation. Check inside the basket, under the crisper tray, and around the heating element for plastic films or foam inserts. Leaving even small pieces can melt during operation, creating smoke and potential fire hazards. Pay special attention to the handle mechanism and air vents where packaging often gets tucked.
Essential First-Time Cleaning Procedure
Wash all removable components in warm, soapy water before your first use—this includes the fry basket, crisper tray, and any included accessories like baking pans. Manufacturing residues that aren’t visible can affect food taste and create unpleasant odors during initial heating. Use a non-abrasive sponge to preserve the non-stick coating, then dry thoroughly. Never immerse the main unit in water, as this will damage electrical components.
Optimal Countertop Placement Strategy
Position your Kalorik on a stable, heat-resistant surface with exactly 4 inches of clearance on all sides. Avoid placing near walls (minimum 6 inches recommended), curtains, or heat-sensitive materials like plastic cutting boards. The rear exhaust vent requires unobstructed airflow—blocking it causes overheating and triggers the E2 error code. Never operate directly on wooden surfaces without a heat-resistant mat, as prolonged use can warp or discolor countertops.
Perfect Preheating Techniques for Crispy Results

Why Your Kalorik Needs 5 Minutes to Heat Up
Preheating your Kalorik air fryer for 3-5 minutes at your target temperature isn’t optional—it’s essential for proper air circulation and consistent results. Without preheating, frozen foods release moisture that turns to steam instead of crisping, while fresh foods cook unevenly with soggy bottoms. The heating element needs this time to reach optimal temperature and establish proper convection airflow patterns that define air frying technology.
Step-by-Step Preheating Process
- Insert empty basket until you hear the secure click
- Set temperature to recipe requirements (typically 350-400°F)
- Set timer for 3-5 minutes
- Press start and wait for completion signal
- Immediately add food when preheating finishes
Pro tip: For frozen items like french fries, preheating is non-negotiable—cold food in a cold basket creates steam pockets that prevent proper crisping. Always preheat at the full cooking temperature, not lower.
Kalorik Control Panel Operation Guide
Dial-Control Models: Simple Operation Steps
For manual Kalorik air fryers with dial controls:
– Power activation: Turn timer dial slightly to engage power
– Temperature setting: Rotate top dial to desired setting (180-400°F range)
– Timing adjustment: Set bottom dial to cooking duration (up to 60 minutes)
– Start procedure: Push basket in until it clicks—cooking begins automatically
Digital Touchscreen Models: Advanced Features
Digital Kalorik air fryers offer precision control:
– One-touch presets: Dedicated buttons for fries, chicken, fish, and vegetables
– Temperature fine-tuning: Adjust in 5°F increments using +/- buttons
– Memory recall: Automatically stores last cooking settings
– Auto shut-off: Activates when timer ends or basket is removed
Foolproof Cooking Sequence
Follow this exact sequence for reliable results:
1. Load food below the MAX fill line (never overcrowd)
2. Insert basket fully until you hear the secure click
3. Set temperature using appropriate controls
4. Set time based on food type and quantity
5. Start immediately after preheating completes
6. Shake or flip food at the halfway point
Food Placement Tactics for Maximum Crispiness
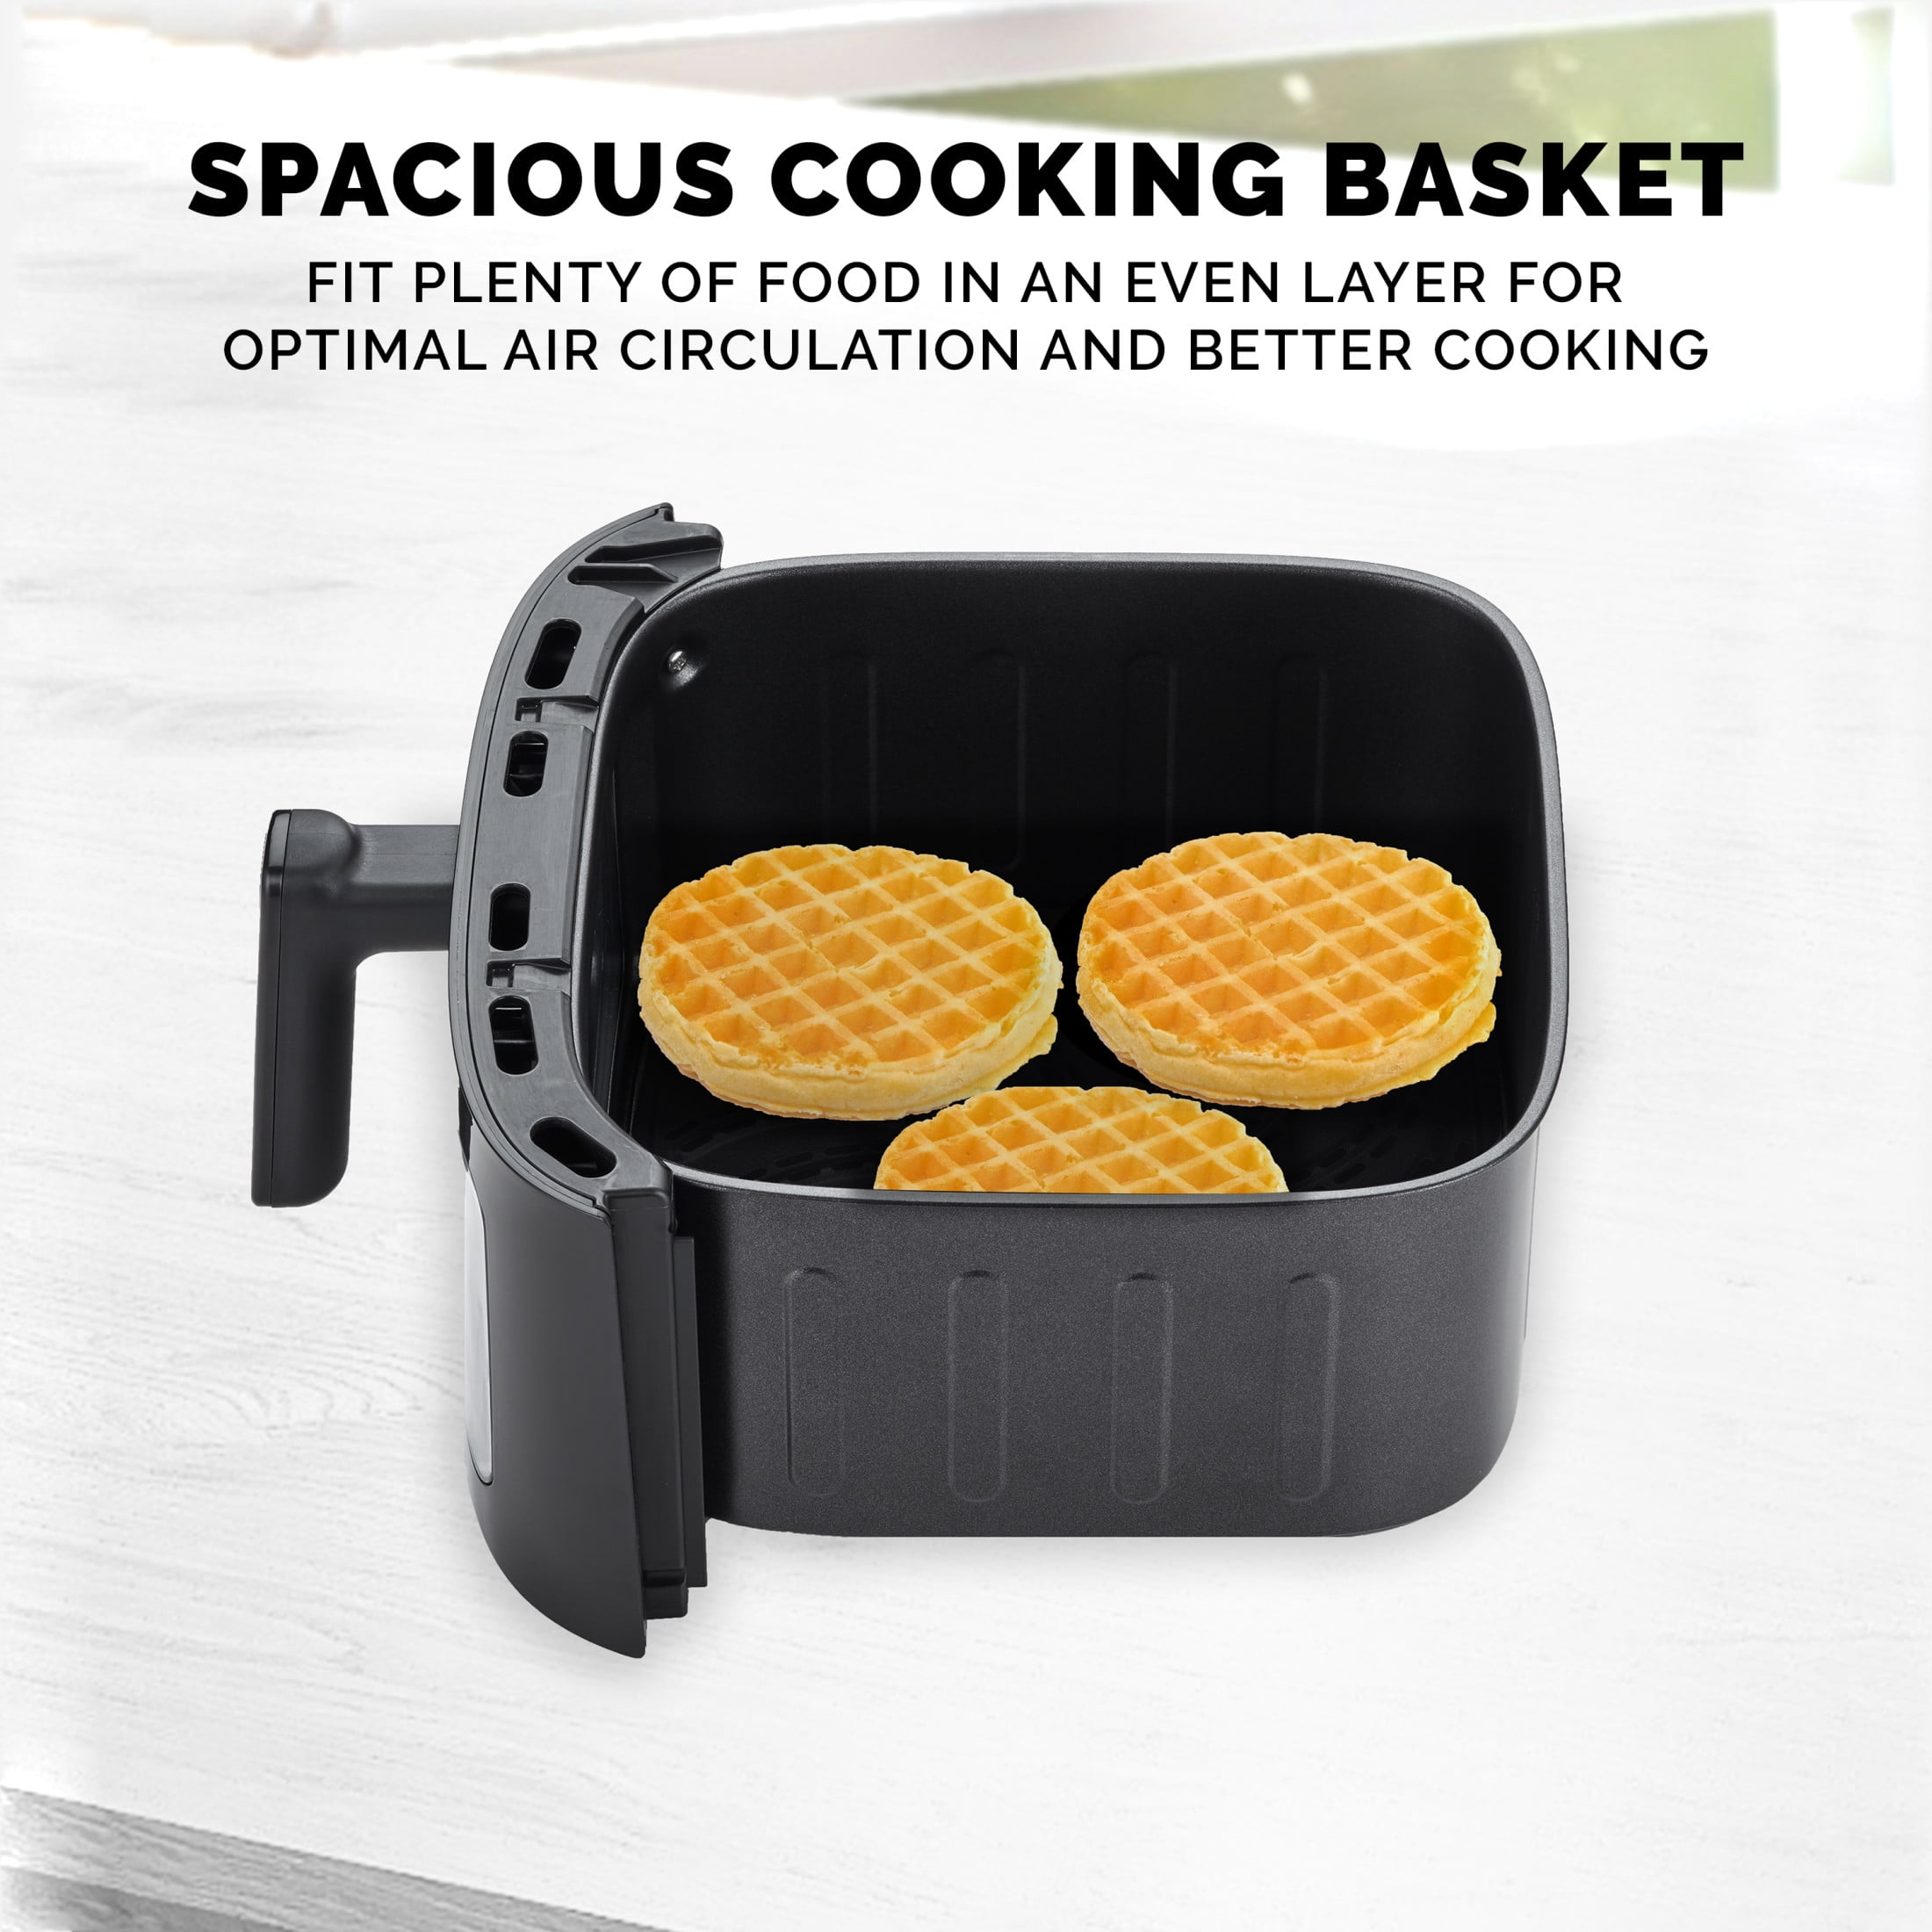
Single-Layer Arrangement Method
Air circulation is the secret to perfect air frying—overlapping food blocks hot air flow, creating steam pockets that prevent crisping. For optimal results, arrange food in a single layer with space between pieces. If cooking larger quantities, work in batches rather than overcrowding. This technique applies especially to high-moisture foods like vegetables and marinated proteins.
Strategic Shaking Schedule
Timing your basket shakes dramatically improves results:
– Fries & vegetables: Shake every 5 minutes
– Chicken wings: Flip completely at 10-minute mark
– Fish fillets: Flip once at halfway point
– Reheating leftovers: Shake once after 2 minutes
Crisper Tray Application Guidelines
Use the crisper tray beneath foods that release excess moisture or oil:
– Marinated meats (chicken, pork)
– High-fat foods like bacon
– Breaded items prone to shedding
– Sauces or glazes that might drip
Oil Usage Secrets for Healthier Cooking
When to Add Oil (And When Not To)
Contrary to popular belief, most foods require little to no oil in your Kalorik. The rapid air circulation creates natural crispiness without added fat. Only use oil when:
– Food appears dry before cooking
– You want enhanced browning
– Cooking lean proteins like chicken breast
– Working with fresh (not frozen) vegetables
Precision Oil Application Techniques
Apply oil using these methods for perfect distribution:
– Toss method: Mix 1 teaspoon oil per cup of food in a bowl
– Spray bottle: Provides even, minimal coverage (best for frozen foods)
– Brush method: Ideal for delicate items like fish fillets
Always use high-smoke point oils like avocado, canola, or peanut oil.
Troubleshooting Common Kalorik Problems
Fixing Soggy Food Immediately
When your food lacks crispiness:
– Preheat fully for the complete 5 minutes
– Dry food surface with paper towels before cooking
– Increase temperature by 25°F for the final 3 minutes
– Reduce quantity by 25% for better air circulation
– Check fill line—never exceed the MAX indicator
Smoke Emergencies: Quick Resolution
If smoke appears during operation:
1. Pause immediately and remove basket
2. Check for excess oil in bottom tray or food debris on heating element
3. Wipe clean with damp cloth before continuing
4. Lower temperature by 25°F for high-fat foods
5. Ensure 4-inch clearance on all sides for proper ventilation
Error Code Decoding and Fixes
Digital model error solutions:
– E1: Temperature sensor failure—unplug for 30 minutes before restarting
– E2: Overheating protection—allow complete cooling before reuse
– E3: Basket seating error—remove and reinsert until you hear the click
Advanced Cooking Techniques Worth Mastering
Multi-Level Cooking Strategy
Maximize your Kalorik’s capacity with included accessories:
– Rack insert: Cook two food types simultaneously
– Baking pan: Make casseroles or cakes
– Skewer rack: Perfect for kabobs and appetizers
Critical rule: Rotate food positions every 5 minutes for even cooking results.
Dehydration Mode for Healthy Snacks
Transform your Kalorik into a dehydrator:
1. Slice foods uniformly thin (1/8 inch)
2. Set temperature to lowest setting (120°F)
3. Extend time to 4-8 hours based on food
4. Space items evenly for maximum air circulation
Best results: Apple slices, kale chips, and homemade beef jerky.
Model-Specific Operation Insights
Kalorik 3.5 Quart Digital Mastery
This popular model features:
– 8 preset programs with one-touch convenience
– Cool-touch handle prevents burns during operation
– 60-minute timer with automatic shut-off
– Non-stick basket requires gentle cleaning to preserve coating
Kalorik 5.3 Quart XL Family Cooking
For larger households:
– Extended preheating needed (5-7 minutes vs 3-5)
– Baking pan included for casseroles and desserts
– Same digital controls as smaller model
– Family portions feed 4-6 people in single batch
Daily Cleaning Protocol for Longevity
Post-Cooking Cleanup Sequence
Follow this exact cleaning process after every use:
1. Unplug and wait 15-20 minutes for complete cooling
2. Remove basket and tray (both top-rack dishwasher safe)
3. Wipe interior with damp cloth—never immerse base unit
4. Clean heating element with soft brush to remove debris
5. Dry thoroughly before reassembly to prevent rust
Stain Removal for Stubborn Residue
For baked-on food:
– Soak components in hot, soapy water for 15 minutes
– Apply baking soda paste to persistent spots
– Use non-abrasive sponge—never steel wool
– Rinse completely to avoid soap taste in next meal
Final Pro Tips for Air Fryer Success
Master your timing: Keep a cooking log to perfect your favorite recipes—every Kalorik has slight performance variations. Start with manufacturer recommendations, then adjust by 1-2 minutes based on your model’s behavior.
Batch cooking strategy: Cook proteins first, then vegetables using residual heat. The remaining warmth reduces cooking time for subsequent batches by 15-20%.
Reheating magic: Set to 350°F for 3-5 minutes for pizza or fries that taste freshly made. The air circulation revives crispiness better than microwaves.
Your Kalorik air fryer transforms weeknight cooking from chore to delight. By following these precise techniques, you’ll consistently achieve restaurant-quality results with minimal oil. Within a week of proper use, you’ll wonder how you ever cooked without it—just remember to preheat, avoid overcrowding, and clean after every use for peak performance.


