
You’re staring at a gorgeous brisket flat while your air fryer collects dust on the counter. Traditional smoking takes all day, but tonight’s dinner can’t wait. Good news: your countertop appliance can transform that tough cut into fork-tender meat with crackling bark in under four hours—no smoker required. Forget dry, stringy results. This guide reveals exactly how to leverage your air fryer’s intense circulation for juicy, flavorful brisket that slices cleanly every time. You’ll learn which cuts actually work (spoiler: skip the full packer), why temperature monitoring beats timing, and three distinct cooking protocols for everything from weeknight roast beef to authentic BBQ texture.
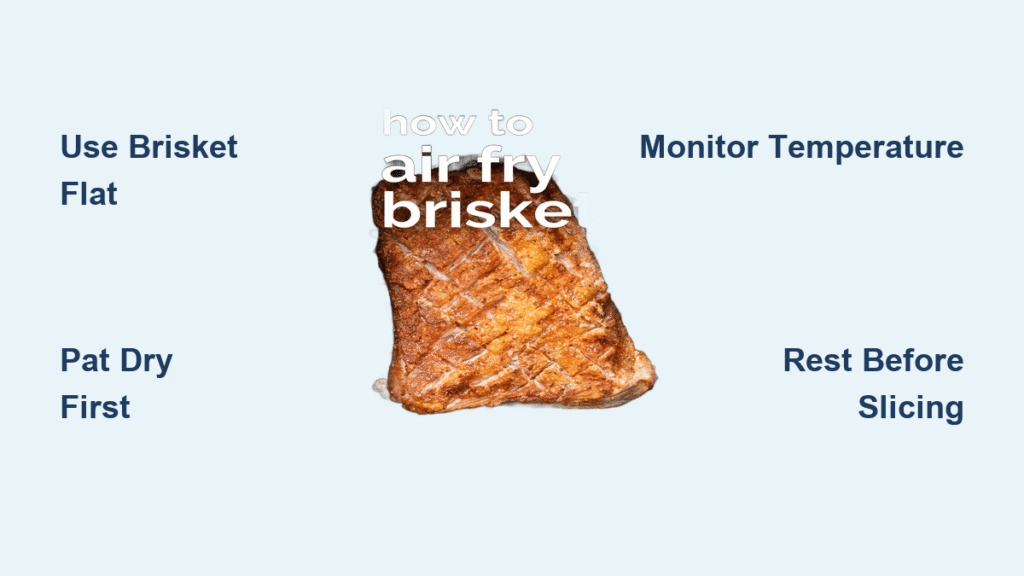
Choose the Right Brisket Cut for Air Fryer Success
Grab a 2-4 lb brisket flat—not the full packer. Full briskets won’t fit standard baskets without awkward trimming, causing uneven cooking. The flat’s uniform thickness ensures consistent heat penetration while its manageable size prevents steaming from overcrowding. Anything larger than 4 pounds traps moisture instead of crisping the exterior.
Leave ¼ inch fat cap intact but score it in a cross-hatch pattern. This strategic slicing helps seasoning penetrate while allowing fat to render during cooking. Crucially, remove silverskin—that tough, translucent membrane never breaks down and creates chewy patches. Your butcher might leave it attached; trim it off with a sharp boning knife before prepping.
Essential Tools That Make or Break Your Brisket
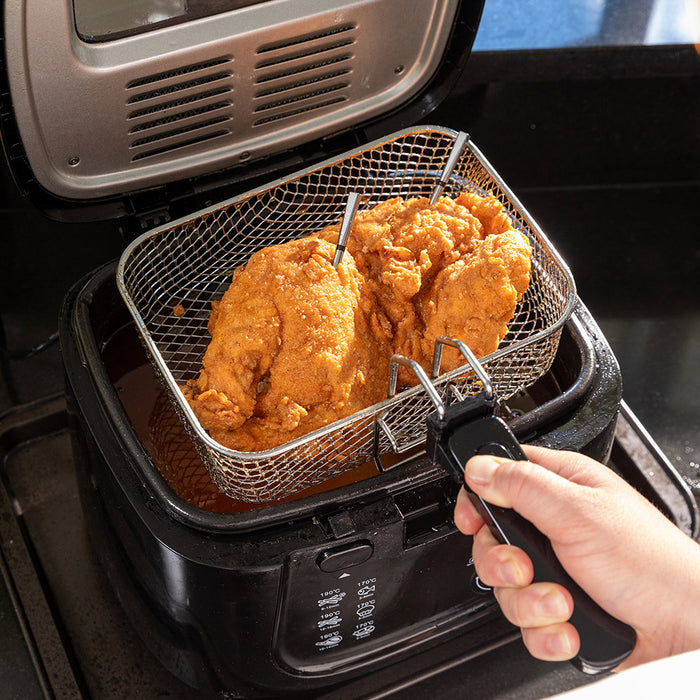
Your air fryer basket size matters more than the brand. Test-fit your brisket before seasoning—it must sit in a single layer with at least 1 inch clearance from the sides. Crowded meat steams instead of searing. Skip multi-level racks; they disrupt airflow and create hot spots that burn edges while undercooking centers.
Non-negotiable tools:
– Digital probe thermometer (continuous monitoring prevents overcooking disasters)
– Parchment paper or oiled foil (prevents sticking without blocking airflow)
– Sharp carving knife (electric knives yield perfect slices but aren’t mandatory)
Prep Your Brisket for Maximum Bark Formation
Dry Surface = Crisp Exterior
Pat the brisket aggressively with paper towels—moisture is bark’s enemy. Spend 60 seconds ensuring every surface feels dry to the touch. Skip this, and you’ll steam the meat instead of crisping it. Trim excess fat beyond the ¼-inch cap, but never remove all fat—it bastes the meat during cooking.
Oil Creates Edible Glue for Seasoning
Rub 1-2 tablespoons of oil (olive or avocado) over all surfaces. This isn’t for flavor—it acts as a binder so your rub sticks instead of sliding off during cooking. Without this step, seasoning pools in the basket, leaving bland meat.
Seasoning Application Secrets
For immediate cooking: Apply rub generously, then rest 15-30 minutes at room temperature. The brief wait lets salt penetrate while warming the meat for even cooking.
For deeper flavor: Refrigerate seasoned brisket uncovered 8-24 hours. The dry brine method intensifies taste and improves moisture retention—critical for lean brisket flats.
Three Proven Cooking Methods That Actually Work
Quick-Crust Method (45 Minutes Total)
Ideal for: Weeknight roast beef texture, not traditional BBQ
1. Preheat air fryer to 375°F
2. Place brisket fat-side up in basket
3. Cook 20 minutes until internal temp hits 150°F
4. Rest 10 minutes before slicing
Why it works: High heat rapidly crisps the exterior while keeping interiors juicy. Slice at 135-145°F for medium-rare tenderness. Pro Tip: Add a splash of beef broth to the basket if your model runs hot.
Mid-Temp Hybrid (45 Minutes Total)
Ideal for: Tender, rosy slices with herbaceous notes
1. Preheat to 365°F
2. Use mustard binder + herb rub (see blend below)
3. Cook 35 minutes until 180°F internal
4. Rest 10 minutes loosely tented
Critical move: Place ½ cup beef broth in the basket before cooking. The liquid creates gentle steam that tenderizes without sacrificing bark. Avoid this if your air fryer has a drawer-style bottom—use foil pouch instead.
Low-and-Slow BBQ Style (2.5 Hours Total)
Ideal for: Authentic pulled texture with concentrated juices
– Phase 1 (Bark): 350°F for 30 minutes fat-up
– Phase 2 (Tenderize): Wrap in foil with ¾ cup broth, cook 300°F for 2 hours
– Finish: Rest 15 minutes at 195°F internal
Key insight: The foil pouch mimics a smoker’s steam environment, breaking down collagen while trapping juices. Unwrap for the last 10 minutes if your air fryer has a “crisp” function.
Temperature Chart: Never Guess Doneness Again
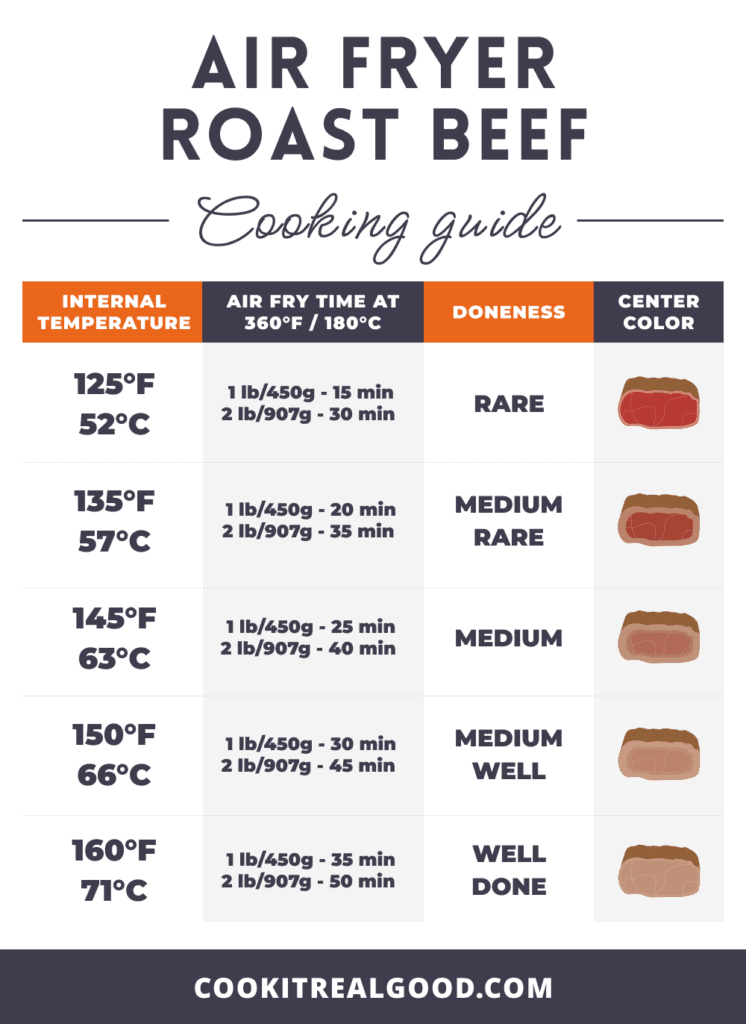
| Desired Texture | Pull Temperature | Total Time | Method |
|---|---|---|---|
| Medium-rare slices | 135°F | 45-60 min | 375°F Quick-Crust |
| Traditional tender | 180-185°F | 2.5 hrs | 365°F Hybrid |
| Pull-apart shred | 195-200°F | 3 hrs | 300°F Low-and-Slow |
Adjust timing ±15% per ½ pound weight difference. A 3.5 lb brisket needs 22% more time than a 3 lb cut. Never rely on timers—air fryers vary wildly. Always use a probe thermometer.
Master Seasoning Blends That Prevent Bitter Bark

BBQ Classic Rub (2.5 lb Brisket)
- 1 Tbsp brown sugar
- 1 tsp kosher salt
- 1 tsp smoked paprika
- 1 tsp garlic powder
- ½ tsp onion powder
- ¼ tsp chili powder
Application rule: Massage rub into scored fat cap first, then sides. Too much sugar burns at high temps—reduce brown sugar by 25% for Quick-Crust method.
Holiday Herb Blend
- 1 Tbsp Dijon mustard (binder)
- 1 tsp garlic powder
- 1 tsp smoked paprika
- ½ tsp salt
- ½ tsp black pepper
- ½ tsp EACH dried rosemary, thyme, oregano
Pro Tip: Double rub recipes for larger cuts, but apply lightly—thick layers create acrid, bitter bark. Pat off excess after seasoning.
Critical Temperature Checks You Can’t Skip
Insert probe horizontally through the side into the thickest section. Avoid fat seams—they read falsely high. Your brisket needs 195°F+ for collagen breakdown, even though USDA says 145°F is “safe.” Undercooked brisket at 180°F remains chewy no matter how long you rest it.
Watch for carry-over cooking: Temperatures rise 5-10°F after removal. Pull at 190°F for 195°F finished temp. If your brisket stalls at 160°F (common in low-and-slow), resist cranking the heat—this is collagen melting.
Rest, Slice, and Serve Like a Pitmaster
Resting Rules That Preserve Juices
- Small cuts (2-3 lb): Rest 10 minutes loosely tented
- Large cuts (3.5+ lb): Rest 20 minutes
- Never wrap tightly—foil traps steam that softens your hard-earned bark
Slicing Technique for Maximum Tenderness
- Identify the grain before cooking (mark direction with knife nicks)
- Slice against the grain in ¼-inch thick cuts
- Use electric knife for clean, uniform slices that don’t shred
Serving hack: Spoon accumulated juices over slices. Pair Quick-Crust brisket with horseradish cream for roast-beef vibes, or serve Low-and-Slow style with pickles and coleslaw for BBQ authenticity.
Fix These 5 Problems Before Dinner Ruins
| Problem | Instant Fix | Prevention |
|---|---|---|
| Dry interior | Pull 5°F earlier next time; add broth pouch | Choose cuts with intact fat cap |
| Uneven bark | Flip halfway if not wrapped | Never overlap meat in basket |
| Burnt edges | Reduce sugar 25%; lower temp 15°F | Pat rub into surface—don’t pile on |
| Chewy texture | Extend cook to 195-205°F internal | Use thermometer—never guess |
| Smoke smell | Clean basket with baking soda paste | Wipe heating element after cooking |
Store and Reheat Without Sacrificing Texture
Storage: Cool completely, then refrigerate in airtight container 4 days max. For freezing, slice first and double-wrap portions—prevents freezer burn and enables 60-second reheats.
Reheat like a pro:
– Air fryer: 350°F for 3-5 minutes with 1 tsp broth
– Oven: 300°F covered until 140°F internal
– Never microwave without damp towel—it turns bark leathery
Critical rule: Reheat only once. Multiple reheats destroy texture.
Your First Air Fryer Brisket Success Plan
Start checking temps 30 minutes early—your machine’s actual output may vary from set points. Cook a small 2.5 lb flat first to learn its quirks. Always slice against the grain; cutting parallel makes even tender brisket tough. And here’s the golden rule: brisket continues cooking while resting—pull it 5-10°F below target temp.
Master these three methods and you’ll transform that countertop appliance into a brisket powerhouse. From Tuesday night sandwiches to holiday feasts, you now have the blueprint for juicy, bark-covered perfection without the smoker’s hassle. The real secret? Your air fryer wasn’t just for fries—it was a brisket machine all along.


