
Nothing ruins lunch more than biting into a soggy, rubbery leftover quesadilla where the once-crisp tortilla has turned to cardboard and the cheese congeals into a waxy lump. That heartbreaking disappointment vanishes when you use your air fryer—the secret weapon for resurrecting cold quesadillas into golden, cheese-pulling masterpieces in under 10 minutes. Forget microwave disasters that create steamed pockets of sadness or oven methods that dry out fillings. With rapid hot air circulation, your air fryer delivers restaurant-quality results: shatteringly crisp exteriors with molten cheese oozing from every seam, all without adding oil.
Whether you’re reviving last night’s homemade chicken and pepper creation or rescuing a fast-food lunch special, this guide reveals the exact temperature, timing, and pro techniques for flawless reheating. You’ll learn why preheating is non-negotiable, how to prevent cheese explosions, and why thick veggie-loaded quesadillas need different handling than simple cheese versions. Most importantly, you’ll never waste a single tortilla again—master these steps and transform leftovers into meals worthy of a fresh order.
Your Air Fryer Setup for Crispy Quesadillas

Skip the guesswork by configuring your air fryer correctly before the quesadilla hits the basket. Any model works—Ninja Foodi, Instant Pot Vortex, or basic basket units—but proper setup ensures even crisping. Grab tongs for safe removal since quesadillas exceed 200°F internally, and keep parchment paper handy for cheese-heavy versions. Never spray cooking oil directly into your basket; residual fats from the original cooking provide enough lubrication, and excess spray creates stubborn, sticky residue that damages non-stick coatings over time.
Why Preheating Makes or Breaks Your Results
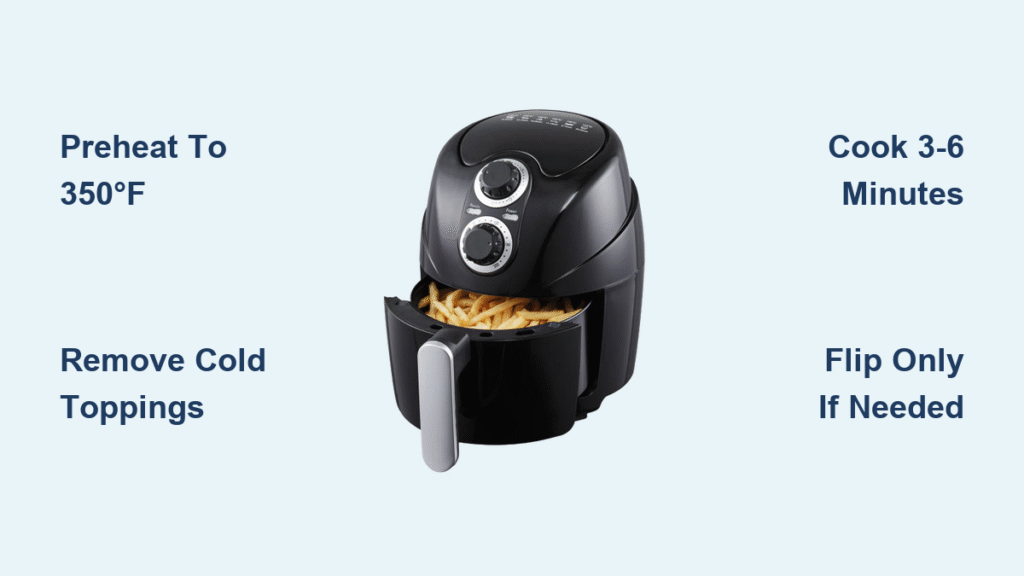
Skipping preheating guarantees uneven results. Cold baskets create steam pockets that soften tortillas instead of crisping them. Always preheat to 350°F for 3–5 minutes until the appliance reaches full temperature—this jumpstarts the Maillard reaction for immediate browning. Test with your hand 2 inches above the basket; you should feel intense radiant heat. Without this crucial step, your quesadilla spends precious minutes warming up the metal instead of transforming your leftovers.
Prep Cold Quesadillas Like a Pro
Remove All Cold Toppings Before Heating
Scrape off every trace of sour cream, guacamole, salsa, or cold pico de gallo. These ingredients separate, turn rubbery, or create steam pockets when reheated, sabotaging crispiness. Refrigerated toppings also lower the internal temperature, forcing you to overcook the tortilla to warm the center. Keep fresh toppings chilled in separate containers—you’ll add them back after reheating for vibrant color and cool contrast against the hot base.
Perfect Single-Layer Placement for Maximum Crisp
Arrange quesadilla wedges flat without overlapping or touching basket walls. Crowding blocks airflow, creating soggy zones where hot air can’t circulate. For oversized fast-food rectangles (like Taco Bell’s), cut into 3-inch triangles. Corn tortillas require special attention—they curl when cold. Press them flat with tongs during the first 60 seconds of cooking to maintain contact with the basket surface. If pieces stick slightly during placement, they’ll release naturally once crisped.
Universal Reheating Method for Perfect Results
Step 1: Preheat to 350°F (177°C)
Set your air fryer to 350°F and allow 3–5 minutes for full preheating. This isn’t optional—it creates the instant sear that locks in moisture while crisping the exterior. Verify readiness by placing your hand near the vent; you should feel consistent, intense heat.
Step 2: Load and Cook with Precision Timing
Place quesadillas in the preheated basket and follow these filling-specific timelines:
– Plain cheese quesadillas: 3 minutes total (check at 2:30)
– Chicken, steak, or ground beef: 5–6 minutes
– Thick veggie-loaded versions: 5–6 minutes with 60-second check intervals
Critical visual cue: Cheese should visibly melt and seep from the edges by the 3-minute mark. If fillings remain cold, continue in 30-second bursts—overcooking dries out cheese and toughens tortillas.
Step 3: Flip Only When Absolutely Necessary
Resist flipping unless the underside lacks golden spots after the full cook time. Modern air fryers circulate heat evenly, making flipping redundant for 90% of quesadillas. If needed, flip gently with tongs and add 60–90 seconds. Over-flipping squeezes out molten cheese and disrupts the crisping process.
Fast-Food Quesadilla Timings Decoded

| Brand | Size & Shape | Reheat Time | Critical Prep Step |
|---|---|---|---|
| Taco Bell Chicken | 6″x4″ rectangle | 5 minutes | Remove ALL foil packaging—trapped steam causes sogginess |
| Chipotle | Large pre-cut wedges | 5–6 minutes | No cutting needed; fits standard baskets perfectly |
Pro tip for fast-food lovers: Taco Bell quesadillas often have uneven cheese distribution. Rotate the piece 180 degrees at the 3-minute mark for balanced melting.
Prevent These 3 Common Reheating Disasters

Stop Over-Browning Before It Ruins Your Meal
If golden spots darken too quickly (common with thin flour tortillas), immediately create a loose foil tent. Crimp edges over the basket rim but leave 1-inch gaps on two sides for airflow. Never seal tightly—this traps steam and defeats the air fryer’s purpose. Resume cooking uncovered for the final minute to restore crispness.
Control Cheese Leakage Without Sacrificing Crisp
For extra-cheesy quesadillas, place a parchment paper square under the piece—but cover no more than 80% of the basket bottom. Full coverage blocks critical airflow, creating humid zones that soften tortillas. If cheese leaks onto the basket, wipe immediately after cooking while residue is warm (never use metal scrapers on non-stick surfaces).
Adjust Time for Thickness Like a Chef
Thick, overstuffed quesadillas need strategic timing:
– First 3 minutes: Sets the exterior crust
– Next 2 minutes: Melts interior fillings
– Final 60 seconds: Re-crisps any softened zones
Thin single-tortilla versions (common in homemade recipes) often require just 2–2.5 minutes. Err on the side of undercooking—you can always add 30 seconds, but burnt tortillas are irreversible.
Storage Rules You Must Follow for Safety
Refrigerate leftovers within 90 minutes of cooking in airtight containers—never leave quesadillas at room temperature overnight. Consume within 72 hours maximum; beyond this, tortillas lose structural integrity and fillings dry out. Crucially, never reheat the same quesadilla twice. Each cycle degrades texture exponentially, turning cheese into a rubbery mess and tortillas into brittle shards. When in doubt, discard—quesadillas are cheap insurance against foodborne illness.
Serve Like a Restaurant Pro
Remove quesadillas with tongs and rest 30 seconds on a wire rack (not a plate—this traps steam and softens the base). Immediately add fresh toppings: cool avocado crema against hot cheese creates magical temperature contrast, while bright pico de gallo cuts through richness. For a full meal, pair with air-fried jalapeño poppers or 90-second microwave black beans. Never drown reheated quesadillas in sauce—drizzle sparingly to maintain crisp edges.
Quick Reference Formula for Flawless Results
Temperature: 350°F (177°C)
Time Range: 3 minutes (cheese-only) → 6 minutes (loaded)
Prep Time: 45 seconds (after preheating)
Cleanup Tip: Wipe basket while warm with damp cloth; stuck cheese releases easily
Master this method once, and you’ll never settle for sad, soggy leftovers again. Your air fryer transforms yesterday’s quesadilla into today’s crispy, cheese-pulling triumph—guaranteed every time. The next time you face cold leftovers, skip the microwave and fire up your air fryer. In less time than it takes to order delivery, you’ll have a quesadilla so perfectly reheated, you’ll swear it was made fresh. That golden crunch, that molten cheese pull—it’s not nostalgia. It’s science, executed perfectly.


