
That disappointing moment when your air-fried chicken emerges either rubbery and dry or pale and undercooked? You’re not alone. Millions of home cooks struggle to unlock their Philips air fryer’s full potential for poultry perfection. But here’s the truth: achieving restaurant-quality chicken with shatter-crisp skin and succulent meat inside requires precise temperature control—not guesswork. This guide reveals the exact cooking specifications for every chicken cut, backed by Philips’ engineering data, so you consistently serve safe, golden-brown results that impress. Forget soggy wings or overcooked breasts—master these science-backed techniques and transform your weeknight dinners forever.
Philips Air Fryer Chicken Temperature Blueprint
Whole Chicken Dual-Stage Method
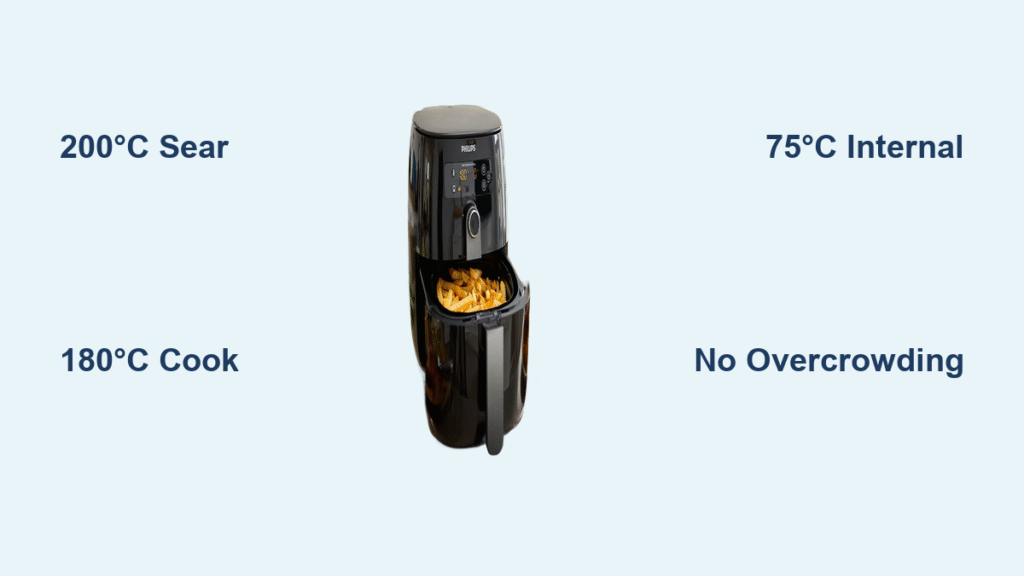
Forget setting-and-forgetting your 1.2kg bird. The two-phase approach is non-negotiable for proper texture. Start with a 200°C blast for exactly 6 minutes to instantly sear the skin surface—this locks in juices while creating the foundation for crispiness. Without opening the basket (to avoid heat loss), immediately drop to 150°C for the full 60 minutes. This gentle second phase ensures thorough cooking through the thickest parts without drying out the breast meat. Critical visual cue: The skin should visibly tighten and turn golden during the initial high-heat phase. If it stays pale, your unit may need recalibration.
Cut-Specific Cooking Times
Drumsticks: Arrange 6-8 pieces in a single layer with space between them. Cook at 180°C for precisely 20 minutes, flipping halfway when the timer beeps at 10 minutes. Overcrowding causes steaming—watch for shrinking gaps as the chicken cooks down.
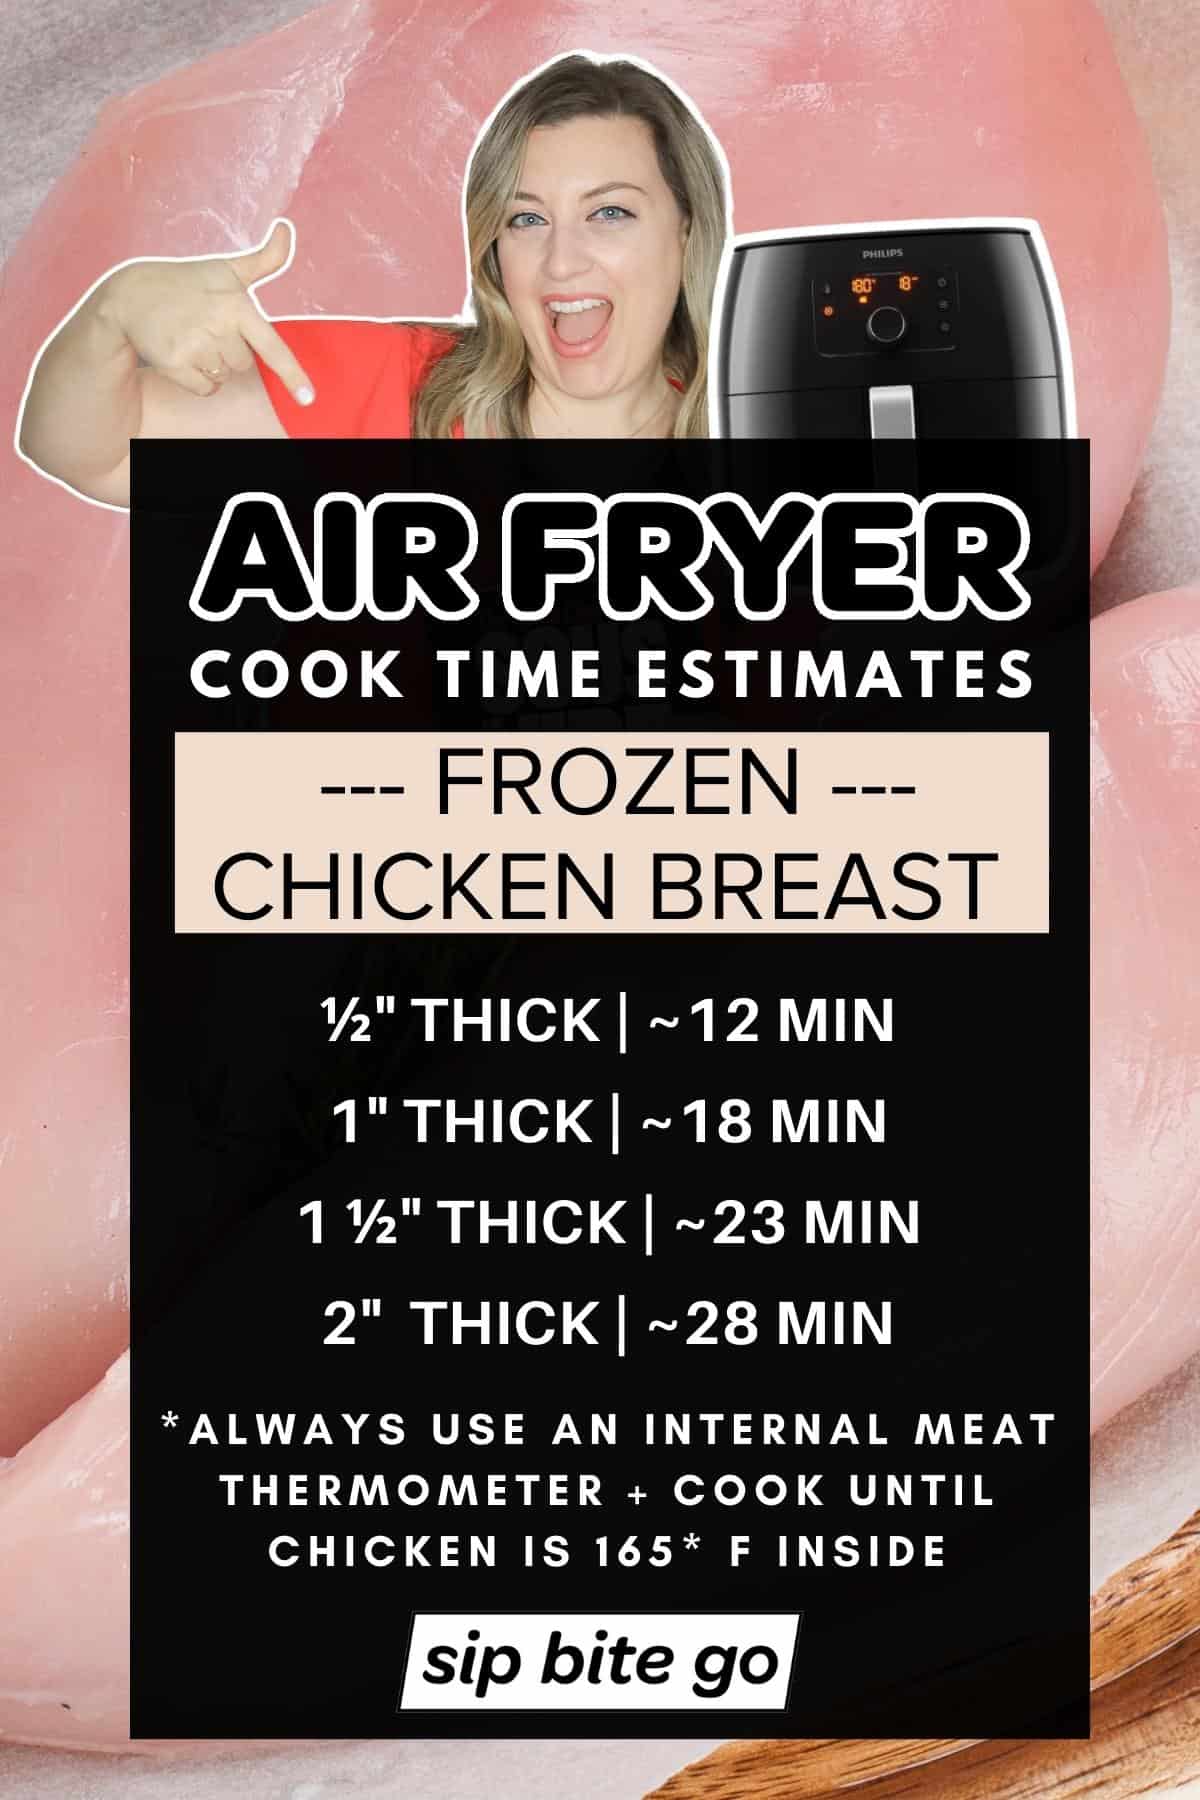
Breasts: For a standard 430g portion, 18 minutes at 180°C delivers ideal results. Pro tip: Press thick ends with a meat mallet to 1.5cm thickness before cooking—this prevents the common “raw center, dry edges” nightmare.
Wings: Achieve your preferred crunch level within the 15-20 minute window at 180°C: 15 minutes yields tender meat with light crispness (perfect for saucing), while 20 minutes creates shatter-crisp skin ideal for dry rubs.
Nuggets: Fresh 500g breast pieces need just 10-15 minutes at 180°C. Warning: Never stack—they’ll steam into rubbery disappointments. Cook in two batches if needed.
Non-Negotiable Safety Temperature Rules
Internal Heat Verification
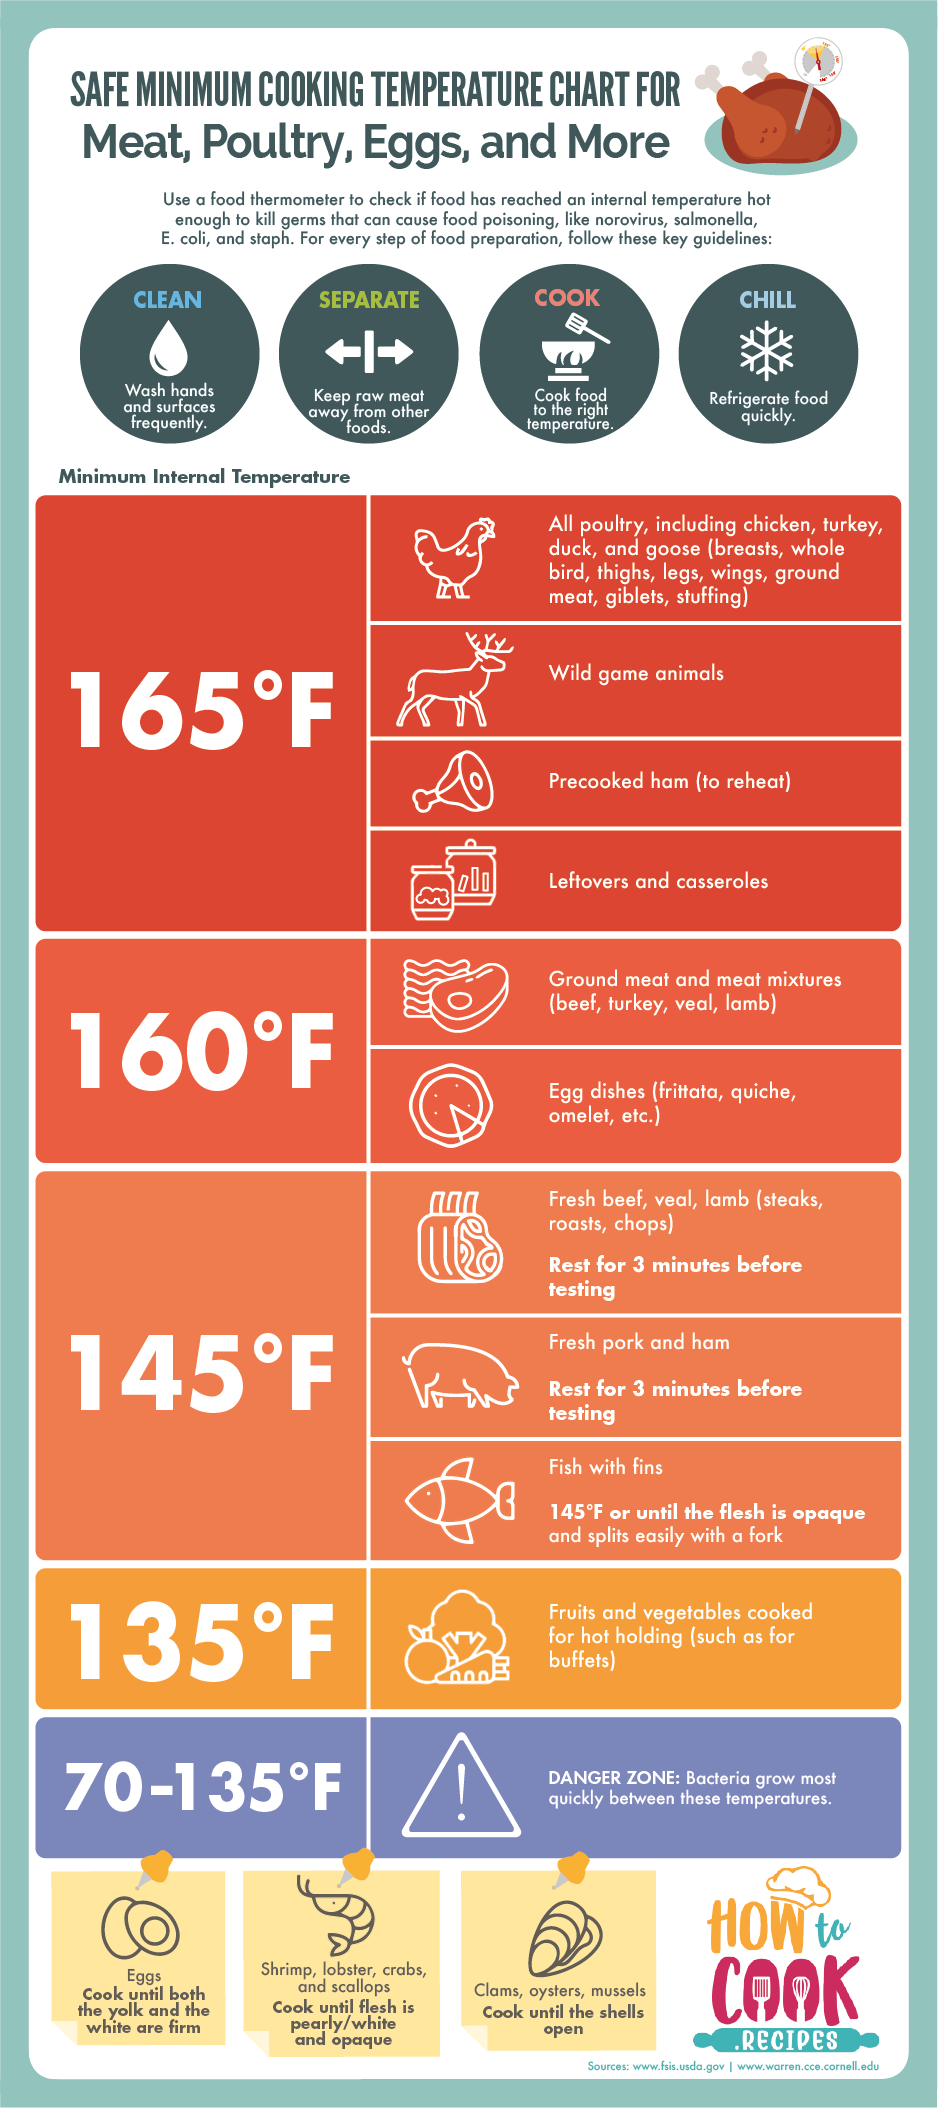
Your chicken isn’t safe until a meat thermometer reads 75°C (167°F) in the thickest section—never rely on color or texture alone. Insert the probe horizontally into breast meat or vertically into drumstick thickest parts, avoiding bone contact. Critical mistake: Pulling chicken at 70°C invites foodborne illness; the final 5°C rise happens rapidly during resting. Always check multiple pieces in mixed batches.
Visual Doneness Indicators
While thermometers are essential, watch for these secondary signs: Clear juices should flow when piercing drumsticks with a fork, not pinkish liquid. Breast meat should feel firm but yielding (like your palm below the thumb) when pressed gently. For whole chickens, wiggle the leg joint—it should move freely without resistance when fully cooked. Never skip: Rest poultry 5 minutes after cooking; this allows residual heat to finish the process while redistributing juices.
Whole Chicken Mastery Sequence
Step-by-Step Execution
- Preheat your Philips air fryer to 200°C for 3 minutes (empty basket)
- Dry thoroughly with paper towels—moisture is the enemy of crisp skin
- Season simply with oil, salt, and pepper (avoid sugary rubs that burn)
- Place breast-side up in the basket without touching sides
- Cook 6 minutes at 200°C, then immediately reduce to 150°C
- Check thigh temperature at 66 minutes—insert probe near bone
Pro Performance Boosters
Pat skin obsessively dry 30 minutes before cooking—surface moisture creates steam instead of crispness. Stick to chickens under 1.3kg; larger birds won’t cook evenly in standard baskets. Game-changer: Tent the breast loosely with foil during the lower-temp phase if your unit runs hot, preventing dryness while legs finish cooking.
Drumstick Crispness Formula

Precision Timing Technique
Set 180°C and place drumsticks vertically with space between them (they’ll shrink 20% during cooking). At the 10-minute mark, flip each piece—never skip this step as uneven air circulation causes one-sided browning. For extra crunch, mist lightly with oil during the final 2 minutes. Troubleshooting: If skin stays pale at 15 minutes, increase next batch temp by 5°C; if blackening occurs, decrease by 5°C. Philips models vary slightly—calibrate with your first batch.
Breast Juiciness Protocol

Brining Breakthrough Method
Submerge 430g breasts in a brine of 1 tbsp salt per cup of cold water for 30 minutes pre-cooking. This osmotic process retains moisture during the 18-minute 180°C cook cycle. Critical step: Pat bone-dry afterward—wet meat steams instead of crisping. Visual cue: Press the thickest part at 12 minutes; it should spring back slowly. If firm immediately, it’s overcooking. For stuffed breasts, add 2-3 minutes but cover filling with foil to prevent burning.
Wings Crispness Control System
Texture Customization Guide
Cook wings at 180°C for your desired outcome:
– 15 minutes: Tender meat with flexible skin (ideal for Buffalo sauce)
– 18 minutes: Balanced crunch that holds sauce without sogginess
– 20 minutes: Glass-like shatter-crisp texture (best for dry rubs)
Sauce timing secret: Toss wings in sauce after cooking—applying during cooking burns sugars and creates sticky, uneven coatings. For extra crispness, sprinkle ¼ tsp baking powder on wings pre-cooking (this alkaline trick accelerates browning).
Homemade Nugget Success
Kid-Approved Cooking Method
Cut 500g breast into 2.5cm cubes, coat lightly in oil/salt/pepper, and arrange in a single layer. Cook at 180°C for 12 minutes, shaking the basket at 6 minutes. Avoid: Over-seasoning—strong spices burn in high-heat air frying. For picky eaters, dip pieces in beaten egg and panko before cooking for extra crunch. Batch tip: Cook in two batches rather than overcrowding—the second batch often cooks faster due to residual heat.
Flavor Maximization Tactics
Marinade Timing Strategy
For surface flavor only, brush oil-based marinades on chicken just before cooking—sugary or acidic mixtures burn at air fryer temps. For deeper penetration, marinate overnight in the fridge, but always pat bone-dry before cooking. Pro move: Add 1 tsp cornstarch to yogurt marinades—it creates an ultra-crisp crust while keeping meat tender.
Critical Mistake Prevention
Overcrowding Disaster Fix
Leaving 1cm between pieces is non-negotiable—crowding traps steam, creating boiled chicken texture. Solution: Cook in batches and keep finished pieces warm in a 90°C oven. For whole chickens, rotate the basket 180° at the 30-minute mark if your model lacks a turntable.
Model-Specific Calibration
Your Philips unit may run 5-10°C hotter or cooler than indicated. First-time protocol: Check drumsticks at 18 minutes—adjust future times by ±2 minutes based on results. Never exceed 200°C for chicken; higher temps char exteriors before interiors cook.
Maintenance for Perfect Results
Pre-Cooking Checklist
- Scrub basket with soapy water to remove old oil residue (burnt bits cause smoke)
- Preheat empty for 3 minutes—cold baskets create uneven cooking
- Lightly oil basket only when cooking skinless pieces to prevent sticking
Post-Cooking Protocol
Let the unit cool completely before cleaning—sudden temperature changes warp components. Remove basket and wash with non-abrasive sponge; never submerge the main unit. Wipe interior with damp cloth to prevent flavor transfer to next batch.
Mastering cooking chicken in Philips air fryer hinges on respecting precise temperature thresholds and airflow dynamics. Start with drumsticks to calibrate your unit before attempting whole birds—this builds confidence while delivering foolproof results. Remember that 75°C internal temperature is your non-negotiable safety checkpoint, and never sacrifice spacing for batch size. Within three attempts, you’ll develop an intuitive sense for visual doneness cues while consistently serving golden, juicy chicken that makes takeout obsolete. Your Philips air fryer isn’t just an appliance—it’s your passport to stress-free, healthy poultry mastery when armed with these exact specifications.


