
Your Philips air fryer delivers golden fries and juicy chicken with minimal oil—but when smoke billows from the vents or food cooks unevenly, you’re not dealing with a broken filter. Unlike coffee makers or HVAC systems, Philips air fryers don’t contain traditional replaceable filters. Instead, three critical components—your mesh basket, grease pan, and heating element area—form the integrated filtration system that traps grease and particles. When these get clogged, airflow suffocates, cooking times double, and smoke triggers your fire alarm. The good news? Most “filter failures” vanish with 15 minutes of targeted cleaning. This guide reveals exactly how to clean your Philips air fryer filter system based on model-specific engineering, preventing $200 replacement costs and restoring that factory-fresh crispness.
Identify Your Air Fryer’s Hidden Filter System
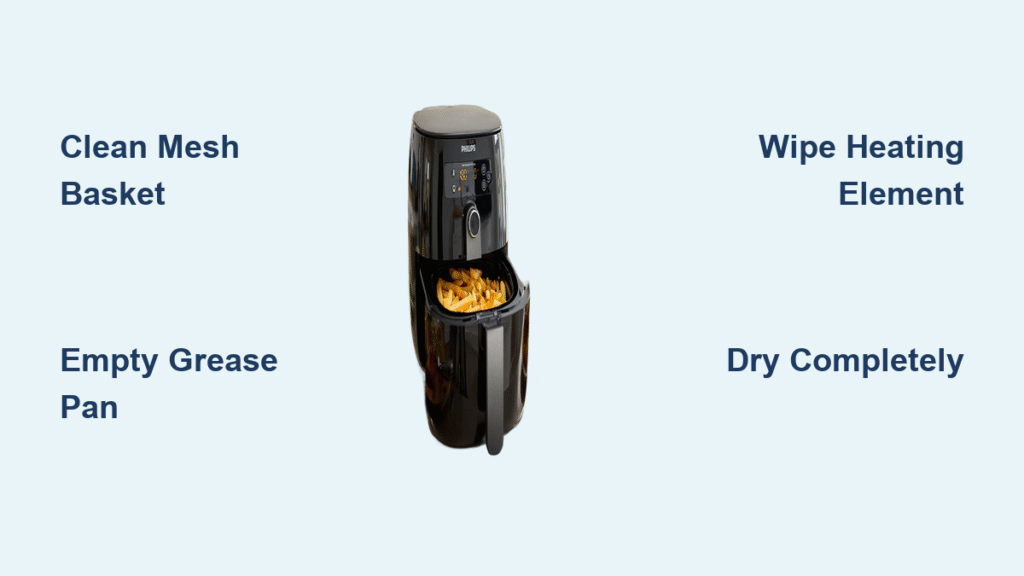
Philips air fryers use a three-part filtration ecosystem—not a single replaceable filter. Recognizing these components stops you from wasting money on unnecessary “filter replacements” sold online. The mesh basket acts as your primary filter, catching 90% of food particles during cooking. Its fine stainless steel weave traps crumbs while allowing superheated air circulation. Below it, the grease pan serves as secondary filtration, collecting oil drippings that would otherwise coat the heating element. Finally, the heating element area functions as an air intake filter—grease buildup here directly restricts airflow like stuffing a vacuum hose with cotton balls. Understanding this triad explains why simply “cleaning the filter” fails: you must service all three zones to eliminate smoke and uneven cooking. Check your model number (usually on the base) since NA55x series units include steam-cleaning capabilities while older models require manual element access.
Daily Mesh Basket Filter Cleaning That Takes 90 Seconds
Your mesh basket is the workhorse of the filtration system, yet most users damage it with aggressive scrubbing. Skip the steel wool—Philips engineers designed these baskets for gentle daily maintenance. For quick post-cooking cleaning, remove the basket while warm (not hot) using the handle release button. Tap it firmly over your trash can to dislodge loose crumbs—this prevents 70% of baked-on residue. Rinse under hot running water for 30 seconds, focusing spray through the mesh from both sides. For stubborn grease, soak only the bottom third of the basket in hot soapy water for 5 minutes (never submerge completely to protect non-stick coating). Use a soft bottle brush on mesh areas with circular motions—never scrape vertically. Air-dry upside-down on a dish rack for 20 minutes before storing. Critical mistake alert: Waiting until grease hardens forces you to use abrasive pads that scratch the non-stick surface, creating sticky residue traps for future meals. Clean immediately after cooking while oils remain liquid.
Grease Pan Filtration Maintenance: Stop Sink Clogs Now
That pooled oil in your grease pan isn’t just messy—it’s actively sabotaging your air fryer’s filtration system by allowing grease to migrate toward the heating element. Never pour this oil down your sink; one air fryer session produces enough grease to clog household pipes within three uses. Instead, while the pan is still warm, pour accumulated oil into a glass jar with a lid (like a pickle jar). Once cooled, this solidified grease becomes easy kitchen waste. For daily cleaning, wipe the pan’s interior with a paper towel to remove excess oil, then fill with hot soapy water and let soak for 10 minutes. Scrub corners with a soft sponge—grease loves hiding where the pan meets the basket rails. Rinse until water runs clear, then dry with a microfiber cloth. Pro tip: Place the pan upside-down on your dishwasher’s top rack for hands-off cleaning during dinner cleanup. If you spot a sticky film or smell burning odors during cooking, you’ve waited too long—soak the pan overnight in vinegar-water solution before scrubbing.
Heating Element Air Intake Cleaning: Fix White Smoke in 20 Minutes
White smoke billowing from your air fryer’s rear vents signals critical grease buildup on the heating element—the heart of your filtration system. Philips recommends cleaning this area every 3 months, but heavy users should do it monthly. Never skip these safety steps: Unplug the unit and wait 30 minutes for complete cooling. Flip the appliance upside-down on a towel-covered counter (never on carpet). Using a damp—not wet—microfiber cloth dipped in warm soapy water, gently wipe the visible coil surfaces. For grease trapped behind the element, insert a straw-cleaning brush (or old toothbrush) and use short back-and-forth motions. Avoid pressing hard—you’re removing residue, not scrubbing grout. Pay special attention to the fan housing where grease pools. Allow 3 full hours of air-drying before upright storage. Warning: If you see visible grease drips on the element or cooking times increased by 25%, clean immediately—this buildup risks electrical shorts and fire hazards.
Steam Cleaning Method for NA55x Series Models Only
If your Philips model starts with NA55 (like HD9651/90), leverage its built-in steam-cleaning function for effortless filter maintenance. This feature safely loosens baked-on debris without disassembling components. Add exactly 1 cup of water to the dry cooking pan—overfilling risks water seeping into electrical parts. Insert the pan, close the lid securely, and select the “Steam” program for 10 minutes. Let the unit cool completely for 20 minutes before opening (steam burns are severe). Wipe interior surfaces with a damp cloth to remove loosened grime—no scrubbing needed. Non-negotiable rule: Never attempt this on non-steam models like the popular HD920/94. Boiling water in standard units creates dangerous pressure build-up and voids warranties. Check your manual’s “Cleaning” section first—using steam on incompatible models melts internal wiring.
Critical Cleaning Mistakes That Destroy Your Air Fryer
These common errors turn simple maintenance into expensive repairs. Never immerse the main unit in water—even splashes into vents can short-circuit the control board. Stop using metal scrubbers immediately; they scratch non-stick coatings, creating particle traps that accelerate clogging. Avoid baking paper or foil liners—they block the 360° airflow essential for filtration, causing uneven cooking and fire risks. Never clean while plugged in or hot—thermal shock cracks components, and live electricity near water causes electrocution. For exterior cleaning, use only a damp cloth with mild detergent; harsh degreasers melt plastic housings. When drying the control panel, ensure buttons are fully dry—residual moisture causes phantom startups. If your basket develops warped edges from improper dishwasher placement (always top-rack upside-down), replace it—warped baskets disrupt airflow like a clogged filter.
Build Your Filter Maintenance Schedule in 4 Tiers

Forget generic “clean monthly” advice—match your routine to actual usage. After every use (2 minutes): Empty grease pan into jar, rinse basket under tap, wipe pan with paper towel. Daily deep clean (if cooking >2 times/day): Soak basket and pan in hot soapy water for 15 minutes, scrub mesh with soft brush, air-dry completely. Weekly (10 minutes): Wipe heating element area with damp cloth, inspect basket for warping, clean window with vinegar spray. Monthly (20 minutes): Full disassembly—soak basket overnight for stubborn residue, use straw brush on element housing, check grease pan corners for hidden buildup. Red flag checklist: If you see grease pooling, smoke during cooking, or cooking times increased by 15%, add an immediate deep clean session. Models used for fatty foods (bacon, wings) need 50% more frequent maintenance than veggie-focused units.
Spot Filter Clogs Before They Ruin Your Meal

Your air fryer broadcasts clear warnings when filtration fails—catch these early to avoid smoke emergencies. Immediate action required: White smoke from rear vents, visible grease droplets on heating element, or food taking 25% longer to cook. Schedule cleaning now: Grease splatter on interior walls, sticky residue on basket rails, or persistent “burnt oil” smell during preheating. Monitor for next session: Slight airflow reduction (heard as quieter fan), minor discoloration on mesh basket, or uneven browning on one side of food. Pro diagnostic test: Place a paper towel over the rear vent while running empty—the moment it sticks firmly indicates healthy airflow. If it flutters weakly or doesn’t move, your filtration system is critically clogged.
Proper Storage After Cleaning: Prevent Mold & Odors
Storing damp components creates invisible mold colonies that transfer flavors to your food. Always ensure 100% dryness: reassemble the basket and pan only after 2 hours of air-drying (use a hairdryer on cool setting to accelerate). Store in a cabinet away from sink splashes—humidity is the enemy of filtration systems. Never stack cookbooks or pots on top; this warps the basket rails, disrupting the seal needed for proper airflow. For long-term storage, leave the lid slightly ajar with a silica gel packet inside to absorb moisture. If you detect musty odors after storage, run an empty cycle at 400°F for 10 minutes before cooking—this burns off residual mold without chemicals.
Quick Troubleshooting Reference for Filter Emergencies
Problem: White smoke during cooking
Solution: Immediately unplug, cool 30 mins, then deep-clean heating element
Problem: Food half-cooked, half-raw
Solution: Remove basket and check for debris blocking bottom mesh—clean with toothpick
Problem: Burning smell with no smoke
Solution: Wipe grease pan rails where it contacts the basket—grease hides in these seams
Problem: Reduced airflow noise
Solution: Inspect basket for warping; replace if edges don’t sit flush in rails
Maintain Peak Filtration Performance Without Replacement Filters
Your Philips air fryer’s filtration system thrives on simple, consistent care—not expensive filter cartridges. By targeting the mesh basket, grease pan, and heating element area with model-specific cleaning, you’ll eliminate smoke, restore crisp results, and extend your appliance’s life by years. Remember: daily basket rinsing prevents 80% of clogs, proper grease disposal saves your plumbing, and quarterly element cleaning maintains factory airflow. Implement this routine today, and your air fryer will deliver perfect crispy texture meal after meal—no “how to clean Philips air fryer filter” searches needed. When grease buildup strikes, you now have the exact steps Philips engineers recommend to get back to golden, smoke-free cooking in under 20 minutes.


