
That greasy stovetop splatter and uneven browning? Your Philips air fryer eliminates both while delivering restaurant-crisp sausages in half the time. Forget wrestling with pans—this hands-off method drains excess fat for healthier results while locking in juices. Whether you’re rushing through breakfast links or prepping game-day brats, you’ll achieve perfect snap and succulence every time.
Most home cooks either undercook their sausages (risking pink centers) or overcook them into dry hockey pucks. The solution lies in precise temperature control and strategic prep—exactly what your Philips air fryer excels at. In this guide, you’ll discover why 400°F outperforms the manual’s default setting, how to prevent explosive bursting, and the smoke-stopping trick using stale bread.
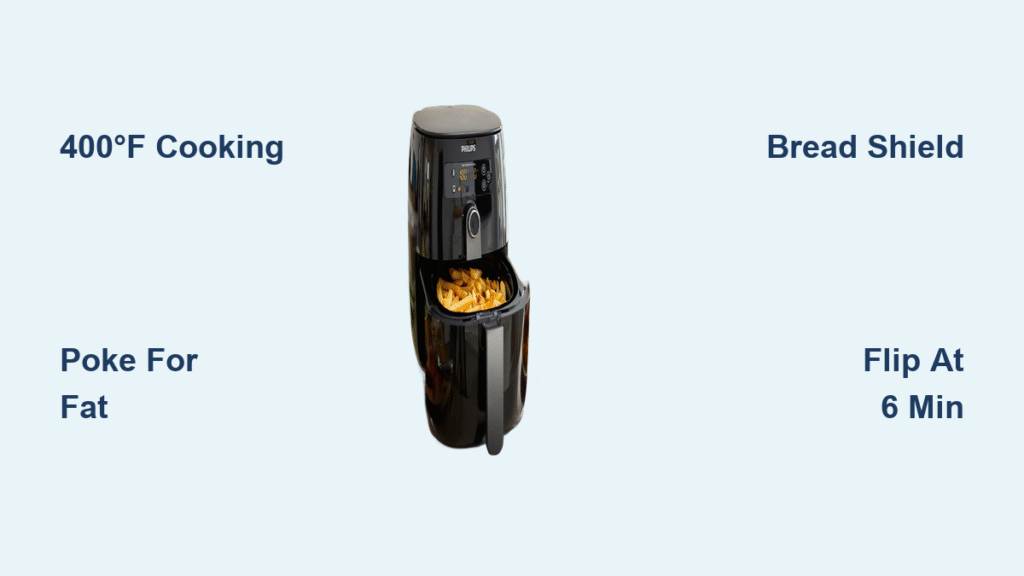
Why 400°F Beats Philips’ Default Temperature for Crispy Sausages

Philips’ official chart recommends 325°F, but community testing proves 400°F delivers superior results for most sausages. The intense, circulating heat rapidly renders fat through the casing while creating that essential Maillard reaction for deep browning. Crucially, the air fryer’s rapid convection prevents the interior from drying out—unlike pan-frying where grease pools.
Use 375°F instead when:
– Cooking delicate chicken or turkey sausages (they dry out faster)
– Handling extra-thick bratwurst over 1.5 inches in diameter
– Cooking smaller batches under 4 sausages (less heat retention)
Never exceed 400°F—higher temperatures cause fat to smoke violently before rendering properly. The 375–400°F sweet spot ensures crispy skin without charring, even for cheese-stuffed varieties.
Exact Cook Times That Prevent Undercooked Centers
Fresh Sausages: Avoid Pink Interiors with These Timings
| Sausage Type | Temp | Time | Critical Checkpoint |
|---|---|---|---|
| Breakfast links | 400°F | 8–10 min | No pink when sliced lengthwise |
| Italian sausage | 400°F | 9–12 min | 160°F internal temp (pork) |
| Bratwurst | 375°F | 12–14 min | Flip at 7 minutes for even cook |
| Chicken/turkey | 375°F | 10–12 min | 165°F internal temp (poultry) |
Pro tip: Insert your thermometer horizontally through the sausage end—not the side—to avoid false readings from surface heat. If juices run clear with no pink tinge, it’s done.
Frozen Sausages: Skip Thawing Without Sacrificing Safety
Add exactly 2–3 minutes to fresh timings at 400°F. The air fryer’s powerful airflow defrosts and cooks simultaneously, but never increase temperature—this creates a charred exterior with frozen centers. Check temperature 1 minute early; frozen sausages cook faster than expected once thawed internally.
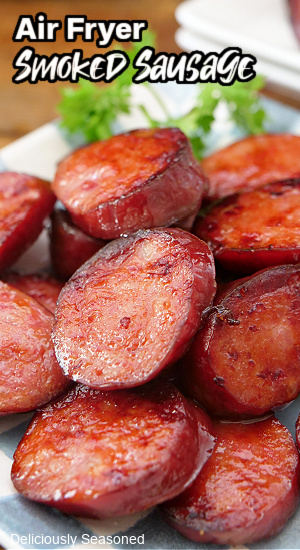
Pre-Cooked Sausages: Revive Leftovers Without Drying Out
| Product | Temp | Time | Visual Cue |
|---|---|---|---|
| Kielbasa slices | 400°F | 4–5 min | Edges curl slightly |
| Whole smoked sausage | 375°F | 8–10 min | Skin blisters but doesn’t split |
| Wieners | 400°F | 5–6 min | Plump with golden spots |
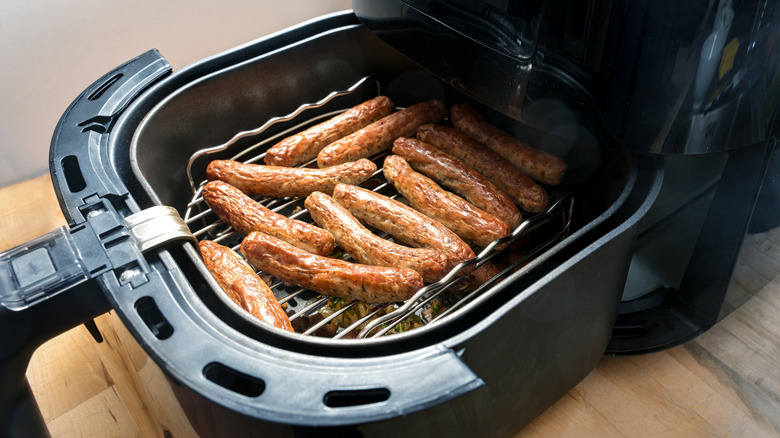
Critical mistake: Overcrowding the basket. Sausages need space for air circulation—cook in batches if necessary.
Poke or Skip? The Bursting Sausage Prevention Method
Poke 2–3 holes with a sharp knife IF:
– You’re cooking fatty pork or beef sausages (excess steam builds pressure)
– You prioritize clean presentation over maximum juiciness
– Your air fryer previously smoked during sausage cooking
Skip poking IF:
– You’re using lean chicken or turkey sausages (less fat = less steam)
– You want ultra-juicy results (poking releases flavorful fat)
– You’re cooking pre-cooked sausages (already stabilized)
The truth: Both methods work. Poking prevents explosive bursts but sacrifices 10–15% of interior fat. No poking yields richer flavor but risks messy splits if temperatures exceed 400°F.
Stop Smoke Alarms With These 3 Fat-Drip Fixes
Smoke happens when dripping fat hits the hot drawer bottom. These tested solutions prevent it:
- Stale bread shield: Place 1 slice under the basket rack. It absorbs 90% of grease droplets without affecting cooking time.
- Water buffer: Add 1–2 tbsp water to the drawer bottom before cooking. The liquid captures fat and cools the surface.
- Mid-cook fat dump: For batches over 8 sausages, pause at 6 minutes to empty the drawer. Never skip this—congealed grease becomes impossible to remove when cold.
Warning: Never use oil spray inside the basket—it creates permanent residue that smokes during future uses.
Flip or Shake? The Browning Technique Debate
At 400°F, flipping is unnecessary—the intense top-down heat circulates evenly. But at 325–375°F, shake the basket at the halfway mark to prevent pale spots. Use metal tongs for thick brats (avoid scratching the non-stick coating) and skip flipping if sausages are already blistering vigorously.
Time-saver: Arrange thicker sausages around the basket perimeter where heat concentrates most. This compensates for uneven airflow in XXL models.
Beyond Hot Dogs: 3 Next-Level Serving Ideas
Breakfast Power Bowl: Dice air-fried Italian sausage, then toss with scrambled eggs, roasted sweet potatoes, and baby kale. Drizzle with sriracha mayo.
Game Day Skewers: Thread sliced bratwurst and cherry peppers onto soaked skewers. Air-fry 3 minutes at 400°F for instant handheld snacks.
Sausage-Stuffed Peppers: Halve bell peppers, fill with crumbled cooked sausage and rice, then air-fry 8 minutes at 375°F until peppers soften.
Reheat Like a Pro: Restore Crispiness in 4 Minutes
Microwaving creates rubbery sausages—always reheat in the air fryer:
1. Place refrigerated sausages in a single layer
2. Cook at 350°F for 3–4 minutes (frozen: add 2 minutes)
3. Stop when exterior feels crisp but interior is steaming
Critical step: Pat sausages dry with paper towel before reheating. Moisture is the enemy of crispiness.
Why Metal Tongs Beat Plastic for Sausage Removal
Your Philips basket’s non-stick coating gets scratched by plastic utensils. Use stainless steel tongs to:
– Safely grip hot sausages without piercing casings
– Prevent grease splatter during removal
– Avoid leaving residue that causes future smoking
Never use forks—they puncture casings, draining precious juices onto the drawer below.
Troubleshooting: Fix These 3 Common Sausage Disasters
Problem: Sausages burst open mid-cook
Cause: Skipping casing pricks OR exceeding 400°F
Fix: Next time, poke 3 holes and lower temp to 375°F
Problem: Pale, uneven browning
Cause: Overcrowded basket creating steam pockets
Fix: Cook in single layers with ½-inch spacing between sausages
Problem: Lingering smoke after cooking
Cause: Fat buildup in the drawer
Fix: Clean drawer immediately while warm using soapy water and a non-abrasive sponge
Mastering these techniques transforms your Philips air fryer into a sausage-cooking powerhouse. You’ll consistently achieve that elusive balance—crispy, blistered exteriors with juicy, fully cooked centers—without stovetop splatter or oven monitoring. Remember the golden rules: 400°F for most fresh sausages, poke fatty varieties, and always use the bread slice trick to prevent smoke. Whether it’s Tuesday-night dinner or game-day feasting, you now have the blueprint for perfect results in 10 minutes or less. For thicker brats or frozen batches, simply add 2–3 minutes and verify with a thermometer—your secret weapon for food-safe, flavorful sausages every single time.


