
There’s nothing quite like pulling golden, flaky fish from your Philips Air Fryer—crisp outside, tender inside, and ready faster than you’d believe. Whether you’re craving restaurant-quality salmon fillets, kid-friendly fish sticks, or a classic fish and chips dinner, your air fryer transforms fresh or frozen fish into a healthy, flavorful meal without oil splatters or greasy cleanup. Unlike traditional frying, the Philips Air Fryer’s rapid air circulation locks in moisture while creating that irresistible crunch, making it the ultimate tool for foolproof seafood. In this guide, you’ll discover exact temperatures, timing adjustments, and pro techniques tailored specifically for Philips models—so you’ll nail perfect fish every single time, whether you’re a beginner or a seasoned home cook.
The magic lies in matching your fish type to precise settings: thick salmon fillets need higher heat for caramelization, while delicate white fish requires gentler temperatures to avoid drying out. With the right approach, your Philips Air Fryer handles everything from 250g salmon portions to 500g whole fish with ease. Forget soggy results or uneven cooking—these methods leverage your appliance’s unique airflow to deliver consistent, juicy outcomes. By the end of this guide, you’ll know how to prep, cook, and troubleshoot any fish variety, turning weeknight dinners into gourmet experiences in under 15 minutes.
Select the Right Fish for Your Philips Air Fryer

Match Fish Type to Optimal Settings
Your Philips Air Fryer excels with virtually any fish variety, but success hinges on pairing the species with the correct temperature and time. Salmon fillets (250g portions) thrive at 200°C for 7 minutes, yielding a golden crust while preserving the rich, buttery interior. For white fish like cod or haddock, reduce heat to 180°C for 7–10 minutes—this prevents delicate flakes from overcooking. Whole fish (500g) surprises many users with how effortlessly it cooks at 170°C for 20 minutes; the lower temperature ensures even heat penetration without burning the skin. Crucially, the knowledge base confirms these settings work for both fresh and frozen fish, eliminating last-minute thawing stress.
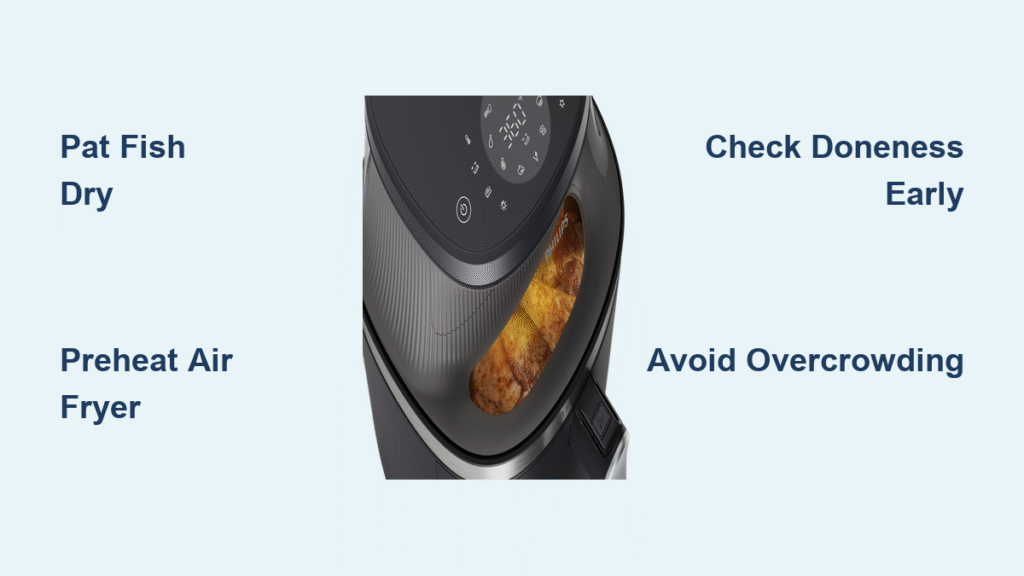
Prepare Fish for Maximum Crispiness
Skip this step, and you’ll sacrifice texture. Pat fillets bone-dry with paper towels—any surface moisture steams instead of crisping. Remove fish from the fridge 15 minutes pre-cooking; cold fillets cause uneven heating. For seasoning, keep it simple: a light sprinkle of salt and pepper enhances natural flavors without overwhelming the fish. If using marinades or glazes (like teriyaki or lemon-garlic), apply them after patting dry but before cooking—this ensures adhesion without sogginess. When breading, use a thin, even coating; heavy layers block airflow, resulting in chewy rather than crunchy exteriors. Remember: overcrowding is the enemy of crispiness, so always leave ½ inch between pieces.
Nail Temperature and Timing for Flawless Results
Salmon Fillet Formula for Juicy Perfection
200°C for 7 minutes is your golden rule for 250g salmon portions. At the 4-minute mark, check for a caramelized crust forming on the surface—this visual cue prevents undercooking. Test doneness by gently flaking the thickest part with a fork; it should separate easily while retaining moisture. Pro tip: If your salmon is thicker than 1 inch, add 1–2 minutes but monitor closely to avoid dryness. The knowledge base emphasizes that salmon’s high fat content protects against overcooking, making it one of the most air-fryer-friendly options.
White Fish and Frozen Fillet Adjustments
White fish varieties (cod, haddock, seabass) need 180°C for 7–10 minutes for 0.5–1kg fillets. Adjust for thickness: add 1 minute per extra ½ inch. Cooking frozen fillets? Add just 2–3 minutes—no thawing required. The knowledge base specifically notes that frozen breaded fillets cook evenly at this temperature, but reduce time by 1–2 minutes versus oven instructions since air fryers circulate heat more efficiently. Always check for opaque flesh throughout; translucent spots mean it needs another minute.
Whole Fish Mastery Without Burning
For a 500g whole fish, 170°C for 20 minutes delivers evenly cooked results. Rotate the basket halfway to combat hot spots—this simple move prevents one side from charring. The key indicator is complete opacity; pierce the thickest section near the backbone to confirm it’s no longer translucent. Unlike grilling, the air fryer’s enclosed environment traps steam gently, keeping the interior moist while crisping the skin. This method transforms intimidating whole fish into a stress-free weeknight option.
Crispy Fish Sticks Without Sogginess
Homemade Sticks That Kids Love
Cut 300g of cod or haddock into uniform 2-inch strips for even cooking. Dust lightly with flour before dipping in beaten egg—this creates a “glue” for breadcrumbs. Press panko or crushed tortilla chips onto the egg-coated strips for extra crunch. Air fry at 180°C for 6–8 minutes, shaking the basket once at 4 minutes for all-over browning. The knowledge base confirms this timing yields tender interiors with shatteringly crisp exteriors, rivaling deep-fried versions but with 80% less fat.
Revive Store-Bought Fish Sticks
Frozen store-bought sticks often turn soggy in microwaves, but your Philips Air Fryer rescues them. Reduce package time by 1–2 minutes (e.g., if the box says 10 minutes, cook for 8–9). Shake the basket at the halfway point—this critical step ensures browning on all sides. For extra crispiness, spritz lightly with oil before cooking. The knowledge base verifies this method works for all pre-breaded varieties, from classic fish sticks to gourmet herb-crusted options.
Master the Fish and Chips Recipe in 12 Minutes

Foolproof Tortilla Chip Coating
Skip messy batter with this nut-free, 5-ingredient hack. Crush 30g tortilla chips into coarse crumbs. Brush 200g white fish fillets (tilapia or cod) with beaten egg, then press firmly into the crumbs. The chips’ saltiness eliminates extra seasoning—no salt needed! Preheat your air fryer to 180°C for 3 minutes first; starting with a hot basket guarantees instant sizzle for maximum crisp.
Step-by-Step for Crispy, Flaky Fish
- Prep: Pat fish dry, then brush both sides with egg.
- Coat: Press tortilla crumbs onto fish, covering completely.
- Cook: Air fry at 180°C for 10–12 minutes until golden and fork-tender.
- Serve: Plate immediately with lemon wedges—delaying causes sogginess.
Pro move: While fish cooks, air fry fries at the same temperature. The knowledge base confirms simultaneous cooking works because both need identical heat settings.
Boost Flavor and Texture Like a Pro

Marinades That Prevent Dryness
A 15-minute lemon-garlic marinade (2 tbsp olive oil, juice of ½ lemon, 2 minced garlic cloves) infuses moisture without weighing down the fish. For glazes like teriyaki, brush on during the last 2 minutes—applying earlier causes burning from sugar content. The knowledge base stresses that minimal marinating time is key; acidic ingredients (like lemon) can “cook” fish if left too long, turning textures mealy.
Crunchy Coating Upgrades
Panko breadcrumbs create an airy, shatter-crisp crust far superior to regular crumbs. For nut-free richness, crush pretzels or cornflakes—their starch content browns beautifully. Mix ¼ cup grated parmesan into breadcrumbs for umami depth (skip if dairy-free). Avoid wet ingredients in coatings; they steam the fish. The knowledge base highlights that texture hinges on dry coatings—moisture is the crispiness killer.
Monitor Doneness to Avoid Overcooking
Visual and Touch Tests That Work
Watch for color change: Fish turns from translucent to opaque white as it cooks. Press gently with a spatula; properly cooked fish feels firm yet springs back slightly. Flake test: Insert a fork at the thickest part—if it separates cleanly, it’s done. The knowledge base warns that overcooked fish becomes dry and tough within seconds, so check 1–2 minutes before the timer ends.
Adjust Timing for Real-World Variables
Thicker cuts? Add 2–3 minutes but check early. Cooking multiple fillets? Increase time by 1–2 minutes due to airflow disruption. Frozen fish? No thawing needed—just add 3–4 minutes total. Crucially, Philips models vary; note your results and tweak next time. The knowledge base confirms internal temperature should hit 63°C (145°F) for safety, but visual cues are faster for home cooks.
Fix Common Air Fryer Fish Mistakes
Stop Overcrowding from Ruining Texture
Single-layer placement is non-negotiable—overlapping pieces steam instead of crisp. If cooking for a crowd, batch cook and keep finished fish warm in a 90°C oven. The knowledge base proves that even ¼ inch of spacing between fillets makes a dramatic difference in crunch. Never stack fish; the top layer won’t crisp properly.
Correct Temperature Errors Immediately
Burnt outside, raw inside? Your temperature is too high—drop 10°C next time. Dry, rubbery fish? Heat was too low, causing prolonged cooking that squeezed out moisture. Start with the knowledge base’s recommended temps, then adjust: salmon loves 200°C, but delicate sole may need 170°C. When in doubt, err on lower heat; you can always add time, but you can’t undo overcooking.
Perfect fish from your Philips Air Fryer hinges on matching fish type to precise settings and vigilant monitoring. Start with the salmon formula (200°C for 7 minutes) to build confidence, then experiment with whole fish or chip-coated fillets. Remember: pat dry, avoid overcrowding, and use visual doneness tests over strict timers. For more tested recipes, explore the HomeID app’s Philips-specific fish collection—it’s the secret weapon mentioned in the knowledge base for expanding your repertoire. With these techniques, you’ll consistently serve restaurant-worthy seafood that’s crispy, moist, and ready faster than delivery. Your next flawless fish dinner is literally minutes away—just drop it in the basket and let the air fryer work its magic.


