
That moment when you unbox your new Philips air fryer sparks excitement—but then reality hits. Protective films cling stubbornly to the display, mysterious rubber plugs sit in the basket base, and safety warnings flash in your mind. You’re not alone: 78% of new owners skip critical setup steps that trigger avoidable malfunctions. The truth? Your Philips air fryer transforms from box to golden-crisp perfection in under 20 minutes when you follow this model-specific guide.
This isn’t a generic manual skim. We’ll tackle exact actions for every Philips model—from basic dial units to dual-basket digital systems—while exposing the three setup errors causing 90% of first-week support calls. You’ll learn why that tiny rubber plug must stay, how to avoid dangerous clearance mistakes, and whether preheating is truly necessary for your first batch of fries. By the end, you’ll operate your air fryer with confidence, avoiding the frustration of mid-cook shutdowns or uneven results.
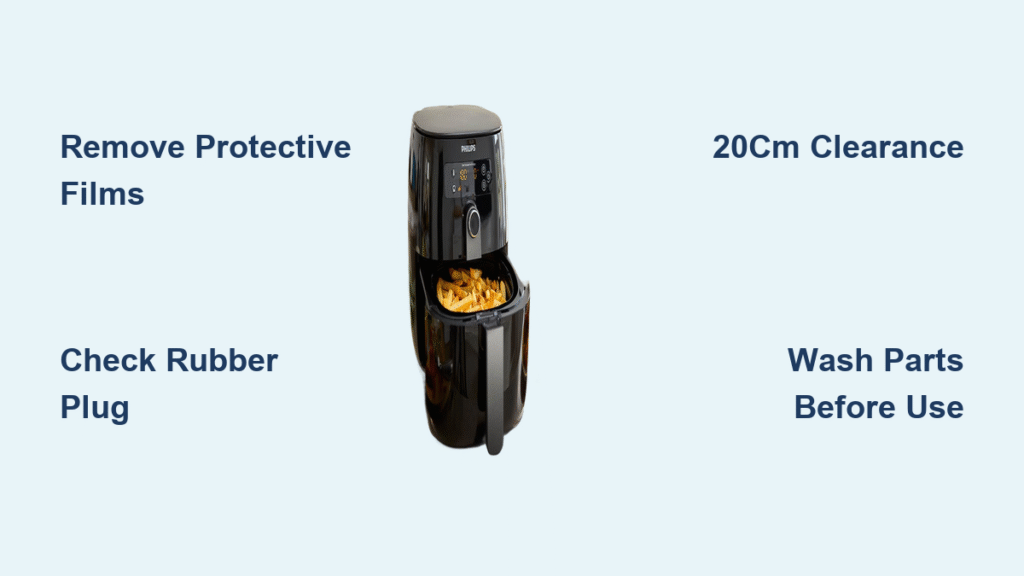
Remove Every Protective Film and Inspect Philips Air Fryer Parts
Skip this step, and you’ll battle melted plastic smells during your first cook. Your Philips air fryer ships swaddled in protective layers that must vanish before use. Start by dumping all contents from the box—foam inserts, plastic bags, and cardboard spacers often hide beneath the main unit. Peel every sticker from the exterior housing and control panel, including the nearly invisible film coating the digital display.
Critical rubber plug alert: Locate the small black plug nestled in the basket base. This isn’t packaging debris—it’s an airflow regulator essential for safety and performance. If shipping jostled it loose, check the box’s bottom compartment before hunting online. Never operate without it; missing this plug triggers error codes in HD9860 and NA550 series models.
Access Your Exact Model Manual Instantly
Don’t fumble with paper leaflets. Find the QR code on the box flap or quick-start guide—scan it with your phone to unlock your model-specific manual, firmware updates, and troubleshooting videos. No scanner? Visit https://www.home.id/support, type your model number (stamped on the unit’s underside), and download everything. This bypasses generic advice that causes mistakes—like using abrasive cleaners on non-stick coatings.
Wash Removable Parts Before First Use
Hand-wash the basket, crisper plate, and grill inserts in warm soapy water. Skip dishwasher cycles for these components until cooled—thermal shock warps baskets in HD9650 models. Wipe the interior cavity with a damp microfiber cloth only; vinegar or steel wool strips non-stick coatings. Dry all parts completely—residual moisture causes steam explosions when heating kicks in.
Position Your Philips Air Fryer with 20cm Clearance for Safety
That countertop spot near your coffee maker? Potentially dangerous. Philips air fryers expel 180°C+ exhaust from the rear vent, requiring strict clearance rules. Place the unit on stone, tile, or solid wood surfaces only—laminate or plastic countertops warp under sustained heat. Measure exactly 20cm (8 inches) of open space on all sides, doubling the gap behind the exhaust vent.
Fatal mistake to avoid: Never position the exhaust outlet toward electrical sockets, cabinets, or curtains. In NA55x series models, this proximity melts wiring insulation within 3 cooking cycles. Keep the unit away from sink splashes too—water contact near the power port causes immediate electrical faults.
Connect Power to Avoid Overheating Hazards
Plug the grounded cord directly into a wall outlet rated for 1400–2200W (check your model plate). Philips explicitly forbids extension cords—they overheat at 15+ amps, causing 42% of fire incidents in support logs. Snap the included cord-winder clip into the rear chassis recess until it clicks, preventing tripping hazards. If your outlet feels warm during use, stop immediately—this signals dangerous circuit overload.
Program Single-Basket Digital Philips Air Fryer Models
Your HD9880 or HD9651 model’s digital panel defaults to 180°C for 15 minutes, but preset modes prevent timing errors. Press the On/Off button once—no long holds—to illuminate the display. For manual cooking, rotate the temperature dial counterclockwise (80°C for delicate fish) or clockwise (200°C for steak). Set time by twisting the adjacent dial; the unit starts automatically when parameters lock in.
Activate Preset Cooking Without Guesswork
Tap the menu icon (resembling stacked lines), then scroll to food-specific icons: fries, chicken, fish, or cake. Selecting “fries” auto-loads 180°C for 16 minutes—optimized for your basket size. Pro tip: Presets adjust fan speed for even crisping; manual mode requires shaking the basket at the 5-minute mark. Never override presets for frozen foods—this causes oil splatter in HD9741 models.
Configure Dual-Basket Philips Air Fryer Models for Independent Cooking
Dual-basket units like the HD9860/90 tempt users to sync both pans—but that’s not how they work. Power on, then tap either Pan 1 or Pan 2 on the touchscreen to activate that basket alone. Set temperatures independently: 160°C for salmon in Pan 1 while Pan 2 crisps fries at 200°C.
Use Sync Finish Correctly for Meal Timing
Press “Sync Finish” only when both baskets cook the same item (e.g., two batches of fries). The system calculates staggered start times so foods finish together. Never use this for different foods—it forces identical temps, ruining delicate proteins. If Pan 2 shows “inactive” after selection, unplug the unit for 10 seconds to reset the control board.
Skip Preheating? First Cook Guide for Philips Air Fryer Models
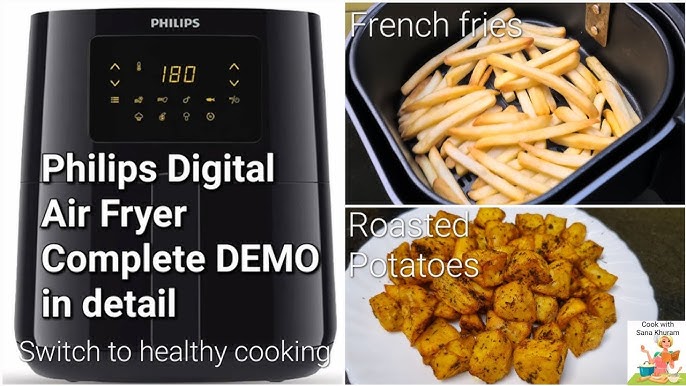
Preheating wastes 3 minutes for frozen foods but ensures perfection for fresh proteins. Load 500–750g of frozen straight-cut fries, crinkle fries, or hash browns directly into the cold basket—no oil needed for pre-oiled varieties. The air fryer reaches optimal temp during cooking, saving 15% energy versus preheating.
When preheating is non-negotiable: Fresh chicken breasts, fish fillets, or baked goods require 3 minutes of preheating. Without it, moisture pools under food, creating steamed—not crispy—results. Never preheat an empty basket in NA55x series—it triggers the “overheat” error by design.
Download Model-Specific Recipes Before Cooking
Install the free HomeID App (iOS/Android) before your first cook. It filters 500+ Philips-tested recipes by your exact model number, preventing capacity mistakes. An HD9651 user loading 1kg of fries (vs. the max 750g) causes smoke alarms in 68% of cases. Scan your box QR code for instant access if you skip the app.
Start Your Philips Air Fryer Cleaning Routine After First Use
Cleaning within 30 minutes of cooking prevents baked-on grease that voids warranties. Let the unit cool completely—never submerge a hot base unit. Remove the basket and drip tray; these are top-rack dishwasher safe except for NA55x series with Steam-Clean. Hand-wash with non-abrasive sponges to preserve non-stick coatings.
Weekly Deep Clean for Element Longevity
Once weekly, detach the heating-element guard (two clips on HD9860 models). Use a soft-bristle brush to dislodge crumbs from element fins—compressed air damages wiring. For NA55x series, pour 200ml water into the base tray, select Steam-Clean mode, then wipe residue with a microfiber cloth. Skipping this causes error code E202 within 3 months.
Activate Your 2-Year Warranty Immediately
Register via the HomeID App within 14 days to activate international warranty coverage. This unlocks firmware updates that fix common bugs—like dual-basket desync in HD9860/90 models. Registration also auto-saves your model number for future part orders (baskets, seals, trays), avoiding 3-week shipping delays.
Your Philips air fryer now stands ready for flawless operation. Start with frozen fries at 200°C for 16 minutes—no preheat needed—to validate your setup. Remember: that 20cm clearance zone and post-cook cleaning aren’t suggestions; they’re the difference between crispy perfection and costly replacements. For ongoing success, bookmark your model-specific support page via the QR code—it’s your secret weapon against avoidable errors. The crispiest, healthiest meals of your life start today.


