
You’ve just brought home your new Philips Air Fryer 3000 Series (HD9252/91) and are ready to revolutionize your kitchen. This powerful appliance delivers restaurant-quality crispy results using up to 90% less oil than traditional frying methods, but many users struggle with basic operation right out of the box. Whether you’re wondering why your fries aren’t crispy or how to properly load the basket, this guide solves those problems immediately.
The Philips 3000 Series Air Fryer L model features a large 1.4kg capacity perfect for families of 4-6 people. While the technology seems straightforward, improper use leads to common issues like white smoke, uneven cooking, and premature coating wear. Most first-time users don’t realize that something as simple as basket positioning or oil application can make or break your air frying experience.
This practical guide cuts through the confusion with step-by-step instructions specifically for the HD9252/91 model. You’ll learn the exact techniques Philips engineers recommend for perfect results every time, plus troubleshooting fixes for the seven most common problems users face. Let’s transform your cooking experience with this essential how to use Philips Air Fryer 3000 Series guide.
First-Time Setup Essentials
Unboxing and Initial Inspection
Carefully remove all packaging materials—the basket and pan come pre-assembled but are secured with protective foam inserts. Check for the quick start guide and complete user manual in the box; these documents contain critical model-specific instructions updated as recently as October 2025. The HD9252/91 requires proper setup before first use to ensure optimal performance and safety.
Pre-Use Cleaning Protocol
Wash the removable basket and pan with warm, soapy water before your first cooking session. Never submerge the main unit—water exposure damages the heating element and electrical components. Dry all parts thoroughly, paying special attention to the basket’s non-stick coating where moisture can hide. Proper drying prevents steam buildup that causes white smoke during initial use.
Register Your Air Fryer Immediately
Visit Philips’ official website and register your HD9252/91 model within 24 hours of purchase. This simple step unlocks instant access to updated manuals, extends your warranty coverage, and provides priority customer support. Registration takes less than two minutes but prevents significant headaches if you encounter operational issues later.
Mastering Basic Operations
Power On and Interface Navigation
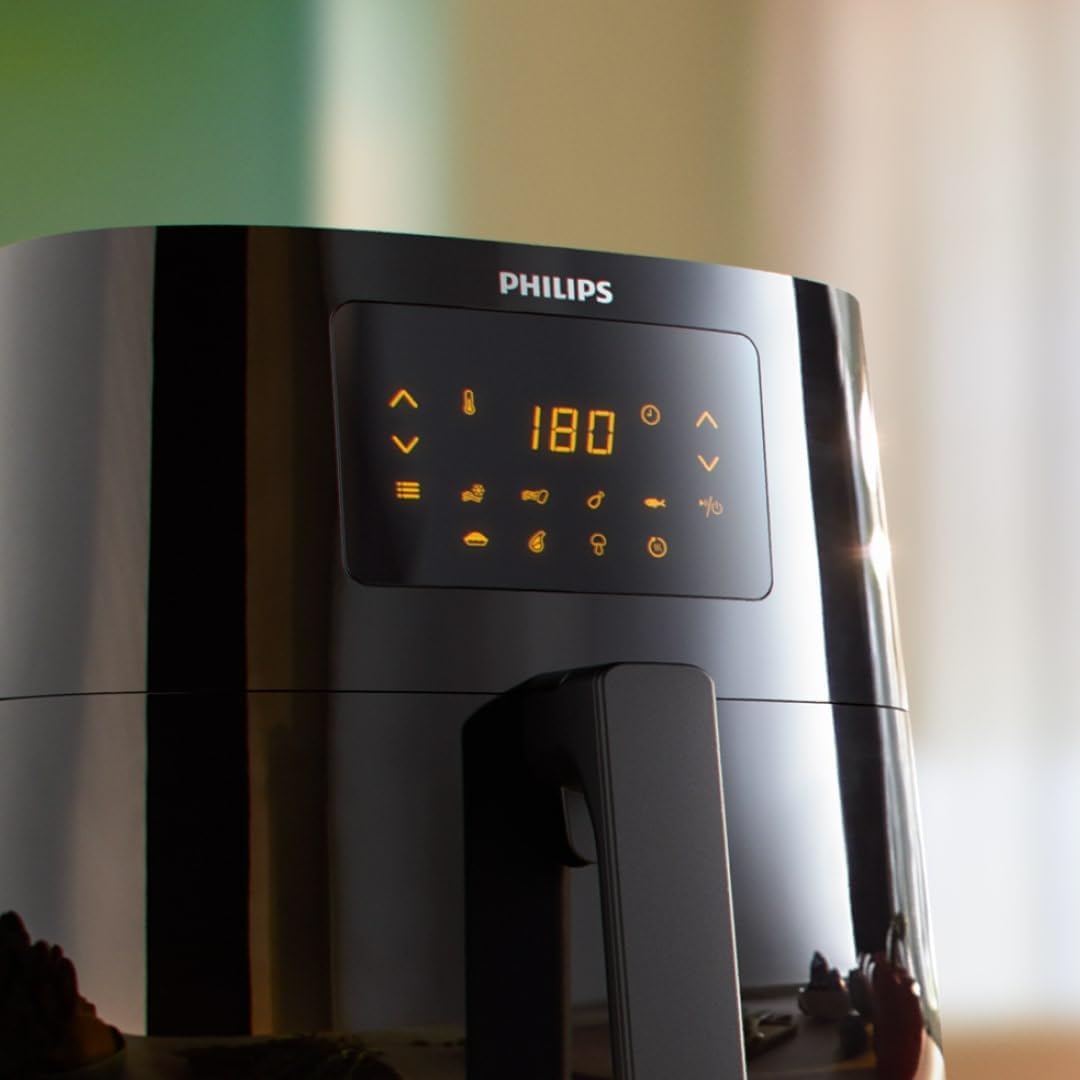
Plug your Philips Air Fryer 3000 Series into a grounded outlet—this 1750W appliance requires stable power to function correctly. Press the power button once; the display illuminates with default settings (180°C for 20 minutes). The touch-sensitive interface responds to light touches—no need to press hard, which could damage the controls over time.
Temperature and Time Controls
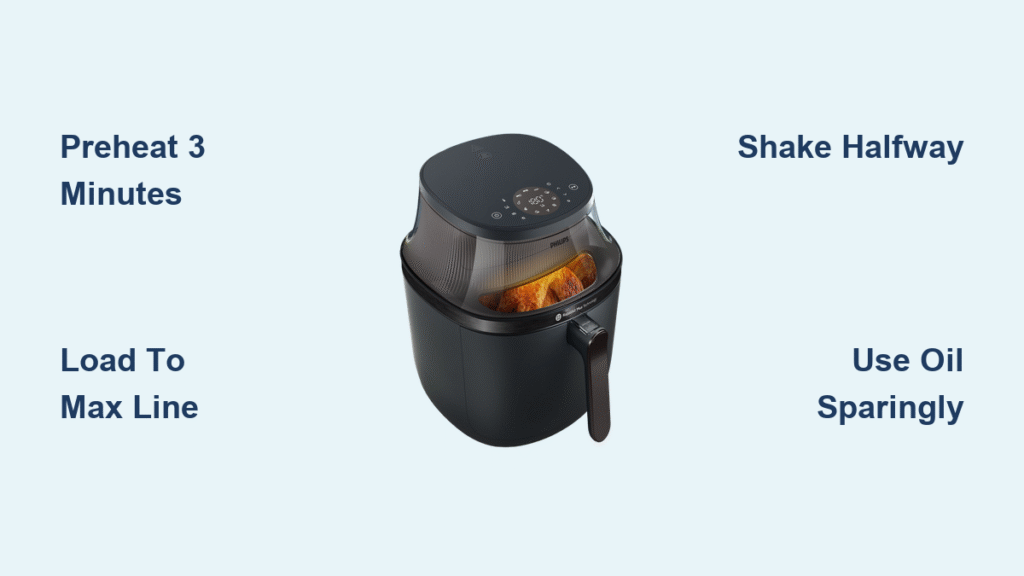
Adjust temperature using the up/down arrows across the full 80°C to 200°C range. Time settings modify in 1-minute increments up to 60 minutes. Pro tip: Always preheat for 3 minutes at your target temperature before adding food—this creates the ideal environment for crispy results without burning.
Basket Insertion Technique
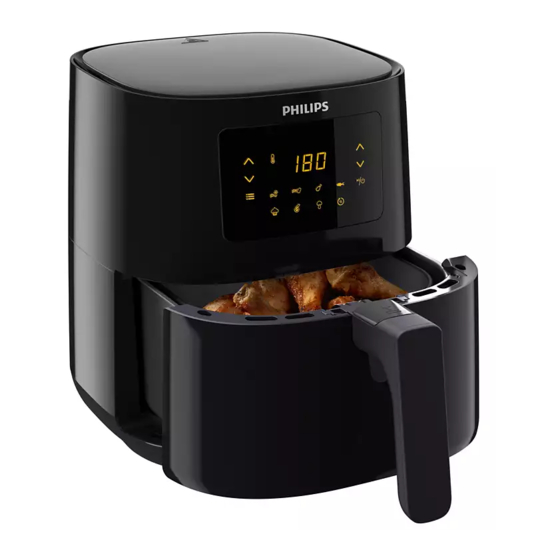
Slide the basket into the pan until it clicks securely into place. The safety mechanism prevents operation if improperly seated, so if your air fryer won’t start, this is the first thing to check. You’ll hear a distinct mechanical click when correctly positioned—never force the basket if it doesn’t slide smoothly.
Preset Functions Decoded

Available Preset Programs
Your HD9252/91 includes seven smart presets optimized for common foods:
– Frozen fries: 200°C for 18 minutes
– Fresh fries: 180°C for 25 minutes
– Chicken: 180°C for 20 minutes
– Fish: 160°C for 15 minutes
– Cake: 160°C for 25 minutes
– Grill: 200°C for 15 minutes
– Vegetables: 180°C for 12 minutes
Customizing Presets
Press the preset button repeatedly to cycle through options. Once selected, modify temperature or time before starting—the fryer remembers your changes for future use. Reset to factory defaults by holding the preset button for 3 seconds when needed. This flexibility lets you adapt presets to your personal taste preferences.
When to Skip Presets
Presets work best for standard portions (500g-800g). Adjust manually when cooking larger quantities, using thicker cuts than recommended, or adding oil to normally oil-free items. For family meals exceeding 1.2kg, increase cooking time by 25% and shake the basket twice during the process.
Oil Usage Guidelines
When Oil Matters
Oil is optional but beneficial for specific foods: use 1 tsp for 500g fresh potatoes, a light spray for breaded items to enhance browning, and ½ tsp for vegetables to crisp edges. Critical warning: Never pour oil directly into the pan—this causes smoking and potential fire hazards.
Oil Application Methods
- Place food in a bowl before cooking
- Add ½-1 tsp oil (or light spray)
- Toss to coat evenly
- Transfer to basket in a single layer
Avoid aerosol cooking sprays—their additives damage the non-stick coating over time. Instead, use a silicone oil mister with your preferred oil for controlled application.
Achieving Perfect Crispiness
Pre-Cooking Prep Secrets
Moisture is the enemy of crispiness. Thoroughly dry potato surfaces with paper towels, chicken skin before seasoning, and vegetable surfaces after washing. Pat foods completely dry—this simple step makes the difference between soggy and spectacular results with your Philips Air Fryer 3000 Series.
Optimal Loading Capacity
Fill the basket to the max line—approximately 800g fries or 1.2kg chicken pieces. Overloading blocks air circulation, creating soggy bottoms. For larger batches, cook in multiple rounds rather than overcrowding. When properly loaded, hot air circulates freely around all food surfaces.
Mid-Cook Shaking Technique
Remove the basket once during cooking (around the halfway mark). Shake vigorously or flip larger items to redistribute heat exposure and prevent sticking. The fryer automatically pauses when the basket is removed—take advantage of this feature for even cooking without burning.
Baking Paper and Foil Rules
Use baking paper or foil sparingly: cut to fit basket bottom only, never cover the entire basket (air must circulate freely), secure corners with food weight, and remove immediately after cooking. Baking paper works best for sticky marinated foods, battered fish portions, and delicate items prone to breaking. If using foil, poke 4-5 holes for circulation and avoid contact with the heating element.
Troubleshooting Common Issues
Food Not Crispy Solutions
Problem: Soggy fries or limp vegetables
Root cause: Overloading or insufficient temperature
Fix: Reduce quantity by 25%, increase temperature by 20°C
Prevention: Always preheat 3 minutes before adding food
White Smoke Emergencies
Problem: Smoke billowing from air fryer
Immediate action: Unplug immediately
Likely causes: Excess oil in pan, food debris burning
Solution: Clean pan thoroughly, use less oil next time
Note: Normal steam appears white but dissipates quickly
Power Failure Fixes
Problem: Air fryer won’t turn on
Check: Outlet works with other appliances
Verify: Basket fully inserted and clicked
Test: Different outlet on another circuit
Contact: Support if indicator lights still fail
Final Success Checklist
Your Philips 3000 Series Air Fryer (HD9252/91) now holds no secrets. Remember to always preheat for crispy results, never overload the basket beyond the max line, and clean thoroughly after each use. Start with simple frozen fries to build confidence, then explore the preset programs and manual settings as you gain experience.
Most “broken” air fryers simply need basket reseating or a good cleaning—keep this how to use Philips Air Fryer 3000 Series guide handy for quick reference. With proper technique, your next perfectly crispy batch is just minutes away, and you’ll wonder how you ever cooked without this kitchen essential.


