
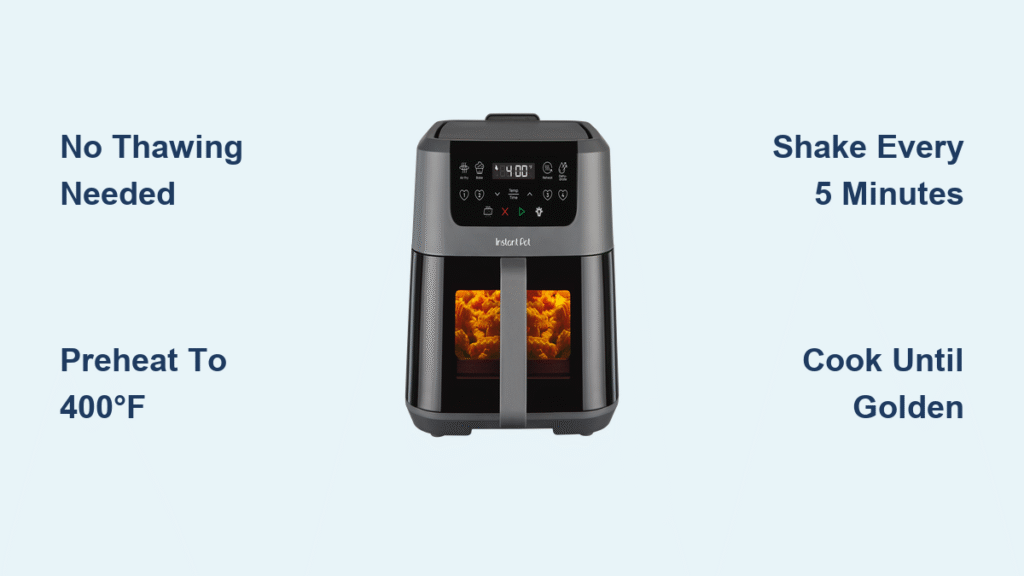
Your Instant Pot Air Fryer can transform a frozen bag of fries into golden, crunchy perfection faster than delivery arrives—and without the oil splatter of deep frying or the 45-minute oven wait. Skip soggy results and burnt edges: With the right technique for your Duo Crisp or Air Fryer Lid attachment, you’ll get restaurant-quality fries with a fluffy interior and shatter-crisp exterior in under 20 minutes. No thawing, no guesswork—just reliable crunch whether you’re feeding one or a crowd.
Instant Pot Models & Basket Capacity That Actually Work
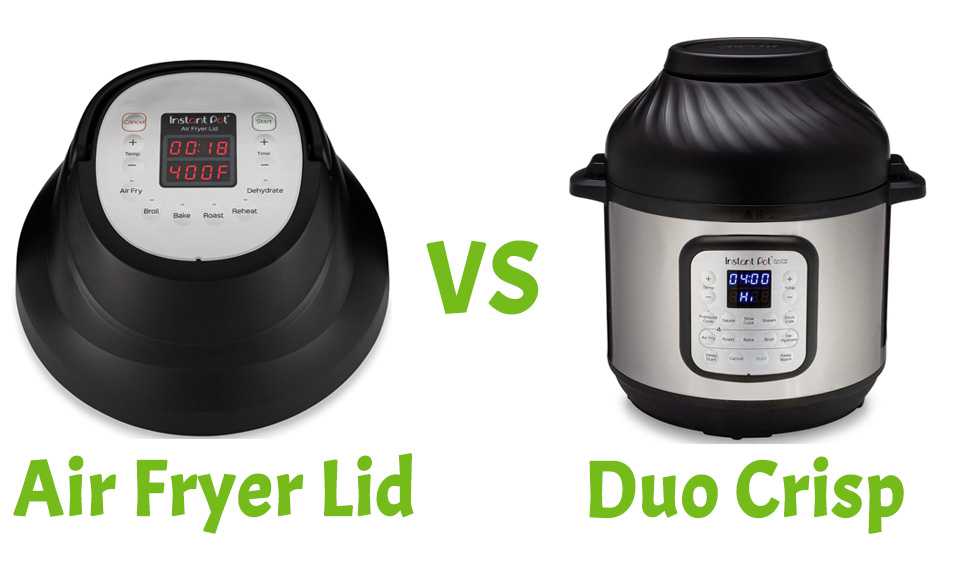
Which Air Fryer Setup Fits Your Kitchen
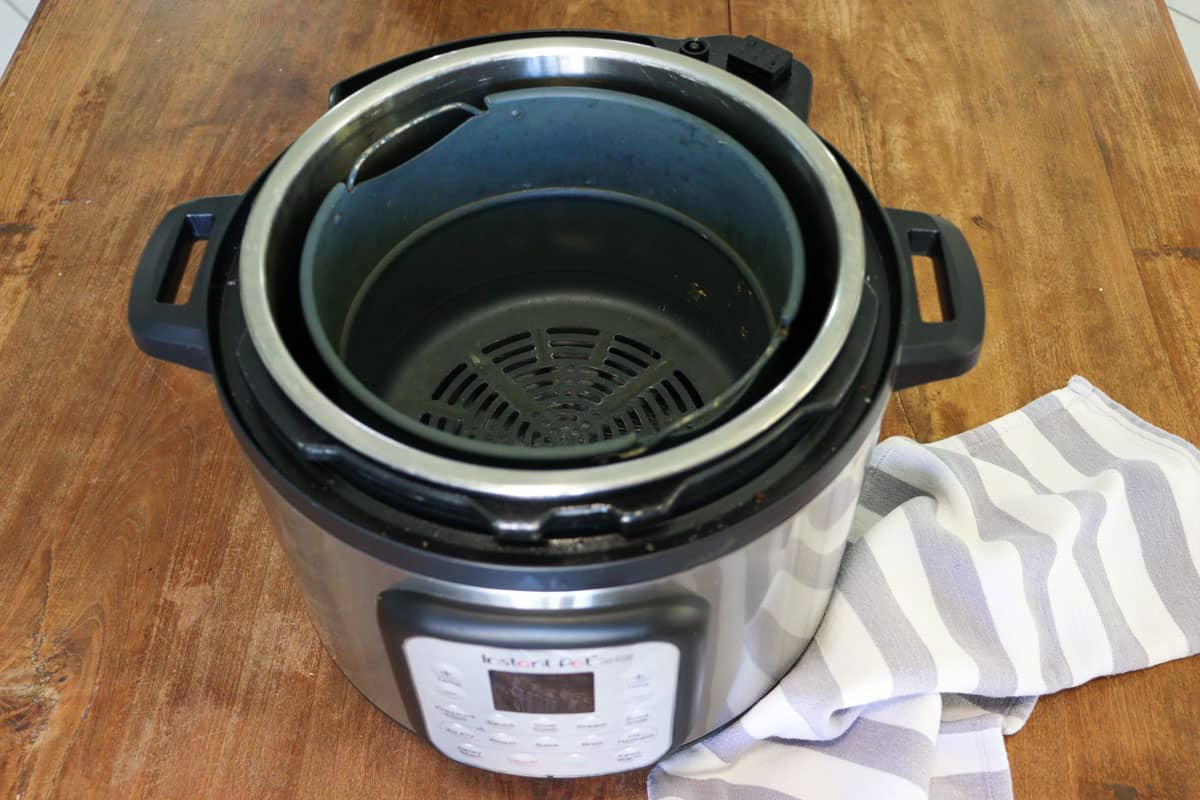
Your Instant Pot’s air frying success depends entirely on your model. The Duo Crisp (with built-in air fryer function) and 6- or 8-quart Instant Pots paired with the official Air Fryer Lid deliver identical results. Standalone air fryers follow the same principles, but third-party lids may lack precise temperature control. Avoid using the standard pressure cooking lid—air circulation requires the specialized basket and fan system.
Avoid Soggy Fries With Correct Loading
6-quart basket sweet spot: 13–16 oz (half a standard 28-32 oz bag). Overfilling traps steam, creating limp fries. Critical rule: Fill basket no more than ¾ full—piles should stay loose, not packed. For full 32 oz bags (like party-sized Ore-Ida), split into two batches. Crowding adds 5–10 minutes per batch and guarantees uneven browning. Keep silicone-tipped tongs and heat-resistant gloves nearby—they’re non-negotiable for safe shaking.
Skip Thawing: The Frozen Fries Preparation Hack
Why Straight-from-Freezer Beats Thawed Every Time
Thawing creates surface moisture that steams instead of crisps. Your Instant Pot’s rapid air circulation handles frozen potatoes perfectly—no preheat needed, though it’s recommended. Do this now: Grab your frozen bag and dump fries directly into the basket. No oil? Most brands (like McCain or Ore-Ida) come pre-coated. If using low-fat or “oven-ready” fries, a 1-second spritz with avocado oil boosts crispness without greasiness.
Preheat Like a Pro (Even If You’re Rushed)
Set 400°F for 3–5 minutes before adding fries. This jumpstarts crisping and reduces total cook time by 2–3 minutes. Skip preheating only for tiny snack batches (under 8 oz). Pro tip: Residual heat from your first batch means subsequent loads cook 10–15% faster—no need to re-preheat.
Exact Timing Chart for Every Fry Style at 400°F
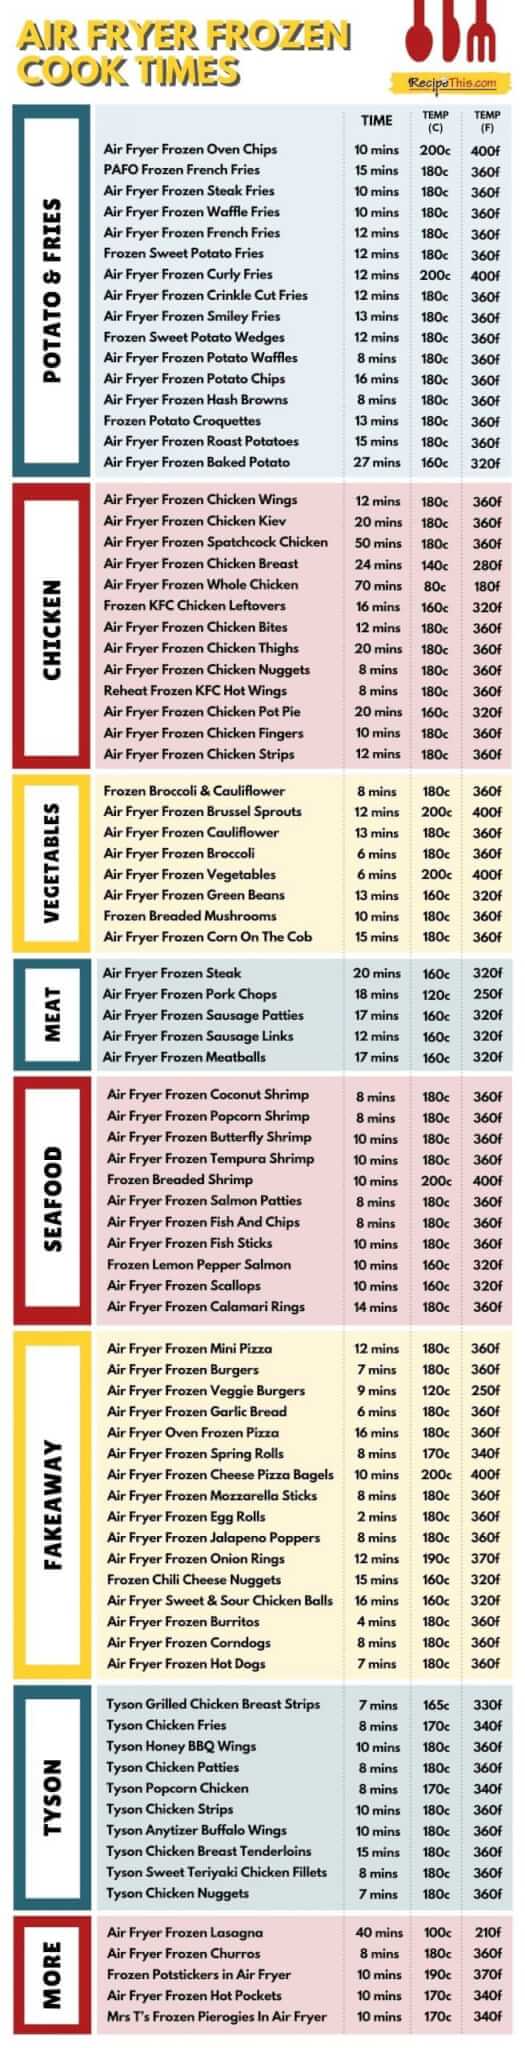
Stop Guessing: Follow This Cut-Specific Guide
All times below assume ½-bag loads (16 oz). Shake aggressively at the “Turn Food” beep or every 5 minutes.
| Fry Type | First Shake Time | Total Time Range | Critical Visual Cue |
|---|---|---|---|
| Shoestring | 10–12 min | 12–15 min | Light golden, snaps when bent |
| Regular Straight | 15 min | 15–20 min | Even golden, audible crunch |
| Crinkle-Cut | 13 min | 15–18 min | Ridges deeply browned, not pale |
| Waffle/Lattice | 13 min | 13–15 min | Grid lines sharply defined |
| Steak/Thick-Cut | 16 min | 20–25 min | Deep bronze, sturdy when lifted |
| Sweet Potato | 12 min | 12–18 min | Dry surface, slight caramelization |
| Tater Tots | 10 min | 14–15 min | Uniformly crisp, no pale spots |
Brand alert: Ore-Ida’s “Golden Crispers” finish 2–3 minutes faster than their “Golden Crinkles” at identical weights. Always start with the lower time range—underdone fries recover with extra minutes; burnt ones don’t.
Foolproof 5-Step Cooking Process
Step 1: Load & Program (Zero Mistakes Here)
Place basket in inner pot → Dump frozen fries (no thawing!) → Optional light oil spray → Press Air Fry → Set 400°F → Input time from the chart above.
Step 2: Shake Like Your Crispiness Depends on It (It Does)
When the “Turn Food” beep sounds:
– Lift lid onto heat-safe surface (never set on counter!)
– Shake basket 3 times vigorously—use gloves to avoid burns
– Optional: Light oil spritz for extra crunch
– Replace lid within 15 seconds to retain heat
Step 3: Test for Perfection Before Seasoning
At “End” signal, grab 2–3 fries with tongs:
– Perfect: Golden color, audible snap when broken
– Needs more: Add 2-minute increments, shaking each time
– Overdone: Next batch reduce time by 3 minutes or drop to 375°F
Step 4: Season Immediately for Maximum Flavor
Transfer fries to a dry bowl within 30 seconds of cooking. Toss with:
– Classic: Sea salt + garlic powder (1:1 ratio)
– Spicy: Cajun seasoning + smoked paprika
– Umami bomb: Grated parmesan + dried rosemary
Never add salt before cooking—it draws out moisture and prevents crisping.
Step 5: Serve With Dips That Elevate Everything
Pair with:
– Queso blanco (for carne asada fries)
– Chipotle mayo (1 tbsp mayo + ½ tsp adobo sauce)
– Malt vinegar spritz (authentic British chip shop style)
Fix Soggy or Burnt Fries in 60 Seconds
Emergency Troubleshooting Guide
Problem: Pale, limp fries after full cook time
Solution: Shake immediately + add 3 minutes at 400°F. Verify basket wasn’t overloaded.
Problem: Over-browned edges but raw centers
Solution: Next batch reduce temp to 375°F and extend time by 2 minutes. Thick-cut fries need lower-and-slower heat.
Problem: Fries welded to basket
Solution: Lightly mist basket with oil before preheating. Avoid sugary-coated fries (like sweet potato)—they caramelize and stick.
Problem: Uneven color (some golden, some pale)
Solution: Shake 5x more aggressively next time. Use tongs to flip stubborn clusters.
Batch Scaling: From Solo Snack to Party Platter
Small Batches (6–8 oz for One Person)
Cook time: 10–12 minutes. Use single-layer pile for ultra-crisp results. Ideal for late-night cravings—ready before Netflix loads.
Standard Family Side (16 oz)
Cook time: 15–20 minutes as per chart. Shake at 7-minute intervals for even browning. Keep first batch warm in a 200°F oven while cooking seconds.
Full Bag for Crowds (32 oz)
Split into two 16 oz loads—this isn’t optional for quality. Total time: 25–30 minutes with shaking every 4 minutes. Never attempt a full bag in one go; airflow fails past ¾ basket capacity.
Reheat Leftovers Without Sacrificing Crunch
Revive Yesterday’s Fries Like New
Refrigerate cooked fries in an airtight container for up to 5 days. To re-crisp:
1. Air fry at 400°F for 2–3 minutes
2. Spritz with oil only if fries look dry
3. Shake basket once halfway
Avoid microwaves—they turn fries leathery. If pressed for time, use oven at 425°F for 5–7 minutes (flip once).
Flavor Upgrades That Make Fries Irresistible
Pro Seasoning Combos (Apply Post-Cook)
- “Steakhouse Style”: Coarse salt + black pepper + dried thyme
- “Nashville Hot”: Cayenne + brown sugar + garlic powder (mix with 1 tsp oil)
- “Truffle Parm”: Grated parmesan + truffle salt + parsley
Loaded Fries in 10 Minutes
Top hot fries with:
– Chili-Cheese: Heated canned chili + shredded cheddar (melt 2 min at 300°F)
– Irish Nachos: Corned beef + sauerkraut + Swiss cheese (air fry 3 min)
– Breakfast Fries: Crispy bacon + fried egg + hot sauce
Critical Pro Tips You Can’t Skip
Never pack the basket—loose piles equal crisp fries. Overfilling is the #1 cause of sogginess.
Shake religiously every 5 minutes—set phone timer if your model lacks “Turn Food” alerts.
Start with less time—you can always add minutes, but burnt fries are ruined.
Lock in one brand—once you nail timing for your favorite fries (e.g., Ore-Ida Crinkles), stick with it. Switching brands resets your timing.
Your Instant Pot Air Fryer isn’t just for reheating pizza—it’s a fries powerhouse. Master these steps, and you’ll never settle for mushy oven fries or greasy takeout again. With consistent 400°F heat and perfect airflow, frozen spuds transform into golden, crunchy perfection in the time it takes to set the table. Grab that bag from your freezer tonight—you’ve got 15 minutes until crispy bliss.


