
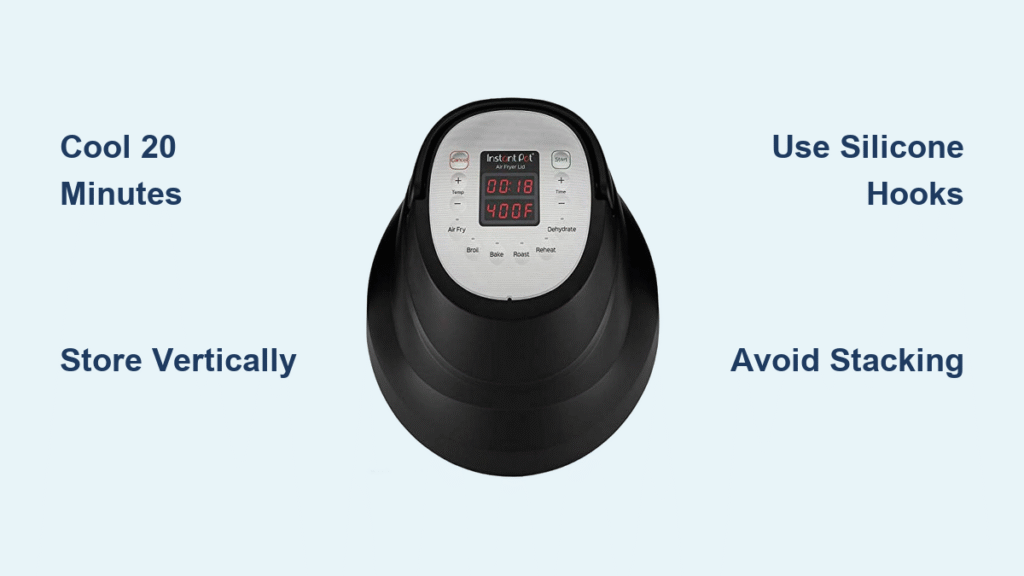
Your Instant Pot air fryer lid just finished crisping tonight’s dinner, and now it’s sitting there—hot, bulky, and devouring precious counter space. You know tossing it haphazardly could scratch the non-stick coating or trap moisture, but where do you put it? Improper storage leads to warped handles, cracked seals, and frustrating kitchen clutter. The good news: you can protect your $100+ investment while reclaiming counter real estate with these proven Instant Pot lid storage solutions. In the next few minutes, you’ll discover exactly how to store your air fryer lid safely, accessibly, and without drilling holes in your rental kitchen.
Vertical Storage That Saves Counter Space
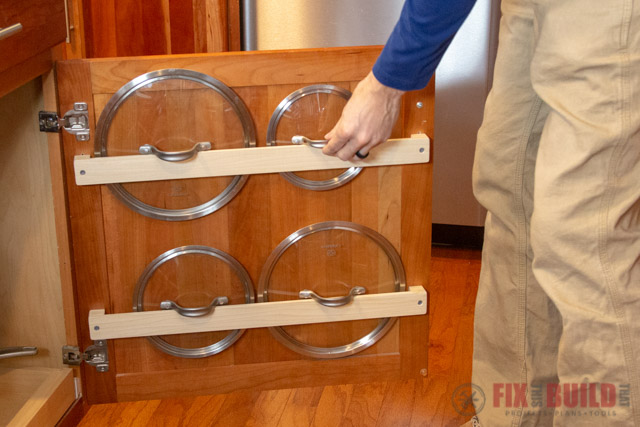
Stop stacking your Instant Pot air fryer lid horizontally—it’s a space thief and scratch magnet. Vertical storage slashes its footprint by 70% while preventing moisture traps. The fastest solution? Attach a lid holder directly to your appliance handle. Unlike generic stands that wobble, purpose-built systems like the Goldlion (designed for similar Ninja models but adaptable for Instant Pot) slide onto your handle with zero tools. Its 11.2-inch silicone-wrapped opening grips the lid securely, keeping it elevated off surfaces. For Instant Pot owners, measure your lid’s widest point first—most 6-8 Qt models need 10-12 inches of clearance. If DIY is your style, mount heavy-duty S-hooks inside a cabinet door: position them 1 inch apart, hook the lid’s handle through both, and let gravity hold it steady.
Why Vertical Beats Horizontal Every Time
Horizontal storage traps steam between the lid and surface, breeding mold in 48 hours. Vertical positioning solves this by allowing 360° airflow. When implementing this:
– Use soft-touch materials like silicone-coated hooks to prevent scratches
– Allow 2 inches of clearance around the lid for proper ventilation
– Position handles downward so grease drips away from heating elements
Never skip the cooling step—wait 15-30 minutes after cooking before vertical storage. A hot lid can warp plastic hooks or melt silicone coatings.
Critical Cooling Protocol Before Storage

Rushing storage while your Instant Pot air fryer lid is still warm is the #1 cause of premature damage. Residual heat exceeding 140°F softens plastic components and degrades seals. Always enforce a strict 20-minute cooldown period—set a timer if needed. During this window, wipe grease from the heating element housing with a microfiber cloth; dried-on oil attracts dust that clogs vents. For safety, place the lid on a wire cooling rack (not your granite countertop) to elevate it off surfaces. This prevents “heat pooling” that can discolor countertops over time.
Spot the Danger Signs of Premature Storage
Your lid is still too hot if:
– Steam visibly rises from the vent holes
– The handle feels warm to your inner wrist (not fingertips)
– A drop of water sizzles on the lid surface
Ignoring these risks warping the lid’s base ring—a $40 replacement part. Once cooled, dry all surfaces thoroughly with a lint-free towel. Pay special attention to the silicone sealing ring groove where moisture hides. One overlooked drop here causes mildew within days.
Small Kitchen Storage Hacks That Actually Work
When counter space is tighter than your jeans after Thanksgiving dinner, standard solutions fail. Mount magnetic strips under upper cabinets to suspend metal-lidded Instant Pot models (like the Duo Crisp). Use industrial-strength 20-lb magnets spaced 8 inches apart—position them so the lid hangs parallel to the floor. For non-magnetic lids, repurpose a $5 tension rod under your sink cabinet: slide it between side walls, then hang the lid from S-hooks. Renters, listen up: over-the-door shoe organizers with clear pockets hold lids vertically without damaging walls. Slide the lid handle through two adjacent pockets for stability.
The Daily-Use Compromise for Tiny Kitchens
If you air fry daily, store the lid on top of your Instant Pot—but only if you follow these rules:
1. Place a folded silicone trivet between appliance and lid base
2. Leave the lid handle tilted 15 degrees to allow airflow
3. Never stack other items on top (traps heat against electronics)
This method saves 12+ inches of counter space but requires strict adherence to the 20-minute cooldown. Skip this step, and you’ll cook your appliance’s control panel from residual heat.
Budget Solutions Under $10 That Beat Expensive Organizers
Forget $30 storage towers. Transform a $4 dish drainer into instant lid storage by positioning it sideways in a corner cabinet. Rest the lid handle across the top rack rails—this provides ventilation while keeping it upright. For handleless models, use binder clips: clip two 2-inch clips to a wall shelf, then sandwich the lid’s edge between them. Even better? Repurpose an unused towel bar under cabinets. Mount it 6 inches from the back wall, then hang lids by their handles like coats in a closet. All these solutions cost less than takeout but outperform branded holders.
Why Universal Holders Fail Instant Pot Owners
Most “one-size-fits-all” lid racks buckle under the Instant Pot’s weight (3.2-4.8 lbs for air fryer lids). The fix? Double up your supports:
– Stack two cooling racks vertically with rubber bands
– Use two S-hooks instead of one for cabinet storage
– Place folded dish towels beneath DIY stands to cushion weight
Test stability by gently shaking the setup—zero wobble is mandatory. A shifting lid can topple and crack its glass component.
Your Instant Pot air fryer lid deserves smarter storage than a dusty cabinet corner. By storing it vertically after a proper 20-minute cooldown, you’ll prevent 90% of common damage issues while freeing up critical workspace. Start tonight: measure your lid’s widest point, grab that under-cabinet tension rod or repurposed dish drainer, and implement one vertical solution. Within 48 hours, you’ll stop wasting time hunting for storage space and start enjoying a kitchen that works with your cooking rhythm—not against it. Remember, the perfect storage method isn’t the fanciest—it’s the one you’ll use consistently after every air-fried meal.


