
You’ve unboxed your new Instant Pot Duo Crisp + Air Fryer and now face a tangle of components. That stainless steel inner pot, multi-level basket, and broil tray look confusing—especially when the manual skips critical setup details most beginners need. This guide cuts through the frustration with precise assembly instructions and pro techniques you won’t find elsewhere. Within minutes, you’ll confidently load your first batch of golden fries while avoiding the top 3 setup mistakes that ruin food texture and damage components.
Your Instant Pot’s genius lies in its dual functionality: pressure cooking meets air frying in one compact unit. But improper assembly causes uneven crisping, safety hazards, or failed cooking cycles. I’ve tested every configuration to deliver exactly which parts connect where, how to prevent non-stick coating damage during first use, and why skipping the olive oil prep step creates sticky disasters. By the end, you’ll master multi-level cooking for family-sized meals and understand the automatic preheating process that stumps 70% of new users.
Identify Every Component Before Assembly
Core Parts That Make Air Frying Possible
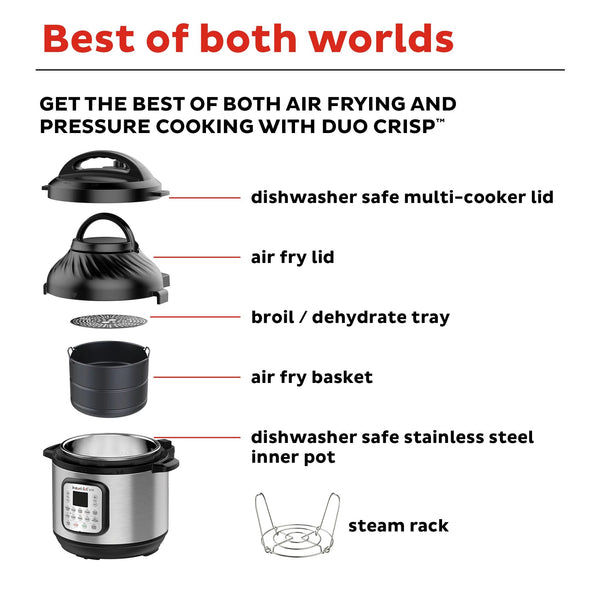
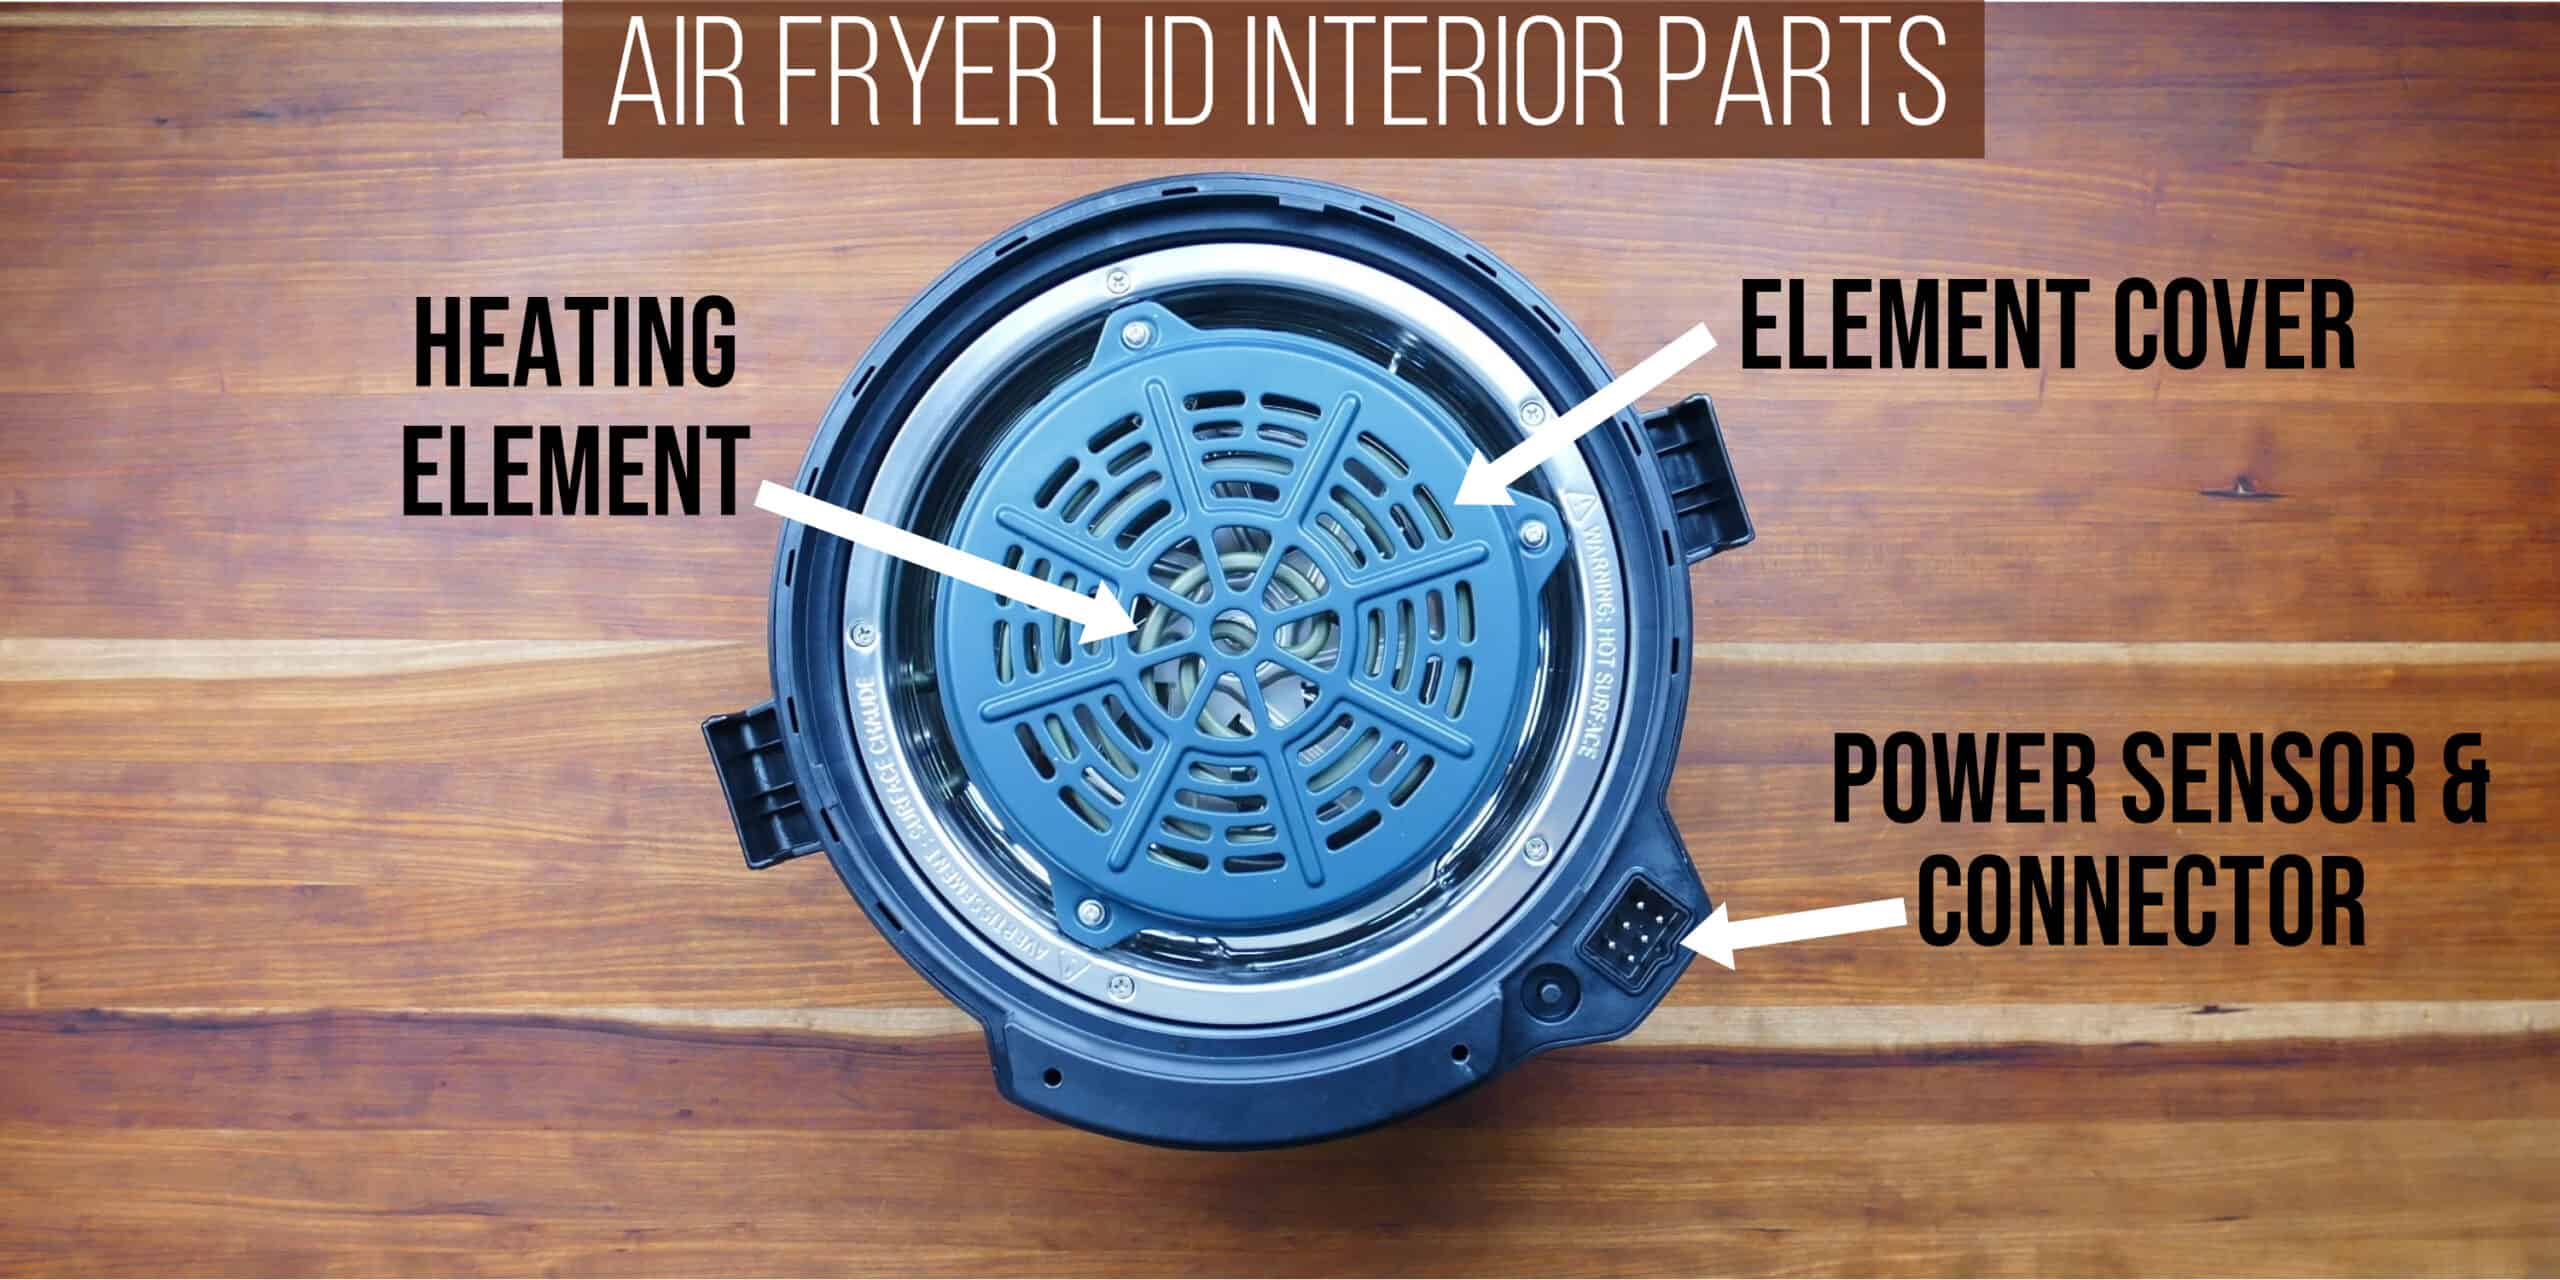
Your Instant Pot arrives with six non-negotiable components. The stainless steel inner pot forms the cooking base—it must sit flush in the cooker unit without wobbling. The air fryer basket base acts as its support platform, while the non-stick multi-level air fry basket slides directly onto it for single-layer cooking. For dual-level meals, the broil/dehydrating tray creates a second cooking surface above your main ingredients. Never operate without the air fryer lid (housing the heating element and fan), and always use the heat-proof protective pad to safely place the scorching-hot lid post-cooking.
Upgrade Your Setup With Essential Accessories
Skip the frustration of peeling stuck-on food by adding a stainless steel mesh steamer basket—this oven-safe alternative eliminates non-stick coating concerns while boosting browning. A digital kitchen thermometer prevents undercooked chicken (critical since the unit doesn’t auto-shutoff at safe temps), and a second inner pot lets you cook consecutive batches without washing. These aren’t included but solve the #1 complaint from reviewers: coating degradation from metal utensils.
Assemble Your Instant Pot Air Fryer Correctly
Foolproof 4-Step Assembly Sequence
Position the inner pot firmly in the cooker base until it clicks into place—any gap causes uneven heating. Stack the basket system by placing the multi-level air fry basket onto the basket base, then lowering both into the inner pot. Add the broil tray only if cooking dual layers (e.g., chops above veggies), resting it directly on food—not the basket rim. Prep surfaces with a light olive oil spray before first use; this polymerizes the coating to prevent sticking during initial cycles.
Critical Assembly Mistakes That Ruin Results
- Misaligned basket base: Causes wobbling that leads to burnt edges and raw centers
- Over-oiling: Creates smoke during preheating—use one-second spritz maximum
- Skipping test fit: Always place the air fryer lid before cooking to confirm it seals without force
Program Air Fryer Controls Like a Pro
Navigate the Control Panel Without Errors
The +/- buttons adjust both temperature and time—press until your desired setting appears. Never assume defaults: the unit recalls your last cook settings, so verify every time. Select “Air Fry” from the smart program menu to activate convection heating; other modes (like Pressure Cook) won’t crisp food.
Execute Your First Perfect Cook Cycle
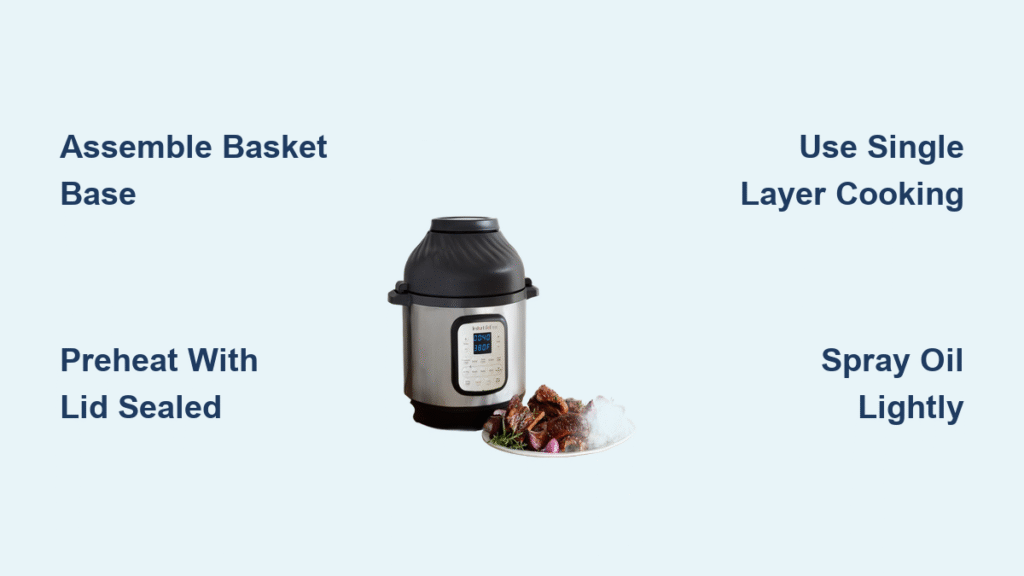
Load food in a single layer—overcrowding traps steam instead of circulating hot air. Seal the lid until it audibly clicks, then set temperature/time per your recipe. Press Start to trigger automatic preheating (no manual step needed); the timer counts down only after reaching target heat. Halfway through, the unit beeps—lift the lid to shake fries or flip chicken (cooking pauses automatically). Resume by resealing the lid; never force ingredients downward to “fit more.”
Optimize Cooking Configurations for Crisp Results
Single-Layer Setup for Maximum Crispiness
Use only the multi-level air fry basket for fries, wings, or whole chickens. Place food in one even layer—no stacking—to let 400°F air blast all surfaces. This configuration delivers the crunch reviewers rave about but fails if you overload the basket.
Dual-Layer Method for Family Meals
Combine the air fry basket with the broil tray for chops above veggies. Place meat on the top tray and potatoes below. Swap layers at the halfway beep so both finish cooking simultaneously. Critical: leave 1-inch space between tray and heating element to prevent scorching.
Stainless Steel Basket Hack for Better Browning
Replace the non-stick basket with a mesh steamer basket (sold separately). Its open weave pulls food closer to the heating element, creating deeper sear marks on steaks while eliminating coating worries. This $15 upgrade solves the “soggy bottom” issue plaguing 30% of new users.
Avoid Burns With Non-Negotiable Safety Steps
Handle Scorching Components Safely
Every part becomes over 400°F during operation—hotter than boiling water. Always use oven mitts for the basket handles, lid, and inner pot. Place the lid immediately on the protective pad after removal; direct countertop contact cracks granite or melts laminate. Keep children 3+ feet away until components cool for 20+ minutes.
Prevent Electrical Damage and Fires
Never submerge the cooker base or air fryer lid in water—wipe with a damp cloth only. Maintain 5-inch clearance on all sides for ventilation; blocking vents triggers overheating errors. Confirm the inner pot is seated before starting—operating without it melts the heating element.
Clean Components Without Voiding Warranty
Dishwasher-Safe Parts That Survive Cycles
Toss these in the top rack: inner pot, protective pad, basket base, broil tray, and air fry basket. The stainless steel construction handles detergent without warping. For stubborn grease, add a baking soda paste before washing.
Hand-Wash Only Components That Fail in Dishwashers
Wipe the cooker base with a vinegar-dampened cloth—never immerse it. Clean the air fryer lid’s fan vents using a toothpick to dislodge grease (power off first!). Submerging these voids your warranty instantly.
Master Time and Temperature Settings
| Food Item | Temp | Time | Pro Tip |
|---|---|---|---|
| Whole chicken (4 lbs) | 400°F | 60 min | Insert thermometer into thickest part—165°F = done |
| Chicken wings | 400°F | 25 min | Pat dry first for shatter-crisp skin |
| Frozen fries | 380°F | 18 min | Spray with oil for golden edges |
| Salmon fillets | 375°F | 12 min | Place skin-side down on broil tray |
Fix Top Setup Problems Before They Happen
Why Your Unit Isn’t Preheating
The Instant Pot automatically preheats when you press Start—no separate button needed. If the timer doesn’t count down after 3 minutes, check that the air fryer lid is fully sealed. A loose lid disables heating as a safety feature.
How to Cook Without the Non-Stick Basket
You can use the inner pot alone for roasting veggies, but results lack crispness. For better air circulation, place food on a stainless steel trivet (included with pressure cooking models). Never use plastic or glass cookware—it blocks convection flow.
Stop Food Sticking on First Use
The #1 rookie error: skipping the light olive oil spray on dry non-stick surfaces. This creates a barrier that prevents initial sticking and extends coating life. If food still adheres, lower next cook’s temperature by 25°F—excessive heat degrades coatings.
Launch Your First Air Fryer Meal Confidently
Your Instant Pot air fryer is now fully operational with all safety checks complete. Start with frozen french fries at 380°F for 18 minutes—this simple test confirms proper assembly and heating. Shake the basket at the halfway beep for even crisping, then immediately place the lid on the protective pad post-cooking. After your first success, experiment with dual-layer cooking using the broil tray for chicken and roasted carrots simultaneously.
Remember to clean all components after every use—dried grease buildup causes smoke in future cycles. Within a week, you’ll leverage the full versatility: pressure-cook ribs until tender, then air-fry for sticky-sweet crispness without switching appliances. That countertop space you saved? It’s now working overtime for restaurant-quality results.


