
You pull yesterday’s burrito from the fridge, ready for a quick lunch, only to face the dreaded microwave disappointment: a limp, soggy tortilla with cold spots in the filling. That familiar frustration ends today. The air fryer transforms your refrigerated burrito into a crackling-crisp masterpiece in under 5 minutes—no soggy disasters, no uneven heating, just restaurant-quality texture with a golden shell and steaming center. Forget thawing frozen leftovers or wasting energy on a full oven; this method targets air fryer burrito not frozen specifically, leveraging precise heat to revive fresh leftovers without drying them out.
This isn’t just reheating—it’s reinventing. While microwaves steam-fill tortillas into mush and ovens waste 20 minutes, the air fryer’s rapid circulation delivers targeted crispness while gently warming fillings to a safe 165°F. You’ll learn the exact 350°F sweet spot, why seam-side-down placement prevents explosions, and how a single spritz of oil creates that addictive crunch. Whether you’ve got a standard 8-inch bean-and-cheese or an overstuffed breakfast burrito, this guide guarantees perfect results every time.
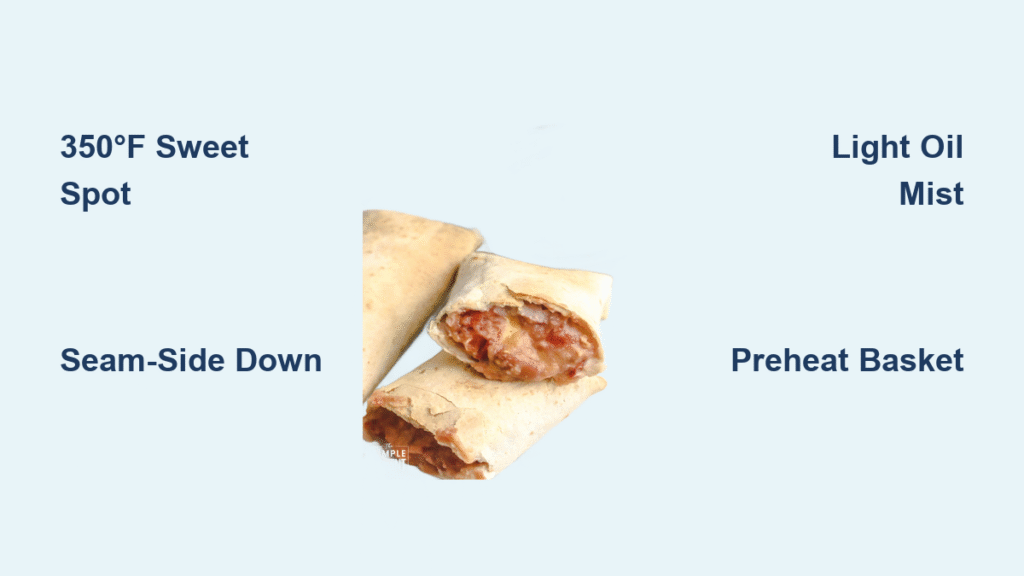
350°F Is Your Burrito’s Sweet Spot
Skip the guesswork: 350°F is the non-negotiable temperature for refrigerated burritos. Higher temps (like 375°F) risk burnt tortillas before fillings heat through, while lower settings leave shells chewy. At 350°F, the air fryer’s focused heat crisps the exterior in 2-3 minutes while conductive warmth penetrates the center to the critical 165°F food safety threshold. This balance prevents the “cold center, burnt edge” nightmare common with microwaves or skillets.
Time your cook precisely based on size:
– Standard 8-10″ burrito: 2-3 minutes total (check at 2 minutes)
– Overstuffed 12″ burrito: 3-5 minutes (add 1-minute increments)
– Two side-by-side: 4-6 minutes (flip halfway)
Always verify with an instant-read thermometer inserted into the thickest part of the filling. If it reads below 165°F, continue cooking in 30-second bursts. Never skip this step—underheated fillings risk foodborne illness, while overcooking creates dry, crumbly tortillas.
Prep Like a Pro: 3 Steps Before Heating
Preheat for 2-3 minutes—this step is non-negotiable. A cold basket causes sticking and uneven browning. Wait for your air fryer’s ready signal (usually a beep) before loading. Meanwhile, prepare your burrito with surgical precision:
- Strip cold toppings: Remove lettuce, sour cream, pico de gallo, or avocado. These ingredients wilt or separate under high heat, creating sogginess. Save them for post-cook assembly.
- Dry the surface: Pat the tortilla gently with a paper towel if condensation formed in the fridge. Moisture is the enemy of crispness.
- Oil strategically: For maximum crunch, mist the exterior with olive or avocado oil using a refillable sprayer (never aerosol cans—they damage non-stick coatings). Focus on the top and sides; avoid the seam to prevent slippage.
Pro tip: If your burrito feels dry, spritz it with water before oiling. This creates internal steam that keeps fillings moist while the oil ensures exterior crispness. Place it seam-side down in the basket—this tucks the weakest structural point against the hot surface, preventing blowouts.
The 5-Minute Transformation Timeline

Minutes 0-2: The Critical Sear
As the burrito hits the hot basket, listen for a faint sizzle. This initial contact creates the foundational crisp layer. The tortilla should develop small, blistered bubbles and a matte-to-golden transition. Do not open the basket during this phase—disturbing the sear causes sticking.
Minute 2: Flip or Rotate
Check for even browning. If your air fryer has hot spots (common in compact models), rotate the basket 180 degrees or flip the burrito with metal tongs. Look for a uniform light golden hue—not dark brown spots. If the tortilla sticks slightly, let it cook 15 more seconds; it’ll release naturally when properly crisped.
Minutes 2-5: Fillings Heat Through
Continue cooking until an instant-read thermometer confirms 165°F internally. The tortilla should audibly crackle when gently pressed—a foolproof texture indicator. Overstuffed burritos may need 4-5 minutes; stop immediately once golden to avoid dryness.
Burrito Blowout? Fix These 4 Common Disasters
Explosion During Cooking
Why it happens: Overfilling or loose wrapping creates pressure pockets that burst when heated.
Instant fix: Resume cooking at 325°F for 1-2 minutes to set the filling without further damage.
Prevent next time: Wrap tortillas tightly (tuck sides inward before rolling) and always place seam-side down.
Burnt Shell, Cold Center
Why it happens: Thick burritos or excessive heat.
Instant fix: Slice lengthwise to expose the filling, then air fry 1-2 minutes more at 325°F.
Prevent next time: For burritos thicker than 1.5 inches, reduce heat to 325°F and extend time by 2 minutes.
Soggy, Lifeless Tortilla
Why it happens: Moisture trapped inside or skipped preheating.
Instant fix: Return to air fryer for 30-60 seconds at 350°F—no oil needed.
Prevent next time: Always preheat, pat the burrito dry, and avoid watery fillings like fresh salsa.
Uneven Heating
Why it happens: Overcrowded basket or poor airflow.
Instant fix: Flip the burrito and cook 1 minute more.
Prevent next time: Never stack burritos. For two side-by-side, use a 5.8-quart+ basket and flip halfway.
Oil Mist vs. No Oil: Texture Showdown

| Method | Result | When to Use |
|---|---|---|
| No oil | Lightly crisp, slightly chewy finish | Health-focused meals or oil-rich fillings (e.g., carnitas) |
| Light oil mist | Audible crackle, deep golden color | Restaurant-style crunch (ideal for bean/cheese burritos) |
| Brushed oil | Extra-crisp, shatteringly crunchy | Gluten-free or low-carb tortillas (prone to dryness) |
Critical note: Use only a refillable oil sprayer with pure olive or avocado oil. Aerosol sprays contain propellants that degrade non-stick coatings over time. Apply 1-2 light spritzes—excess oil causes greasiness.
Gluten-Free Tortilla Survival Guide
Gluten-free tortillas crisp 30-60 seconds faster than flour varieties due to starch composition. They transition rapidly from perfect to burnt, so vigilance is key:
- Reduce time: Cook 1.5-2.5 minutes max at 350°F
- Lower heat: For delicate wraps (e.g., almond flour), use 325°F
- Double-wrap: Prevents tearing during flipping
- Moisture boost: Lightly spritz with water before oiling to maintain flexibility
Check every 45 seconds after the 1-minute mark. The ideal texture has visible bubbles but no dark brown spots—GF tortillas won’t develop the same deep golden hue as wheat-based versions.
Post-Cook Perfection: Toppings That Transform
Reheat first, then layer fresh toppings to preserve texture contrast. Add these immediately after cooking:
– Cheese: Sprinkle queso fresco or shredded cheddar over the hot burrito—it melts in 30 seconds
– Cool crunch: Add shredded lettuce or cabbage for temperature contrast
– Bright finish: Squeeze fresh lime juice and cilantro over the top
– Creamy balance: Dollop cool sour cream or avocado crema
Pro move: Place a slice of cheese on the burrito during the last 60 seconds of cooking. It melts into a gooey, golden cap that seals in moisture.
Equipment Must-Haves for Flawless Results
- 3.5+ quart basket: Minimum size for one standard burrito (smaller baskets cause crowding)
- Metal tongs: Long-handled for safe flipping without piercing the tortilla
- Instant-read thermometer: Non-negotiable for verifying 165°F internal temp
- Perforated parchment: Optional liner for easy cleanup (solid parchment blocks airflow)
Avoid: Foil or parchment without perforations—they trap steam, creating sogginess. If using foil, crinkle it loosely to allow air gaps.
Final check before serving:
☐ Internal temp hits 165°F at the center
☐ Tortilla is golden with audible crispness when touched
☐ No cold spots remain when gently squeezed
☐ Fresh toppings added post-cook
Master this air fryer burrito not frozen method, and you’ll never settle for soggy leftovers again. In under 5 minutes, your refrigerated burrito becomes a crispy, steaming meal that outperforms takeout—and with zero thawing required. For best results, store fresh burritos airtight for 3-4 days max, and always reheat seam-side down with a light oil mist. The next time lunch leftovers call, fire up the air fryer: perfection is literally minutes away.


