Your air fryer just died mid-cook. The timer counts down, the fan hums, but your wings stay raw while the kids’ stomachs growl. Before you curse and order takeout, know this: 9 out of 10 “broken” air fryers suffer from solvable issues like a tripped breaker or misaligned basket. Most fixes take under 15 minutes and cost $0. This guide cuts through the confusion with model-agnostic diagnostics—no tech skills needed. You’ll diagnose dead units, cold heating elements, and error codes like a pro while saving your dinner and avoiding unnecessary repairs.
Why Your Air Fryer Won’t Turn On After Power Outage
Outlet and Breaker Verification That Actually Works
Don’t assume the outlet’s fine—household circuits fail silently. Plug a lamp or phone charger into the exact same socket your air fryer uses. If that device works, move your fryer to a different room’s outlet immediately. Still dead? Head to your breaker panel and flip the relevant switch fully OFF, then ON—not just a wiggle. Power surges often cause “partial trips” where breakers look normal but aren’t fully engaged. This 90-second test resolves half of all “completely dead” air fryer cases.
Pro tip: After storms or outages, always reset breakers this way. Standard testing with a lamp catches faulty outlets 100% of the time—no multimeter needed.
Power Cord Damage You’re Probably Missing
Unplug your unit and trace the entire cord length with your fingers. Feel for stiff spots indicating internal wire breaks, then inspect visually for:
– Fraying near plug or fryer connection points
– Melted sections where cord bends sharply
– Burn marks on insulation (indicates overheating)
– Loose connections that wiggle when touched
Critical warning: If your model has a fixed cord (not detachable), visible damage means stop using it immediately. Never attempt DIY cord replacement—this risks fire or electrocution. Contact the manufacturer for certified repair.
Blown Internal Fuse Diagnosis and Replacement
Your air fryer’s hidden safety fuse often blows during voltage spikes. To test:
1. Unplug and wait 10 minutes (capacitors must discharge)
2. Remove base screws to access the control panel
3. Locate the glass or ceramic fuse (check service manual for position)
4. Set multimeter to continuity mode—touch probes to both ends
5. No beep = blown fuse requiring replacement
Only use an identical replacement fuse matching voltage (120V), amperage (usually 5-10A), and temperature rating. Substituting higher-rated fuses bypasses critical safety protections—this is a fire hazard.
Digital Reset Secrets for Locked Safety Systems
Modern fryers lock up after power glitches. Try these resets in order:
– Basic soft reset: Unplug for 5 full minutes (not 30 seconds)
– Hard reset: Press the recessed reset button with a paperclip (common on Ninja/Cosori models)
– Safety lock override: If a padlock icon appears, press the timer or start button once to disengage
Key insight: Some units (like Instant Vortex) require resetting after every power interruption—even brief brownouts.
Air Fryer Powers On But Won’t Heat Properly
Control Panel Settings That Block Heating Every Time
Your unit won’t activate the heating element until you complete this sequence:
1. Set a timer (even 1 minute—many users skip this)
2. Select temperature above 100°F (defaults to 0°F on startup)
3. Press “Start” after preset selection (presets reset after power loss)
Most common mistake: Owners blame “broken heating” when the timer simply isn’t set. The fan runs to circulate air, creating false hope that heating is working.
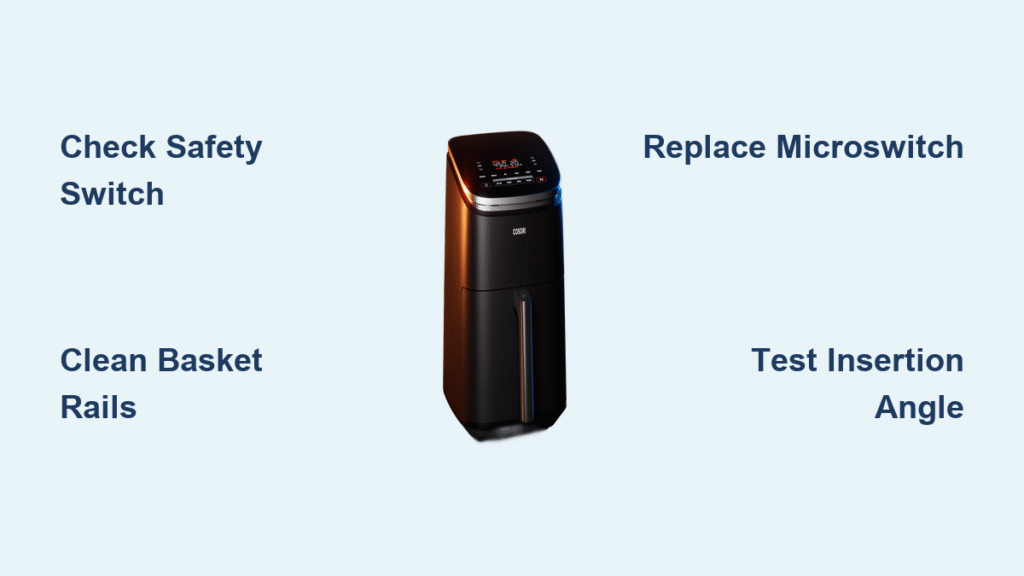
Basket Position Failures Causing Safety Lockouts
That “click” when inserting the basket isn’t just satisfying—it’s a critical safety switch. If the basket isn’t fully seated:
– Heating elements stay disabled
– Error codes like E4 may flash
– Unit runs but never gets hot
Fix in 20 seconds: Remove basket, wipe tracks with damp cloth, reinsert with firm downward pressure until you hear/feel the click. Check for warped silicone liners or food chunks jamming the rails.
Heating Element Failure Confirmation Steps

When your fryer runs but stays cold:
Visual check (unplugged & cooled):
– Shine flashlight into chamber—look for broken coils or black carbon buildup
– Critical: Never touch element if unit was recently used (burn risk)
Multimeter test:
1. Access terminals behind control panel
2. Measure resistance across element wires
3. Normal: 10-60 ohms (beep on continuity mode)
4. Failed: Infinite resistance (no beep)
Reality check: Element replacement requires soldering skills—unless you’re experienced, this is a technician job. Don’t risk damaging circuit boards.
Fan Failure That Causes Cold Spots and Shutdowns
A stuck fan prevents heat circulation, triggering thermal cutoffs. Diagnose by:
– Manual spin test: Unplugged, spin fan blade—should rotate freely
– Noise clues:
– Clicking = loose blade screw (tighten with tiny screwdriver)
– Rattling = food debris inside housing (use tweezers to remove)
– Silence when powered = dead motor (requires professional repair)
Pro move: Clean fan vents weekly with compressed air—grease buildup is the #1 cause of early fan failure.
Air Fryer Heats But Cooks Unevenly or Smokes
Burnt Food and Raw Centers Fix Protocol

Uneven cooking means disrupted airflow. Solve it by:
– Preheating religiously: 3-5 minutes at target temp before adding food
– Loading correctly: Single food layer with space between pieces (no overcrowding)
– Mid-cycle shaking: Flip/shake food when timer beeps at halfway point
– Basket check: Place basket on flat surface—if it rocks, replace it (warped baskets cause 70% of hot spots)
Critical rule: Never exceed the fill line. Overloading is the top user error causing half-cooked meals.
Smoke and Burning Odors Elimination Guide
Smoke means grease hitting the heating element. Stop it by:
– New unit burn-off: Run empty at 400°F for 20 minutes before first use
– Post-cook cleaning: Wash basket and crumb tray immediately after use
– Oil control: Use spray bottles—not pour oils—to avoid drips
– Deep clean: Soak stuck-on grease 30 minutes in warm soapy water
Danger sign: Persistent smoke after cleaning indicates internal grease buildup—requires professional disassembly.
Error Code Decryption for Instant Fixes
Decode flashing displays with this universal key:
| Code | Real Meaning | Immediate Action |
|——|————–|——————|
| E1/E2 | Overheating | Cool 20 min; reduce food load |
| F1/F2 | Fan failure | Power cycle; if returns, call repair |
| E4 | Basket not seated | Reinsert firmly until click |
Beep pattern decoder: Three quick beeps = timer reminder. Continuous beeping = fault—count beeps and match to manual.
Air Fryer Maintenance That Prevents 90% of Failures
Daily 5-Minute Routine After Cooking
Skip this and face repairs within months:
1. Cool completely before cleaning (housing warm = safe)
2. Wash basket/tray with non-abrasive sponge
3. Wipe interior with damp cloth—never spray liquid directly
4. Dry thoroughly to prevent corrosion
Pro tip: Store with basket slightly open to avoid moisture traps.
Weekly Deep Clean to Avoid Costly Repairs
Set a 15-minute calendar alert every Sunday:
– Clear vents: Brush intake/exhaust with soft toothbrush
– Element care: Gently remove carbon with nylon brush (no metal!)
– Silicone parts: Replace frayed liners before they melt onto coils
Neglect consequence: Clogged vents cause 40% of overheating errors.
When to Stop DIY and Call a Professional
Warranty-Safe Repair Protocol
Before contacting service:
– Verify installer responsibility: If professionally installed <30 days ago, contact them first
– Gather intel: Note exact error codes, symptom timeline, and model/serial numbers
– Never disassemble beyond user-accessible parts—hidden capacitors store lethal voltage
Critical boundary: If you smell burnt electronics or see melted components, unplug immediately and seek professional help. Don’t risk fire.
Final diagnostic checklist before service call:
– [ ] Tested outlet with lamp (not just phone charger)
– [ ] Fully reset unit (unplugged 5+ minutes)
– [ ] Basket clicked into place with zero resistance
– [ ] Timer set to minimum 1 minute
– [ ] Vents cleared of visible debris
– [ ] Error code matched to manual
Most air fryer failures aren’t broken appliances—they’re simple oversights like an unset timer or misaligned basket. By methodically working through these fixes, you’ll rescue tonight’s dinner and extend your appliance’s life by years. The next time smoke alarms blare or your fries stay soggy, skip the panic. Grab this guide, spend 10 minutes troubleshooting, and get back to crispy perfection—no repair bill required.