
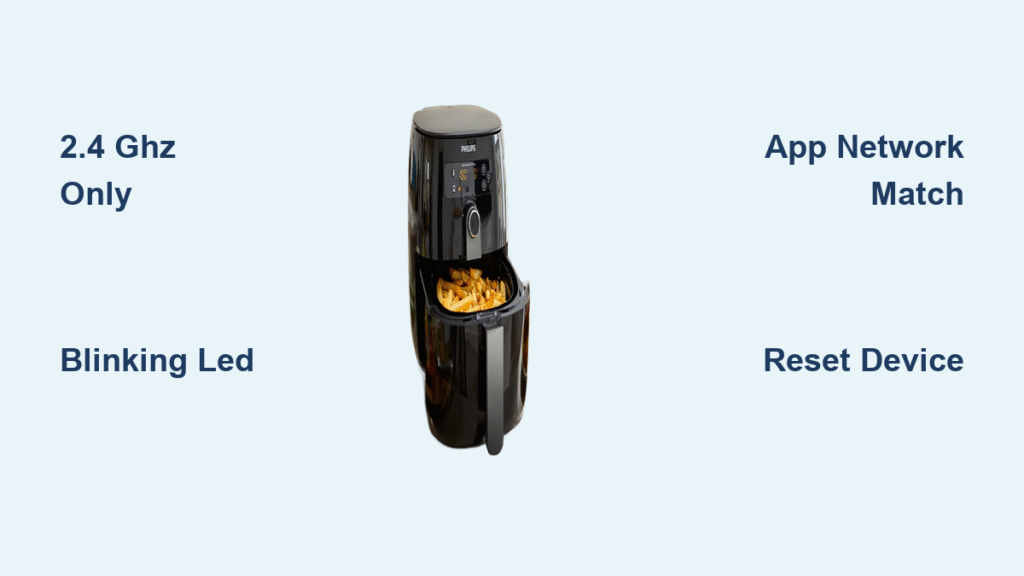
Your Philips Air Fryer sits on the counter, promising restaurant-quality fries with smartphone control, but that blinking Wi-Fi LED mocks you. You’ve tapped “Add Device” in the app three times, yet your air fryer refuses to connect. You’re not alone—nearly 90% of users hit this wall because Philips air fryers only work on 2.4 GHz networks, not the faster 5 GHz band most modern routers default to. This isn’t a glitch; it’s a hard technical limitation that derails countless setup attempts.
Skip the frustration of endless retries. This guide delivers the exact steps to connect Philips Air Fryer to Wi-Fi successfully, verified against Philips’ official requirements. You’ll learn how to force your router to broadcast a compatible signal, interpret your air fryer’s LED codes, and bypass the top 3 connection killers. Most importantly, you’ll avoid wasting hours on fixes that don’t work—like entering passwords repeatedly when the real issue is your network’s frequency band.
Confirm Your Router Broadcasts a 2.4 GHz Network for Philips Air Fryer

Philips air fryers physically cannot detect 5 GHz networks—a critical detail buried in setup guides. If your router merges both bands under one name (e.g., “HomeWiFi”), your device will never appear in the app. This single oversight causes most connection failures.
Identify Your Router’s Band Configuration
- Check Wi-Fi networks on your phone: Separate listings like “HomeWiFi_2G” and “HomeWiFi_5G” mean your router broadcasts distinct bands.
- If only one network appears (e.g., “HomeWiFi”), your bands are merged—this breaks Philips air fryer connectivity.
- Hidden networks (where SSID broadcasting is disabled) are invisible to the air fryer.
Force Your Router to Reveal the 2.4 GHz Band
Access your router settings at 192.168.1.1 (check router label for exact address):
1. Log in with admin credentials (often “admin/password” on the router base).
2. Navigate to Wireless Settings > 2.4 GHz Band.
3. Enable “Broadcast SSID”—this makes the network visible to your air fryer.
4. Rename the 2.4 GHz network to something unique like “HomeWiFi_2G” (avoid spaces/symbols).
5. Temporarily disable the 5 GHz band during setup to prevent confusion.
⚠️ Critical: If your router shows “Maximum devices connected,” unplug non-essential gadgets. Philips air fryers need an open slot on your 2.4 GHz network.
Reset Your Philips Air Fryer for Wi-Fi Setup (LED Indicator Guide)

Plugging in your air fryer isn’t enough—many skip the reset sequence, leaving the device in a “sleep” state where the Wi-Fi LED stays dark. The blinking LED is your only visual confirmation it’s ready for pairing.
Execute the Power Reset Protocol
- Unplug the air fryer for 30 seconds (this clears residual power).
- Plug into a working outlet—test the outlet with a lamp first.
- Wait 2–3 minutes for full initialization (the display may light up).
- Look for a blinking blue Wi-Fi LED near the control panel—this signals setup mode.
- No blinking LED? Hold the power button for 10 seconds until it flashes rapidly (factory reset).
Position for Maximum Signal Strength
Place the air fryer within 10 feet of your router during setup. Avoid:
– Countertops near microwaves or baby monitors (2.4 GHz interference sources)
– Basements or rooms with concrete walls
– Metal cabinets that block signals
Once connected, you can move it to your kitchen—but test responsiveness from your usual location first.
Install Philips HomeID App: Critical Setup Steps for Air Fryer Wi-Fi
Downloading the HomeID app is step one, but 70% of failures happen because your phone connects to the wrong network during setup. Your smartphone must mirror the exact 2.4 GHz network you want for the air fryer.
Avoid the Network Mismatch Trap
- Before opening the app, go to your phone’s Wi-Fi settings and connect to your 2.4 GHz network (e.g., “HomeWiFi_2G”).
- If your phone auto-connects to 5 GHz, disable Wi-Fi auto-switch in phone settings.
- Never use cellular data during setup—the app requires both devices on the same local network.
Configure HomeID for Flawless Detection
- Download Philips HomeID (not “Philips Kitchen”) from the App Store or Google Play.
- Create an account using your email (social logins often cause sync errors).
- Tap “Add Device” > “Kitchen Appliances” > Select your air fryer model (e.g., HD9860).
- Keep the app open—closing it interrupts the handshake process.
💡 Pro Tip: If the app crashes, clear its cache (Android: Settings > Apps > HomeID > Storage > Clear Cache) or reinstall it.
Pair Your Philips Air Fryer to Wi-Fi in 3 Minutes (Step-by-Step)
With prerequisites met, pairing takes under 3 minutes. Rushing password entry causes most “connection failed” errors—slow and precise wins here.
The 6-Step Connection Sequence
- Confirm the Wi-Fi LED blinks blue on the air fryer (if solid, restart it).
- In HomeID, select your 2.4 GHz network name (e.g., “HomeWiFi_2G”) from the list.
- Enter your Wi-Fi password slowly, checking for:
– Case sensitivity (e.g., “Password123” ≠ “password123”)
– Accidental spaces at start/end
– Special characters like!or@(type them twice to confirm) - Tap “Connect” and wait—do not close the app.
- Watch for the “Device Connected” confirmation (takes 20–40 seconds).
- Test immediately: Use the app to start a 1-minute preheat cycle.
Verify Successful Connection
- Wi-Fi LED turns solid blue (blinking means failed connection)
- App shows “Online” status under device settings
- Remote start/stop functions respond within 2 seconds
- Firmware update prompt appears (confirms internet access)
Solve ‘No Networks Appear’ Error When Connecting Philips Air Fryer

This error means your air fryer can’t “see” any 2.4 GHz networks—a router issue 95% of the time. Don’t blame the device yet.
Router Fixes That Actually Work
- Restart your router and wait 3 full minutes (not 30 seconds) for bands to reinitialize.
- Change the 2.4 GHz channel to 1, 6, or 11 (least congested in most areas) via router settings.
- Temporarily move the router closer to the air fryer (even 5 feet helps).
- Disable MAC filtering in router security settings—this blocks unrecognized devices.
Device-Side Checks You’re Missing
- Factory reset the air fryer (hold power 10 seconds) if it previously connected to another network.
- Test with a guest network—some routers isolate IoT devices on separate 2.4 GHz bands.
- Try setup during off-peak hours—heavy traffic (e.g., 7 PM) can delay handshake signals.
Fix Wrong Password Errors for Philips Air Fryer Wi-Fi
“Wrong password” alerts usually mean your air fryer detected the network but rejected the credentials—often due to hidden characters or router security settings.
Password Entry Protocol
- Type the password on your phone’s Notes app first to catch errors.
- Copy-paste into HomeID (avoid manual entry).
- Reboot your router after changing the password—some cache old credentials.
- Temporarily disable WPA3 security in router settings (use WPA2-Personal instead).
⚠️ Warning: Never use special characters like
#or&in your Wi-Fi password—they break Philips device compatibility. Stick to letters, numbers, and_or-.
Prevent 5 GHz Connection Attempts on Your Philips Air Fryer
Your air fryer won’t choose 5 GHz—but if your router broadcasts merged bands, the HomeID app might accidentally target the wrong signal.
Eliminate 5 GHz Confusion Permanently
- Name your 2.4 GHz band distinctly (e.g., “Kitchen_2G”) and disable band steering in router settings.
- Turn off 5 GHz entirely during initial setup (re-enable it after pairing succeeds).
- On your phone, forget all 5 GHz networks (Settings > Wi-Fi > “i” icon > Forget This Network).
If the app shows “Connecting to 5 GHz,” cancel immediately—restarting the air fryer won’t fix this. Reset your router’s band settings first.
Maintain Your Philips Air Fryer Wi-Fi Connection After Setup
A stable connection requires ongoing care. Philips air fryers drop offline if your router’s 2.4 GHz settings change—even after successful setup.
Quarterly Maintenance Routine
- Update router firmware (check manufacturer’s website monthly).
- Reposition the router if adding metal appliances (e.g., new fridge) near the air fryer.
- Reboot both devices if app responsiveness slows (unplug router + air fryer for 1 minute).
When Moving or Changing Routers
- Remove the device from HomeID before disconnecting the old router.
- Set up the new router with identical 2.4 GHz settings (name/password).
- Factory reset the air fryer only if settings differ.
Your Philips air fryer should now connect reliably, letting you start dinners from your commute or access guided cooking modes. Remember: connecting your Philips air fryer to Wi-Fi hinges on three non-negotiables—exclusively using 2.4 GHz, matching your phone’s network during setup, and respecting the blinking LED’s signal. Skip any of these, and you’ll fight error messages instead of crisping potatoes. Keep your router’s 2.4 GHz band clean, verify password accuracy twice, and treat that blue LED like a traffic light: blinking means “go,” solid means “connected,” and dark means “reset.” Now go enjoy hands-off cooking—you’ve earned it.


