
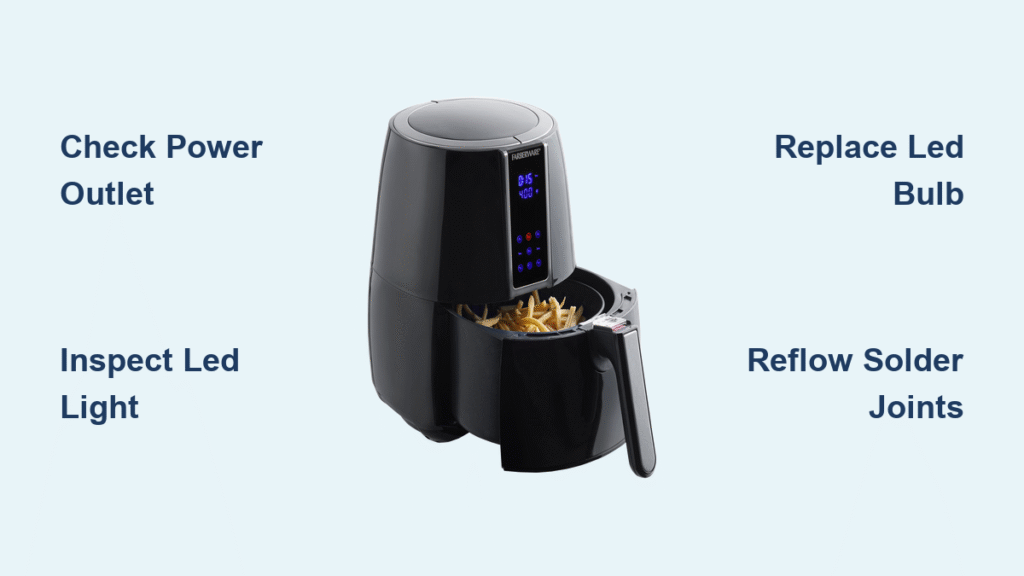
Your Farberware air fryer sits on the counter, plugged in and silent. You press the power button—nothing. No reassuring glow from the indicator light, no way to know if it’s heating up or just pretending to work. This frustrating scenario plays out in kitchens across America, leaving home cooks wondering if dinner will be undercooked or their appliance has finally given up.
When your Farberware air fryer light not working issue strikes, you’re left flying blind through every recipe. This guide walks you through exactly why this happens, how to diagnose the root cause, and proven methods to restore your unit’s visual feedback—saving you from guesswork cooking and potential food safety issues. Most light failures stem from simple component issues you can fix in under 30 minutes with basic tools.
Why Farberware Air Fryer Indicator Lights Fail
LED indicators in your Farberware air fryer aren’t just decorative—they’re your primary communication channel with the appliance. These tiny lights tell you when power flows, when preheating completes, and when cooking cycles end. Their failure typically stems from three specific culprits that develop over time.
Heat cycling creates microscopic cracks in solder joints connecting the LED to the circuit board. Every time you open the basket to shake fries, thermal shock weakens these connections further. Voltage spikes from your home’s electrical system can instantly burn out the LED’s internal components, leaving you with permanent darkness. Moisture from steam and cooking vapors slowly corrodes electrical contacts, causing intermittent failures that worsen gradually.
How LED Circuits Actually Work
Your Farberware air fryer uses a simple LED circuit design with three critical components working together. The LED itself (typically a 3mm or 5mm bulb) receives power through a current-limiting resistor (usually 330Ω or 470Ω). This resistor protects the LED from burning out by regulating electrical flow. Both components connect to the main control board that sends power signals based on your cooking settings.
When the Farberware air fryer light not working problem occurs, one of these elements has failed. Pro Tip: Failed LEDs often show dark spots or complete blackening when inspected closely, while resistor failures frequently appear as scorch marks on the circuit board.
Spotting Your Specific Light Failure Pattern
Complete Darkness When Plugged In
Your air fryer shows zero signs of life—no power light, no heating indicator, nothing. This typically points to complete LED failure or a severed connection somewhere in the power chain. Before assuming the worst, verify your outlet works with another appliance. If the outlet’s fine, the LED circuit has likely failed completely.
Intermittent Flickering
The light works—sometimes. You might notice it functions perfectly when the basket sits just right, then disappears when you close the drawer firmly. This frustrating pattern screams connection issues, usually internal wire fatigue where power cables flex near moving parts. The problem worsens over weeks until permanent failure occurs.
Quick Diagnostic Steps You Can Do Now
External Power Verification
Start simple. Test your outlet with a phone charger or lamp to confirm house power isn’t the issue. Examine your air fryer’s power cord for kinks, cuts, or damage where it enters the unit. A damaged cord can deliver enough power for heating elements but fail to properly illuminate indicators. Critical Safety Note: Always unplug your unit before any visual inspection to prevent electrical shock.
Initial Light Assessment
Plug in your air fryer and cycle through all functions. Note which lights should activate—typically a power indicator and separate heating light. Document exactly what’s missing: complete darkness versus partial illumination helps narrow down the failure point significantly. Most Farberware models use a red light for heating and blue/green when ready—missing one color suggests a specific circuit problem.
Internal Component Inspection Made Simple

Safety-First Disassembly
Never rush into internal repairs. Unplug your unit and let it cool for at least 30 minutes—the heating elements retain serious heat. Remove all accessories and place the fryer upside-down on a non-conductive surface. You’ll typically find 4-6 Phillips head screws securing the bottom panel. Keep track of their positions; some models use different lengths. Warning: Improper disassembly can void your warranty—check if your unit is still under coverage before proceeding.
Visual Damage Hunt
Once inside, look for obvious problems first. Burnt components appear blackened or melted. Discolored circuit boards indicate overheating. Check the LED itself—failed LEDs often show dark spots or complete blackening. Look for hairline cracks in solder joints, especially around the LED leads and nearby resistors. Use a magnifying glass if available; these failures are often microscopic.
DIY Repair Solutions That Actually Work
LED Replacement Procedure
Required tools: 25-40W soldering iron, desoldering braid, replacement LED (3mm or 5mm depending on model), heat-resistant tweezers.
Start by identifying the exact LED specifications—note voltage and current ratings printed on the component or nearby. Heat the solder joints while gently pulling the LED free with tweezers. Clean the pads with desoldering braid, then install the new LED observing polarity (longer lead connects to positive). Test before reassembling everything. This five-minute fix resolves most complete darkness issues.
Solder Joint Reflow
This simplest fix often resolves intermittent failures. Clean the joint with isopropyl alcohol, apply flux to oxidized areas, then reheat with the soldering iron until the solder flows smoothly. Allow 2-3 minutes cooling before testing—rushing this step creates new problems. Pro Tip: Gently flex the circuit board while testing to identify which joint needs reflowing.
Model-Specific Fixes for Common Farberware Units

Farberware 3.2 Quart Digital (201522)
This model commonly suffers power indicator failure due to resistor R21 overheating. The fix involves replacing a single 330Ω resistor located near LED1 on the main control board. Total repair time: 15 minutes with basic soldering skills. This specific resistor handles power regulation for the indicator circuit and frequently fails after 1-2 years of regular use.
Farberware 5.3 Quart XL (201523)
Dual LED failures affect both power and preheat indicators simultaneously. Replace both LEDs and their associated resistors—four components total. The larger housing provides easier access, making this a straightforward repair. Expert Note: This model’s circuit board layout makes component identification simpler than smaller models.
Preventing Future Light Failures
Power Protection Strategy
Use a quality surge protector rated for kitchen appliances. Voltage spikes from your home’s electrical system represent the leading cause of premature LED failure. This simple $15 investment often prevents not just light failures but more expensive control board damage. Farberware air fryer light not working issues frequently stem from these electrical surges that go unnoticed during normal operation.
Monthly Maintenance Routine
Unplug your air fryer monthly and wipe the control panel with a barely-damp cloth. Never spray cleaners directly—moisture seepage causes corrosion. Check for loose screws on the bottom panel, as vibration can slowly back them out over time. These minor checks extend your appliance’s lifespan significantly.
When Replacement Makes Sense
Cost-Benefit Analysis
Compare repair costs ($40-80 professionally, $10-20 DIY) against new unit prices ($60-120). Factor in your time, skill level, and the unit’s age. Three-year-old units approaching end of typical lifespan often justify replacement rather than repair. If your Farberware air fryer light not working issue is accompanied by other malfunctions, replacement becomes even more cost-effective.
Temporary Workarounds
When the light fails completely, rely on external kitchen timers. Preheat for exactly 3-5 minutes depending on your model, then cook according to recipe timing. Place an oven thermometer in the basket to verify temperature without visual indicators. Watch for the heating element’s red glow through the basket holes as a power indicator—this visual feedback confirms the unit operates correctly.
Your Farberware air fryer light not working problem doesn’t have to ruin your cooking routine. With these targeted solutions, you can restore visual feedback to your appliance and continue enjoying quick, healthy meals. Most light failures stem from easily-replaced components, making this one of the more straightforward appliance repairs. Whether you tackle a simple LED replacement or decide it’s time for an upgrade, understanding the root cause empowers you to make the right decision—often for less than the cost of takeout dinner. Document your symptoms carefully, follow safe disassembly procedures, and you’ll conquer this common kitchen appliance headache in no time.


