
That unmistakable snap when you bite into a sausage—crisp golden casing giving way to juicy, flavorful meat—is achievable without splattering oil or firing up the grill. Your air fryer delivers flawlessly cooked sausages in under 15 minutes, whether you’re prepping breakfast links for a hungry family or Italian sausages for tonight’s pasta. Skip the guesswork: This guide reveals exact temperatures for plump brats, delicate chicken sausages, and frozen breakfast links straight from the freezer. You’ll learn why poking casings can ruin your results, how to prevent smoky kitchen disasters, and the critical 5-minute rest that locks in flavor.
Master these techniques, and you’ll never serve dry, unevenly cooked sausages again. Let’s transform your air fryer into a sausage-cooking powerhouse.
Optimal Temperature Settings for Flawless Sausages

Your sausage type dictates the perfect air fryer temperature—deviate, and you risk burst casings or dry interiors. For standard pork, Italian, or bratwurst, 400°F (204°C) creates rapid browning while sealing in juices. Chicken or turkey sausages need gentler heat: 375°F (190°C) prevents lean meats from drying out. Breakfast links cook best at 360°F (182°C) to avoid splitting their thin casings.
Pro Move: Always preheat your air fryer for 3–5 minutes. This mimics a searing-hot skillet, ensuring immediate caramelization the moment sausages hit the basket. Skipping preheating causes steaming instead of crisping—your first visual clue of failure.
Step-by-Step Air Fryer Sausage Method
Perfect Sausage Workflow in 7 Steps
Follow this sequence for restaurant-quality results every time:
- Preheat air fryer to your chosen temperature (3–5 minutes)
- Pat sausages completely dry with paper towels—moisture is the enemy of crispiness
- Optional oil boost: Lightly brush lean chicken sausages with ½ tsp olive oil
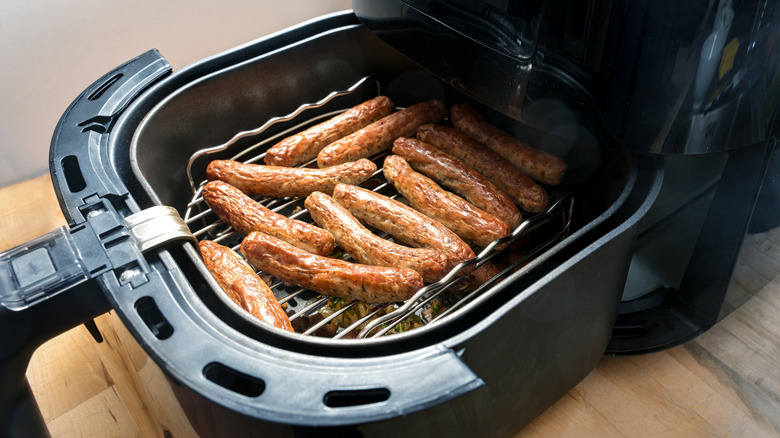
- Arrange in single layer with ¼–1 inch spacing for unobstructed air circulation
- Cook per timing guide, flipping halfway (except oven-style models)
- Verify internal temperature with an instant-read thermometer at earliest time
- Rest 5 minutes on a wire rack—this redistributes juices for maximum succulence
Critical Reminder: Never skip the thermometer check. Pork sausages must hit 160°F (71°C), while chicken/turkey requires 165°F (74°C) for safety.
Visual Cues That Guarantee Perfect Doneness
Watch for these telltale signs mid-cook:
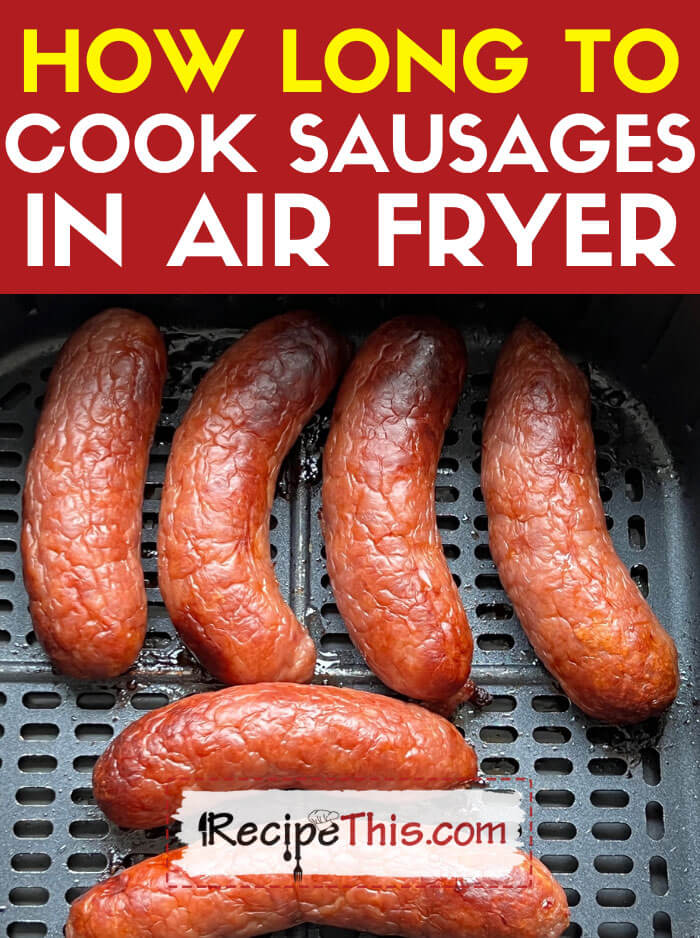
– Flip timing: When golden-brown spots cover 70% of the bottom surface
– Fat activation: Tiny bubbles forming on the casing indicate fat rendering
– Final stage: Slight wrinkling as internal temperature peaks—this is normal!
Pro Tip: If sausages start smoking, immediately lower heat by 25°F. This usually happens with high-fat varieties when drippings hit the heating element.
Exact Timing for Every Sausage Type
| Sausage Style | Fresh/Thawed | Frozen | Key Indicator |
|---|---|---|---|
| Breakfast links (1 oz) | 8–10 min | 12–15 min | Shake basket once at 5 minutes |
| Italian sausage (3–4 oz) | 9–12 min | 18–20 min | Flip at 6 minutes |
| Bratwurst (3–4 oz) | 10–12 min | 19–21 min | Check temp at 9 minutes |
| Kielbasa ring (pre-cooked) | 7–8 min | 9–10 min | Look for deep brown spots |
| Chicken sausage (pre-cooked) | 5–7 min | 7–9 min | Skin blisters slightly |
Non-Negotiable Rule: Begin checking 2 minutes before the minimum time. Sausages continue cooking from residual heat after removal—overcooking by just 90 seconds dries out delicate meats.
The Poke Debate: Science-Backed Decision Guide
Poking casings divides home cooks into two camps. Here’s how to choose wisely:
Avoid Poking for Maximum Juiciness
- Best for: Flavor-focused cooking with lean or pre-cooked sausages
- Why it works: Casings act as natural moisture barriers—piercing releases precious juices
- Critical exception: Never poke chicken sausages—they dry out instantly
Strategic Poking for High-Fat Varieties
- Best for: Fatty Italian sausages or brats with extremely tight casings
- Pro technique: Make 3 shallow slits with a paring knife—deep cuts cause blowouts
- Smoke prevention: Draining excess fat reduces smoking in 80% of air fryer models
The Compromise: Only poke if the sausage feels rock-hard when squeezed. Otherwise, trust your air fryer’s airflow to render fat cleanly.
Frozen Sausage Success Strategy
Cook straight from the freezer with these adjustments:
– Add 3–5 minutes for pre-cooked varieties like kielbasa
– Add 6–8 minutes for raw sausages like brats
– Boost heat for browning: Increase temperature by 25°F during the final 2 minutes
– Expect pale exteriors early: This is normal until the outer layer thaws
Weeknight Hack: Freeze cooked breakfast links in single servings. Reheat frozen in 4 minutes at 300°F for instant protein-packed meals.
Stop Smoking and Mess Before It Starts
High-fat sausages often trigger smoke alarms, but these fixes work immediately:
– Parchment liner: Cut to basket size and weigh down with sausages (prevents contact with heating elements)
– Pre-clean drip tray: Old grease residue burns faster than fresh drippings
– Switch to lean meats: Chicken sausages rarely smoke even at 400°F
Cleanup Secret: Line the drip tray with foil before cooking. Once cooled, crumple and discard—zero scrubbing needed.
Batch Cooking Capacity Rules
| Air Fryer Size | Standard Sausages | Breakfast Links |
|---|---|---|
| 3–5 quart | 5–8 | 10–12 |
| 6–8 quart | 8–12 | 15–18 |
| Oven-style | 8–10 per tray | 20+ per tray |
Golden Rule: Never overlap sausages. Crowding creates steam pockets, yielding pale, soggy results instead of crispy perfection. Cook in batches if needed—your patience pays off in texture.
Storage and Reheating Without Sacrificing Quality
Storage That Preserves Freshness
- Refrigerator: Store in airtight containers for 3–4 days max
- Freezer: Wrap individually in parchment paper for up to 3 months
- Meal prep pro tip: Slice before freezing for 50% faster reheating
Reheating That Restores Crispness
- Air fryer: 300°F for 3–4 minutes (best for texture retention)
- Skillet: Medium heat, 2–3 minutes per side with 1 tsp oil
- Microwave: 30-second bursts under a damp paper towel (last resort)
Critical Note: Always reheat to 165°F internal temperature—even pre-cooked sausages need this safety step.
Troubleshooting Common Sausage Disasters
| Problem | Quick Fix | Prevention Strategy |
|---|---|---|
| Wrinkled casing | Normal cooling effect—serve immediately | Slice thicker sausages before cooking |
| Dry interior | Reduce time by 2 minutes next batch | Never poke lean chicken sausages |
| Burst casing | Lower temp 25°F; poke 3 light slits | Pat sausages drier before loading |
| Pale color | Increase preheat time by 2 minutes | Never overcrowd the basket |
| Smoky kitchen | Clean drip tray; use parchment | Choose leaner sausage varieties |
Creative Serving Ideas That Impress
Move beyond hot dog buns with these chef-inspired presentations:
– Breakfast power bowl: Dice air-fried links with crispy potatoes and fried eggs
– Pasta perfection: Slice coins into marinara or pesto for instant protein boost
– Gourmet pizza topping: Layer sliced Italian sausage over fig jam and goat cheese
– Meal-prep hero: Pair with roasted veggies and tahini for grab-and-go lunches
– Charcuterie upgrade: Serve chilled slices with cornichons and grainy mustard
Time-Saver: Cook sausages while oven-roasting vegetables—dinner ready in 20 minutes flat.
Final Pre-Cooking Checklist
Before pressing start, verify these six essentials:
– [ ] Confirmed if sausages are fresh or frozen
– [ ] Air fryer basket thoroughly cleaned and dried
– [ ] Made poke decision based on sausage type
– [ ] Instant-read thermometer charged and calibrated
– [ ] Parchment liner pre-cut (if using)
– [ ] Serving plates and sides prepped
Master these fundamentals, and your air fryer becomes the MVP of weeknight dinners. Tonight, grab that package of sausages—your perfectly crisp, juicy results are just 10 minutes away. No more rubbery casings or dry interiors. Just slice, serve, and savor the snap.


