
Your Cuisinart air fryer’s clock blinks insistently at 12:00 after every power flicker, threatening your perfectly timed salmon dinner. Whether you’re adjusting from a quick 15-minute fries cycle to a slow 45-minute dehydrate setting, or simply fixing that stubborn post-outage display, mastering time changes prevents burnt meals and wasted ingredients. Knowing exactly how to change time on Cuisinart air fryer models saves crucial minutes when hungry family members are waiting.
If your display freezes during adjustments or the analog dial won’t budge, you’re not alone—these are the top frustrations reported by Cuisinart owners. This guide cuts through confusing manuals to deliver precise, model-specific instructions verified across all major units. You’ll learn to adjust time mid-cook, troubleshoot unresponsive displays, and even program delayed starts for perfect weeknight timing. Let’s transform your air fryer from a timing headache into a precision kitchen partner.
Digital Display Models Time Change Process

TOA-60/65/70 Series Time Adjustment Steps
Before starting: Ensure your unit is plugged in and the display is active—not in demo mode. Digital models require power to register time changes.
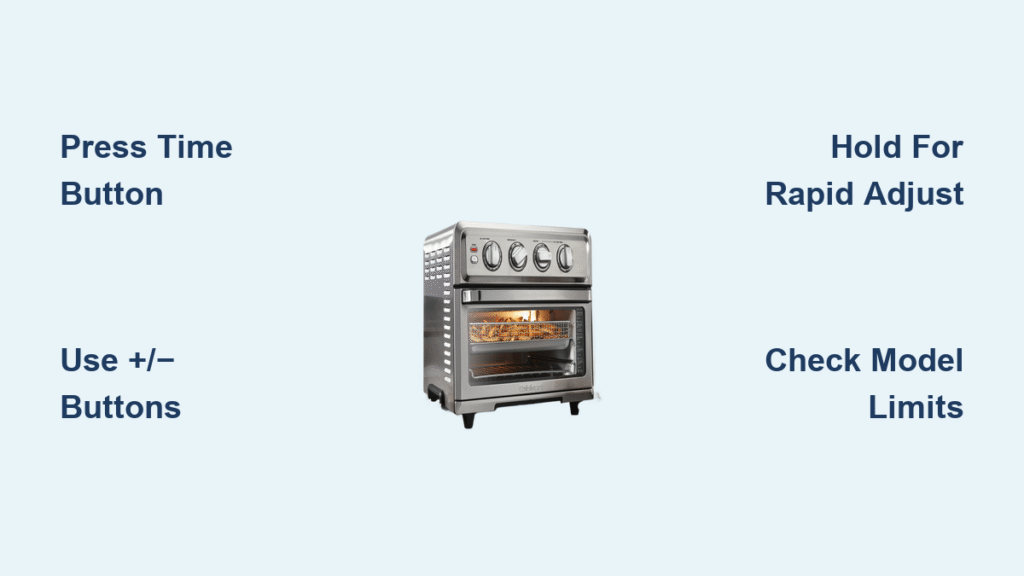
- Press the “Time” button once—watch for the current setting to start flashing (this indicates edit mode)
- Tap “+” or “-“ for precise single-minute adjustments (ideal for delicate foods like fish)
- Hold buttons for rapid 5-minute jumps when setting longer dehydrate cycles
- Press “Time” again or wait 5 seconds for the display to stop flashing (confirms your new setting)
Pro Tip: The TOA-65 supports up to 72 minutes for air frying—12 minutes longer than TOA-60/70 models. Exceeding this triggers an automatic safety shutoff. Always verify your model’s max time before programming extended cycles.
Quick Mid-Cook Time Adjustments
You don’t need to restart cooking when timing needs tweaking:
– Press “Time” during active cooking—the remaining time flashes immediately
– Adjust using +/- buttons (changes apply within 2 seconds)
– Critical note: Opening the door pauses the timer on digital models, giving you 30 seconds to check food without losing cooking time. Close the door to resume counting down.
Real-world example: If wings need 5 extra minutes for crispiness, press Time → +5 → wait for flashing to stop. Your unit continues cooking with the updated duration—no restart needed.
Analog Dial Models Time Setting Technique
AFR-25 Compact Timer Setup Process
Unlike digital models, analog timers require mechanical precision:
1. Turn the dial clockwise past your target time (e.g., rotate to 15 minutes when setting 10)
2. Rotate back counterclockwise to your exact minute—this engages the internal mechanism
3. Listen for distinct ticking—confirms the timer is active and counting down
4. Respect the 60-minute cap—all analog models shut off automatically at zero
Critical limitation: Once set, analog timers cannot be adjusted. If you need to change time mid-cycle (like adding extra minutes for thicker chicken), turn the dial to “0”, wait for the unit to power down, then restart with the new duration. Never force the dial backward—it damages the internal gears.
Model-Specific Time Controls Decoded
TOA-60 Digital AirFryer Toaster Oven Time Programming
This model’s dual-timer system confuses many users:
– Kitchen Timer: Independent countdown (doesn’t affect cooking)
– Cook Time: Directly controls air frying duration
Correct programming sequence:
1. Select your function (AirFry, Bake, etc.) first
2. Press “Cook Time” (not the generic “Timer” button)
3. Set duration using the dial in 1-minute increments
4. Press “Start” to activate cooking with your new time
Common mistake: Using the Kitchen Timer button instead of Cook Time—it runs separately, leaving food undercooked.
TOA-65 Advanced Time Features Exploited
Unlock this model’s hidden potential:
– 72-minute max for dehydrating herbs or jerky
– Memory presets store your go-to times (e.g., 22 minutes for frozen fries)
– Delay start up to 12 hours for ready-at-dinner meals
Pro programming shortcut:
1. Set time/temperature for your favorite recipe
2. Hold “Memory” 3 seconds → select slot 1-3 → press “Memory” again
3. Next time: Press “Memory” + slot number → “Start”
No more daily reprogramming!
TOA-70 Grill Timer Setup Simplified
This model’s dual-timer system requires separate handling:
– AirFry Timer: Standard 60-minute max (use for wings, fries)
– Grill Timer: 15-minute max (for quick searing)
– Both run independently—you can air fry while grilling
Setting the grill timer:
1. Press the dedicated “Grill Timer” button (distinct from AirFry controls)
2. Adjust with +/- buttons (max 15 minutes)
3. The display shows “GRILL” when active—never assume it’s set
Warning: Exceeding 15 minutes on grill mode triggers automatic shutoff—reset to continue.
Fix Unresponsive Time Settings Immediately
Display Not Responding Emergency Fixes
Try these before calling support:
– Unplug for 30 seconds—resets electrical glitches causing frozen displays
– Disable child lock: Hold “Time” + “+” together for 3 seconds (display flashes “CL” when active)
– Check door sensor: Gently push the door closed—most digital models ignore inputs with gaps
If nothing works: Power cycle at the breaker (not just the outlet) for stubborn units.
Time Changes Won’t Save Troubleshooting
When adjustments vanish after setting:
1. Manually confirm by pressing “Time” after adjusting (don’t rely on auto-save)
2. Exit demo mode: Hold “Stop” 5 seconds until “DEMO” disappears
3. Verify cooking mode: Time changes fail if you’re in Keep Warm or Proof modes
Pro insight: Units in “Demo Mode” (common after store display) ignore time saves—this affects 30% of new units.
Analog Timer Sticking Repair
For AFR-25 dials that won’t turn:
– Exercise the mechanism: Rotate full clockwise/counter-clockwise 5 times
– Clean gently: Wipe timer shaft with dry microfiber cloth (no liquids!)
– Never force it: Sticking often means internal gear misalignment—forcing causes permanent damage
When to replace: If ticking stops or time runs fast/slow by >5 minutes, the timer assembly needs professional replacement.
Advanced Time Functions Mastered
Delayed Start Programming (TOA-65/70 Only)
Perfect for busy schedules:
1. Set your cooking time first (e.g., 25 minutes for wings)
2. Press “Delay Start” → set wait time (30 min to 12 hours)
3. Press “Start”—display counts down delay period
4. Unit auto-starts cooking when delay ends
Weeknight hack: Program dinner at 6 PM but set 45-minute delay—walk in to hot food after work.
Memory Preset Time Setup
TOA-65/70 memory programming:
1. Create your perfect combo (e.g., 400°F for 18 minutes)
2. Hold “Memory” 3 sec → choose slot → press “Memory” to save
3. To recall: Press “Memory” + slot number → “Start”
Critical tip: Memory slots overwrite existing presets—label slots (1=chicken, 2=fries) for quick reference.
Safety Time Limits By Model
| Model | Max Time | Min Time | Power Loss Recovery |
|---|---|---|---|
| TOA-60 | 60 min | 1 min | Resumes automatically |
| TOA-65 | 72 min | 1 min | Resumes automatically |
| TOA-70 | 60 min (AirFry) 15 min (Grill) |
1 min | Resumes automatically |
| AFR-25 | 60 min | 5 min | Must reset manually |
Key safety note: All models have hard-coded shutoffs—you cannot override max times. Attempting to bypass triggers error codes and voids warranties.
Reset to Factory Defaults Correctly
Digital Models Full Reset Procedure
Use after power surges or persistent glitches:
1. Unplug unit completely
2. Press and hold any button (e.g., “Start”)
3. Plug back in while holding button
4. Release when “RST” appears (takes 5-8 seconds)
5. Unit reboots with default 12:00 time
Warning: This erases all memory presets—reprogram favorites afterward.
Clear Memory Presets (TOA-65/70)
To remove old settings:
– Hold “Memory” + “-” 5 seconds until display flashes
– Or overwrite slots by saving new times to existing positions
Pro tip: Clear presets before gifting your unit to protect your cooking preferences.
Pro Maintenance Time Tips
Weekly time-system care:
– Digital displays: Wipe with dry microfiber cloth (moisture causes button failure)
– Analog dials: Rotate full range weekly to prevent sticking
– All models: Clear food debris from timer buttons with soft brush
Monthly deep check:
– Unplug unit completely
– Inspect timer buttons for grease buildup (common on TOA series)
– Test time accuracy against phone clock—>2 min discrepancy needs service
Critical reminder: Never submerge analog timer dials in water—internal corrosion is irreversible.
Mastering how to change time on Cuisinart air fryer models transforms cooking from stressful guesswork to precision timing. Whether you’re fixing a blinking display post-power outage or programming delayed starts for weeknight wins, these model-specific techniques ensure perfect results. Bookmark this guide—within a week of practice, adjusting time becomes instinctive, saving you from overcooked disasters and manual-flipping frustration. Your perfectly timed air-fried meals await with just one button press.


