
Your Cosori air fryer delivers crispy perfection in minutes, but grease buildup and food residue sabotage performance fast. Sticky baskets, lingering odors, and uneven cooking signal it’s time for a thorough cleaning session. This guide reveals exactly how to clean Cosori air fryer components safely while extending your appliance’s lifespan. You’ll master daily wipe-downs, deep cleaning hacks, and critical maintenance schedules that keep your machine running like new.
Essential Safety Steps Before Cleaning
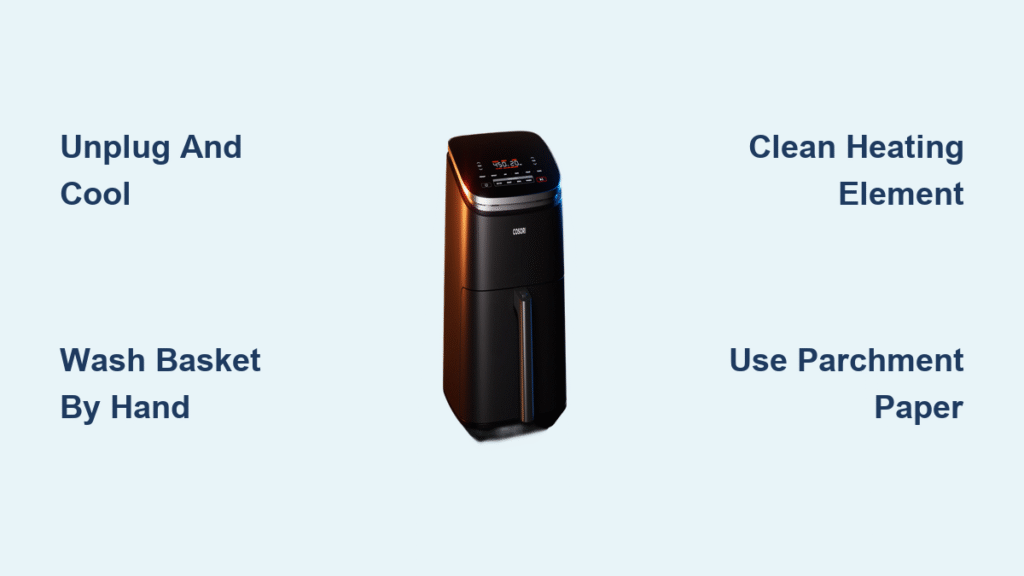
Unplug your Cosori immediately after cooking and allow 30-45 minutes for complete cooling. Never clean while warm—residual heat creates burn risks and steam can damage internal electronics. Place the unit on a heat-resistant surface away from children and pets during cooldown. Confirm safety by touching the basket handle and exterior; if it feels warm, wait longer. Skipping this step risks severe burns from hidden hot spots near the heating element.
Quick Daily Cleaning Method
Remove Basket and Crisper Plate Immediately
Slide out the basket and crisper plate within 10 minutes of cooking to prevent grease hardening. These removable parts trap 90% of cooking debris. Hold the basket over your trash can and tap firmly to dislodge crumbs. For stuck particles, use a silicone spatula—never metal tools—to avoid scratching the non-stick coating. Pay special attention to the mesh bottom where tiny food fragments embed.
Hand-Wash Technique for Non-Stick Protection
Fill your sink with warm water and mild dish soap. Soak basket and crisper plate for 3-5 minutes while wiping the air fryer exterior with a damp microfiber cloth. Use circular motions with a soft sponge to clean:
– Mesh basket bottom (where grease penetrates deep)
– Crisper plate edges (common grease traps)
– Handle connection points (hidden debris zones)
Never use steel wool or abrasive pads—these permanently damage the non-stick surface, causing food to stick during future cooking.
Dishwasher Safe Components
Place basket and crisper plate on your dishwasher’s top rack only to avoid warping from heating elements below. This method shines for:
– Sanitizing after raw chicken or fish
– Removing stubborn bacon grease
– Busy weeknights when hand-washing isn’t practical
Run a normal cycle with standard detergent—no pre-rinsing needed. Always air-dry components completely before reassembly to prevent rust.
Deep Clean Interior Chamber

Heating Element Maintenance
The top-mounted heating element attracts grease splatter during high-heat cooking. Dampen a microfiber cloth with warm soapy water and wring until nearly dry—excess moisture risks electrical damage. Wipe gently while supporting the element from below to avoid bending. For baked-on residue, apply a baking soda paste (3:1 ratio with water), wait 10 minutes, then wipe with a damp cloth. Never use metal tools near this fragile component.
Wall and Fan Cleaning Protocol
Wipe interior walls using upward circular motions to lift grease without pushing debris toward the fan housing. Focus on:
– Corners where oil pools (use cotton swabs for precision)
– Fan blades (turn by hand while wiping)
– Door seal edges (prevent crumbs from jamming the latch)
Work top-to-bottom, replacing your cloth when it darkens with grease. Finish with a dry microfiber pass to eliminate streaks.
Prevent Buildup Strategies
Cleaning Frequency Schedule
Skip this routine at your peril—grease accumulation cripples performance fast. Commit to:
– After every use: Empty crumbs, wipe exterior
– Every 3-5 cooks: Deep clean basket and crisper plate
– Weekly: Full interior chamber wipe-down
– Monthly: Heating element inspection and fan cleaning
Consequences of Neglect
Ignoring maintenance causes 15-20% efficiency loss as grease restricts airflow. You’ll notice uneven browning and lingering burnt smells from reheated residue. Worst case: excessive grease creates fire hazards during high-temp cooking. Permanent staining also ruins the non-stick coating, making future cleanings exponentially harder.
Liners for Effortless Cleanup

Parchment Paper Technique
Cut parchment to match your Cosori basket size (7″, 9″, or 11″ rounds). Always weigh paper down with food—never preheat empty as it may ignite. Leave a ½-inch border around edges for proper air circulation. This simple barrier catches 80% of grease splatter from burgers or wings, reducing cleanup time to 30 seconds.
Aluminum Foil Guidelines
Use foil only for extremely greasy foods like bacon. Crimp edges under the basket rim to prevent air currents from shifting it. Never cover basket holes—this blocks airflow and creates soggy food. Remove foil immediately after cooking; prolonged contact damages the non-stick coating.
When to Skip Liners
Avoid barriers when cooking crisp-dependent foods like french fries or roasted Brussels sprouts. Direct air contact triggers the Maillard reaction for golden perfection. Also skip liners for lightweight items like kale chips—they’ll blow into the heating element.
Approved Cleaning Solutions
Safe Cleaning Agents
Stick to these proven options:
– Dawn dish soap (cuts grease without residue)
– Baking soda paste for carbonized stains
– White vinegar solution (1:1 with water) for odor elimination
– Lemon juice as natural degreaser
Never Use These
Abrasive cleaners like Comet scratch non-stick surfaces irreparably. Bleach creates toxic fumes when heated. Steel wool removes protective coatings, causing rust and food sticking. High-pressure sprayers force water into electrical components.
Monthly Deep Clean Checklist

30-Minute Maintenance Routine
Every 30 days, perform this critical inspection:
1. Disassemble completely—remove all detachable parts
2. Soak basket and crisper plate in hot soapy water for 15 minutes
3. Clean fan area with cotton swabs dipped in vinegar solution
4. Inspect heating element for thick grease buildup
5. Test all components fit securely after drying
Seasonal Deep Maintenance
Every 3-6 months, add these steps:
1. Clean exterior vents with a soft brush attachment
2. Check power cord for fraying or damage
3. Apply light oil coating to non-stick surfaces (wipe excess thoroughly)
4. Run empty cycle at 400°F for 10 minutes to burn off residue
Troubleshooting Common Issues
Remove Baked-On Residue
For carbonized food that won’t budge:
1. Soak overnight in hot, soapy water
2. Apply baking soda paste directly to problem areas
3. Use soft-bristled brush in gentle circular motions
4. Repeat without increasing pressure—patience beats force
Eliminate Persistent Odors
Lingering smells indicate hidden grease:
1. Heat empty air fryer at 400°F for 10 minutes
2. Simmer lemon slices in basket for 5 minutes at 350°F
3. Wipe interior with vinegar-water solution
4. Air-dry completely with basket and door open for 24 hours
Handle Excessive Grease
For thick buildup:
1. Apply degreasing solution (2 drops dish soap + 1 cup warm water)
2. Wait 15 minutes for penetration
3. Use soft brush in small circles
4. Rinse thoroughly and dry completely—moisture causes rust
Proper Storage Practices
Storage Positioning
Store your Cosori with basket and crisper plate inserted to prevent dust accumulation. Wrap the power cord loosely—tight bends damage internal wires. Maintain 6 inches clearance on all sides for ventilation. Never stack items on top of the unit, which traps moisture and invites mold growth.
Long-term Care
Before extended storage:
1. Complete deep clean all components
2. Apply thin oil layer to non-stick surfaces
3. Store in dry location away from steam sources
4. Cover with breathable cloth to prevent dust while allowing air circulation
Quick Reference: 5-Minute Post-Cooking Routine
Master this efficient sequence after every use:
1. Unplug and cool (30-45 minutes)
2. Empty basket over trash can
3. Quick wipe exterior with damp microfiber cloth
4. Rinse basket if heavily soiled
5. Leave door open for complete drying
Consistent cleaning maintains your Cosori air fryer’s performance and prevents costly repairs. The 5-minute daily routine saves hours of scrubbing later, while monthly deep cleaning ensures years of reliable service. Your perfectly crispy meals depend on clean components—make how to clean Cosori air fryer maintenance as routine as preheating. Start today and enjoy restaurant-quality results without the mess.


