
That crispy chicken looked perfect until you lifted the basket and saw the greasy aftermath. Sound familiar? Cleaning your Nuwave air fryer basket doesn’t have to be a chore that makes you dread using your favorite kitchen appliance. This guide walks you through everything from quick daily wipes to deep cleaning stubborn residue, ensuring your basket stays pristine and your food keeps tasting fresh. Learn how to clean Nuwave air fryer basket properly and extend its lifespan while maintaining optimal cooking performance.
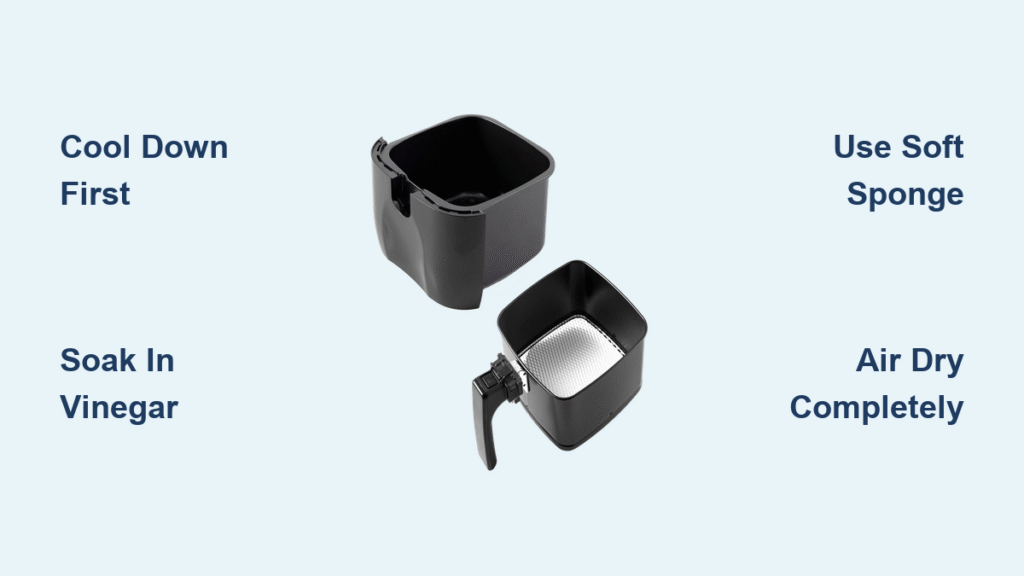
Cool Down Safety First Before Touching Your Basket
Before you even think about cleaning, unplug your Nuwave air fryer and wait at least 30 minutes. The heating elements retain dangerous heat long after cooking stops, and the ceramic coating needs time to stabilize before exposure to water. Test both the basket handle and base unit—they must be completely cool to the touch.
Critical safety tip: Remove the basket from the unit immediately after cooking finishes. This speeds up cooling by nearly 50% and prevents prolonged heat exposure that could warp the aluminum frame. Never rush this step—attempting to clean a hot basket risks serious burns and thermal shock damage to the non-stick coating.
Basket Components Breakdown for Thorough Cleaning
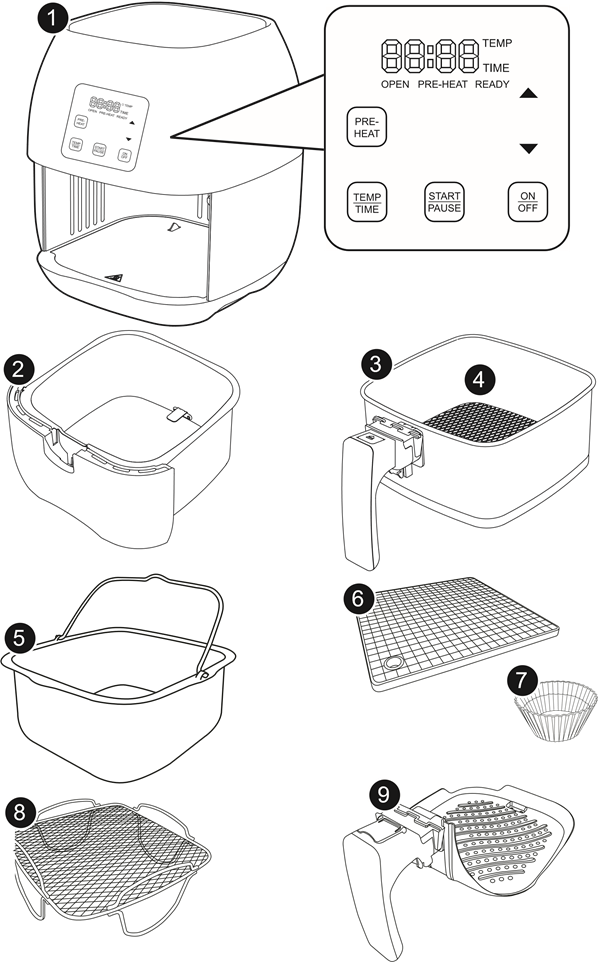
Your Nuwave basket isn’t just one piece—it’s a two-part system designed for complete cleaning access. The outer basket features the heat-resistant handle and frame, while the inner crisper plate (perforated tray) slides out with a simple press of the release tabs. Separating these components takes seconds but makes all the difference in removing hidden grease buildup.
Key insight: The ceramic non-stick coating on both pieces requires gentle handling but rewards you with effortless food release when properly maintained. Never force the components apart—each model has specific release mechanisms that work smoothly when handled correctly. This separation allows you to clean hard-to-reach areas where grease accumulates between cooking sessions.
2-Minute Daily Clean Routine After Every Use
Develop this simple habit to prevent major cleaning headaches later. After your basket has cooled, immediately separate both components and turn them upside down over your trash can. This removes 80% of food debris before it has a chance to harden.
- Rinse with warm water: Hold both pieces under lukewarm water (never hot) to loosen surface oils
- Finger-clean method: Use your fingers or a silicone spatula to gently dislodge stuck bits
- Air dry completely: Place on a dish rack until fully dry before reassembly
Warning: Never use metal utensils during daily cleaning—they cause microscopic scratches in the ceramic coating that accumulate over time. These tiny abrasions become food traps that accelerate residue buildup and eventually compromise the non-stick performance.
Weekly Deep Clean Protocol for Stubborn Residue
When daily cleaning isn’t enough, dedicate 15 minutes to a thorough weekly cleaning session. Start by filling your sink with warm water and adding just 2-3 drops of mild dish soap—more soap creates unnecessary suds that are harder to rinse.
Soak Time for Maximum Residue Release
Submerge both basket components completely and let them soak for 10-15 minutes. The ceramic coating releases most residue naturally during this soaking period. For particularly greasy sessions, add a tablespoon of baking soda to the water—it boosts cleaning power without abrasion.
Targeted Scrubbing Technique
Use a soft sponge in gentle circular motions, focusing on problem areas:
– The perforated holes of the crisper plate where grease hides
– Handle attachment crevices that collect food particles
– The basket rim where oil tends to pool during cooking
For stubborn spots that resist regular cleaning, apply a baking soda paste directly to the area and let it sit for 5 minutes before light scrubbing. This natural abrasive lifts residue without damaging your coating.
Conquer Stubborn Baked-On Mess in 3 Effective Ways
When regular cleaning fails, escalate your approach with these professional techniques that won’t harm your basket.
Vinegar Power Soak for Carbonized Food
Create a 50/50 solution of white vinegar and warm water. Submerge affected areas for 30 minutes—this natural acid breaks down hardened grease without harsh chemicals. The vinegar smell dissipates completely after rinsing.
Boiling Water Blast for Grease Dissolution
Carefully pour boiling water (with 1 tablespoon baking soda) directly into the basket placed securely in your sink. Let it cool naturally before scrubbing—this thermal shock method dissolves grease that soap can’t touch. Never immerse hot basket components in cold water—this causes thermal shock that damages the coating.
Commercial Degreaser Application
Choose non-stick safe degreasers only. Spray affected areas, wait 10-15 minutes for penetration, then use a non-abrasive sponge. Rinse thoroughly with warm water to remove all chemical residue before next use.
Dishwasher Safety Guidelines Most Owners Get Wrong

While many newer Nuwave baskets (post-2020 models) are labeled dishwasher safe, top rack only placement is mandatory. The intense heat from bottom rack elements can warp plastic components and degrade the ceramic coating over time.
Critical settings: Use gentle cycles with water temperatures under 150°F and disable heated drying. Remove components immediately after the cycle finishes to prevent water spotting. Despite the convenience, hand washing extends your basket’s lifespan by up to 40% compared to frequent dishwasher use.
Hand Washing Best Practices for Longest Coating Life
Master these details to protect your investment. Water temperature is crucial—aim for 100-110°F, warm enough to cut grease but cool enough to protect the coating. Test with your wrist; it should feel comfortably warm, not hot.
Soap selection matters: Choose mild, phosphate-free options like Dawn Platinum, Seventh Generation, or Method. Avoid anything containing bleach or ammonia—they break down protective coatings over time. After washing, position components on a dish rack to ensure complete air circulation for thorough drying.
Protect Your Non-Stick Coating Like a Pro
The ceramic coating lasts years with proper care but fails quickly with misuse. Never use metal utensils, steel wool, or abrasive scrubbers—they cause irreversible damage. Always opt for silicone, wooden, or plastic cooking tools that won’t scratch the surface.
Storage rule: Never stack heavy items on your basket. Store components separately when possible, or place a soft cloth between pieces if stacking is necessary. If food starts sticking despite proper oiling, your coating may need replacement—don’t ignore this warning sign.
Clean the Main Unit Exterior While Basket Soaks
Don’t neglect the air fryer unit itself while cleaning the basket. After confirming it’s unplugged and completely cool, wipe the exterior with a damp cloth and mild soap solution. Focus on the heating element area using a soft brush to remove debris.
Control panel caution: Clean digital displays with a barely damp microfiber cloth only—never spray liquids directly onto the unit. For stubborn smudges, apply a 50/50 water-vinegar solution to your cloth first. Moisture in button crevices can cause permanent electrical damage.
Eliminate Odors and White Residue Permanently
Persistent Smells Solution
Wash components with warm water mixed with lemon juice (1 tablespoon per cup). For severe odors, coat the interior with baking soda paste and leave overnight before rinsing. This natural deodorizing method removes cooking smells without chemical residues.
Hard Water Deposit Removal
White, chalky residue indicates mineral buildup from your water supply. Soak affected areas in equal parts vinegar and warm water for 20 minutes, then gently scrub with a soft sponge. Pro tip: Darkening of the basket bottom is normal seasoning—don’t scrub it away as it actually improves non-stick performance.
Monthly Maintenance Checklist for Peak Performance
Every 30 days, perform this quick inspection:
– Check handle rivets for looseness
– Examine coating for chips or scratches
– Verify crisper plate fits securely
– Test handle stability when lifting
Address minor issues immediately before they become safety hazards. Loose handles can cause basket drops during cooking, creating dangerous hot oil splatter situations.
When Replacement Becomes Necessary for Safety

Replace your basket immediately when:
– Non-stick coating peels or chips significantly
– Food sticks consistently despite proper cleaning
– Handle becomes loose or wobbly
– Warping prevents proper seating in the unit
Contact Nuwave at 1-877-689-2838 with your model number ready. Most replacements cost $25-45 and come with a 1-year warranty—don’t risk using a damaged basket that could contaminate your food.
Eco-Friendly Cleaning Options That Work
Reduce chemical use with these effective natural solutions:
– Baking soda + castile soap paste for daily cleaning
– Lemon juice + salt for stubborn stains
– White vinegar soaks for grease breakdown
These biodegradable options clean effectively without damaging your basket or harming the environment. They’re especially important if you have young children or are concerned about chemical residues transferring to food.
Storage That Prevents Mold and Warping
Perfect storage method:
– Ensure all components are bone-dry before storing
– Store basket separately from main unit when possible
– Place soft cloth between stacked pieces to prevent scratching
– Keep away from direct heat sources like stoves or radiators
Never store with any moisture trapped inside—this invites mold growth that’s difficult to eliminate and creates persistent odors. Proper storage extends your basket’s lifespan by preventing unnecessary wear and tear.
Clean your Nuwave air fryer basket properly using these techniques and it’ll reward you with years of effortless cooking. Master these cleaning methods once, and you’ll never dread post-cooking cleanup again. Your next batch of crispy fries will taste as fresh as the first, with no residual grease affecting flavor or texture.


