
You’ve got a frozen pot pie in your freezer, dinner plans are collapsing, and your oven’s preheating time feels like an eternity. What if you could transform that humble frozen meal into a golden-crusted masterpiece in under 30 minutes? Air fryers deliver exactly that—bubbling fillings and shatteringly crisp crusts without the 45-minute oven wait. Thousands of home cooks have ditched microwave disasters for air fryer pot pies that rival restaurant quality, and this guide reveals exactly how to replicate their success.
Forget soggy bottoms or burnt edges. Whether you own a compact 3-quart basket or a spacious oven-style air fryer, you’ll master foolproof methods for frozen store-bought pies, semi-homemade ramekin versions, and scratch-made double-crust creations. We’ve tested every brand, size, and technique so you can skip the guesswork and serve perfect pot pie tonight.
Frozen Pot Pie Air Fryer Method
Never Thaw Your Pie
Resist the urge to thaw frozen pot pies before cooking—they’re engineered to bake straight from the freezer. Thawing collapses the delicate pastry layers, creating a gummy bottom crust that never crisps properly. Marie Callender’s, Banquet, and store-brand pies all deliver optimal results when rock-solid. Slide your pie directly from freezer to air fryer basket for that ideal flaky texture.
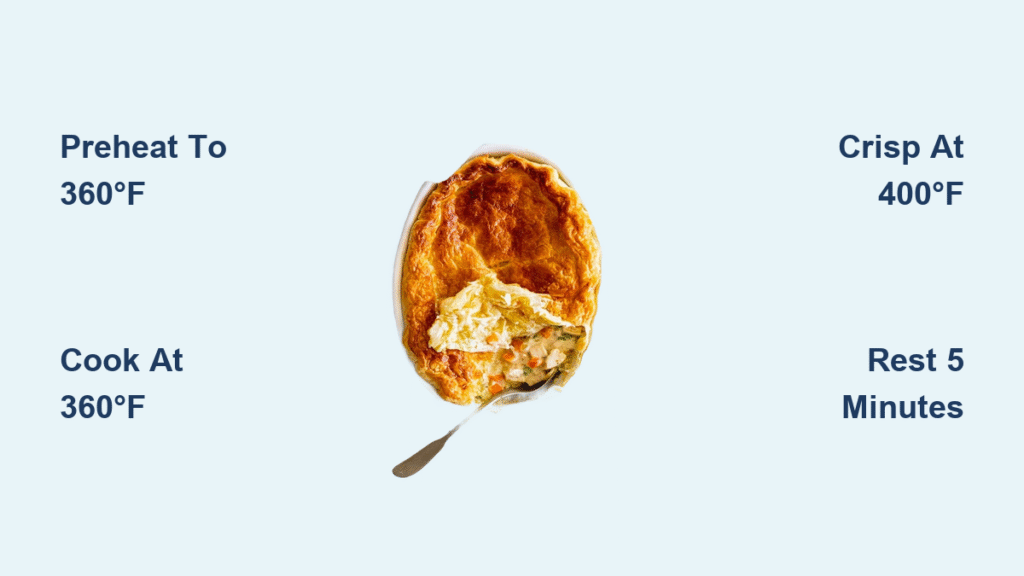
Two-Step Temperature Formula
The dual-temperature approach prevents burnt crusts while ensuring piping-hot fillings. Start with a 5-minute preheat at 360°F, then cook at this lower temperature for most of the cycle to gently heat the filling. Finish with a high-heat blast to crisp the crust:
- Preheat air fryer to 360°F for 5 minutes
- Cook at 360°F for 15–21 minutes (depending on size)
- Crisp at 400°F for 2 minutes
- Rest 5 minutes with basket closed—carryover heat finishes the center
This method works because the initial lower temperature prevents crust scorching while the filling safely reaches 165°F internally. Skipping the rest step risks a molten filling that could burn your mouth.
Size-Specific Timing Chart
| Pie Size | Initial Time | Final Crisp | Total Time | Critical Tips |
|---|---|---|---|---|
| 6-7 oz (Banquet) | 15 min at 360°F | 2 min at 400°F | 22 min | Tent edges with foil if browning too fast |
| 10 oz (Marie Callender’s) | 21 min at 360°F | 2 min at 400°F | 28 min | Ideal baseline for first-time users |
| 15-16 oz Family | Not recommended | — | — | Crust burns before filling hits 165°F |
Pro Tip: Always place pies on the middle rack position for even heat circulation. Family-sized pies won’t fit properly in most air fryers—save those for your conventional oven.
Quick Single-Temperature Shortcut
When time is critical, cook at a steady 380°F for 17–20 minutes. While you’ll sacrifice some filling moisture compared to the two-step method, results still vastly outperform microwave cooking. Verify doneness with an instant-read thermometer—insert into the geometric center to confirm 165°F. If the filling isn’t bubbling after 15 minutes, add 2-minute increments until safe.
Capacity & Equipment Setup
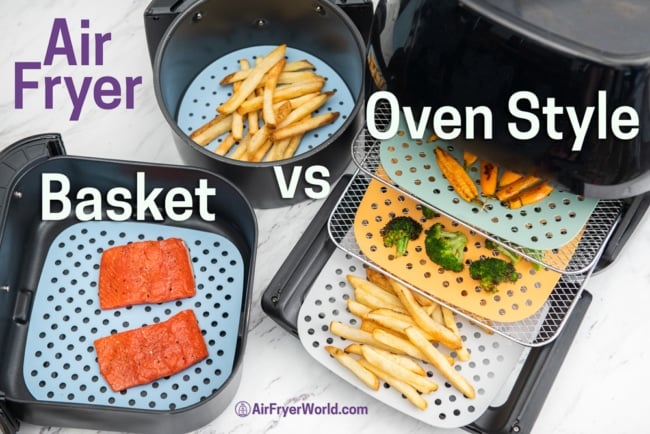
Basket vs Oven-Style Air Fryers
Your appliance size dictates how many pies you can cook:
- 3-quart basket: Fits one mini pie (10 oz or smaller) centered in the basket. Family pies will crowd the space, causing uneven cooking.
- 6-quart basket: Holds two mini pies side-by-side in a single layer—perfect for weeknight dinners for two.
- Oven-style models: Accommodate multiple mini pies or one family pie if space allows (though we still don’t recommend family sizes).
Critical Warning: Never stack pies vertically. Blocked air circulation creates cold spots where fillings won’t reach safe temperatures.
Ramekin Alternative for Small Batches
When your basket feels oversized, use 6-8 oz oven-safe ramekins for portion control and even cooking. This shines for semi-homemade versions or reheating leftovers. Grease ramekins thoroughly before filling to prevent sticking, and leave ½-inch headspace for bubbling fillings. The ramekin’s sides shield the crust from direct heat, eliminating soggy-bottom syndrome.
Safety Checks & Common Mistakes
Temperature Verification Protocol
Visual cues like bubbling filling or clear steam are unreliable indicators of doneness. Always insert an instant-read thermometer into the pie’s geometric center—the deepest point where cold spots hide. The filling must register 165°F to kill harmful bacteria. If it’s undercooked, tent with foil and continue cooking at 360°F in 2-minute increments.
Crust Shield Technique
When crust edges darken too quickly, create a foil shield mid-cook. Tear a small square of foil, loosely tent it over the pie, and only cover the edges—leave the center exposed to continue crisping. Avoid pressing foil directly against the crust, which creates steam pockets that soften the pastry.
Hot Tray Warning
Aluminum pie trays become scalding during cooking—hotter than the basket itself. Always slide the finished pie onto a plate before handling. Never serve directly from the tray; residual heat can cause severe burns even after 2 minutes of resting.
Semi-Homemade Ramekin Method
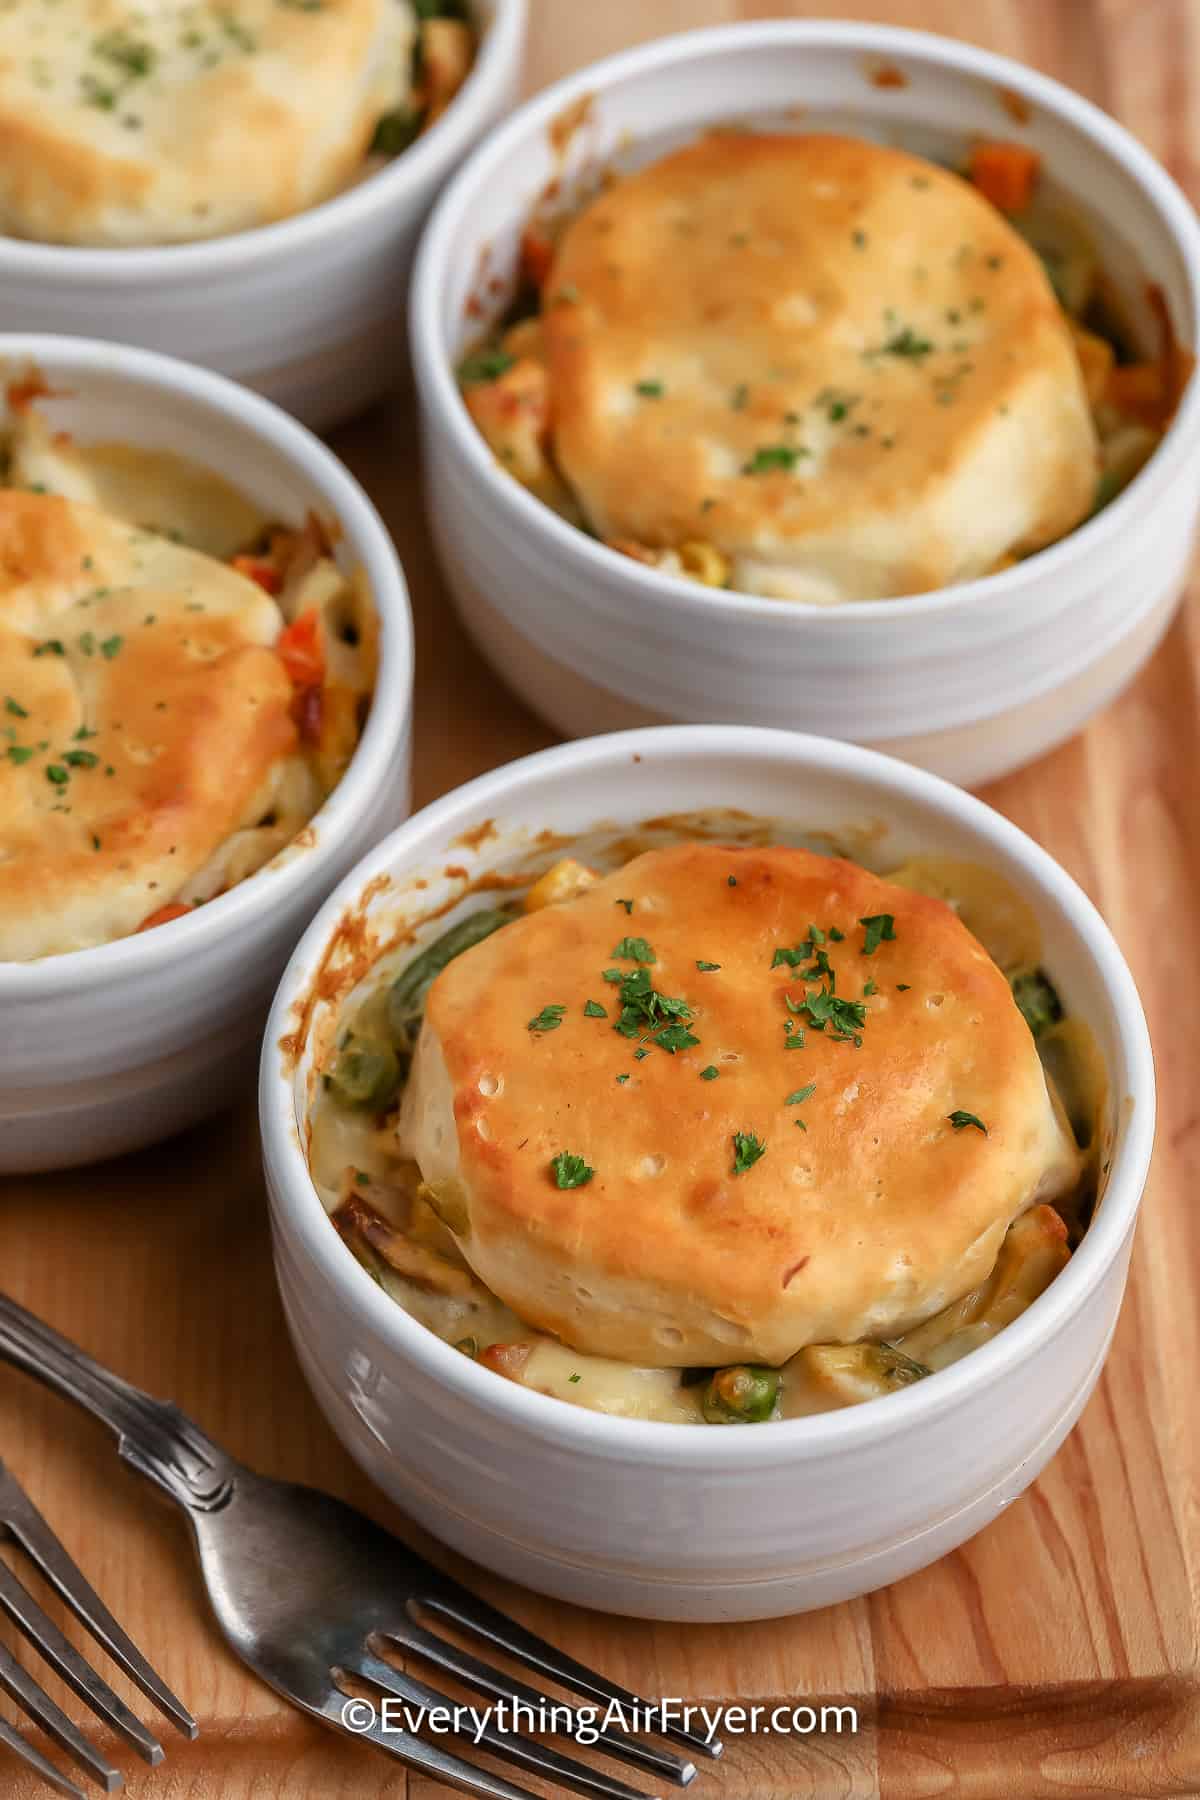
Biscuit-Top Shortcut
Transform leftovers into elegant individual pot pies using refrigerated biscuit dough:
- Prepare filling on stovetop: Sauté 2 cups cooked chicken with 1.5 cups frozen vegetables. Whisk 3 tbsp butter and 3 tbsp flour into a roux, then gradually add 2 cups broth until thickened.
- Portion into greased 6-8 oz ramekins, filling ¾ full.
- Top each with one uncooked biscuit (no need to separate—use whole tube biscuits).
- Air fry at 325°F for 12 minutes until biscuits are golden and filling bubbles vigorously.
Pro Tip: Brush biscuits with melted butter before cooking for extra flakiness.
Make-Ahead Strategy
Double your filling recipe and freeze portions in labeled zip-top bags for up to 6 months. Thaw overnight in the fridge, then spoon into ramekins and top with fresh biscuit dough. You’ll have restaurant-quality pot pie ready in 15 minutes—faster than delivery.
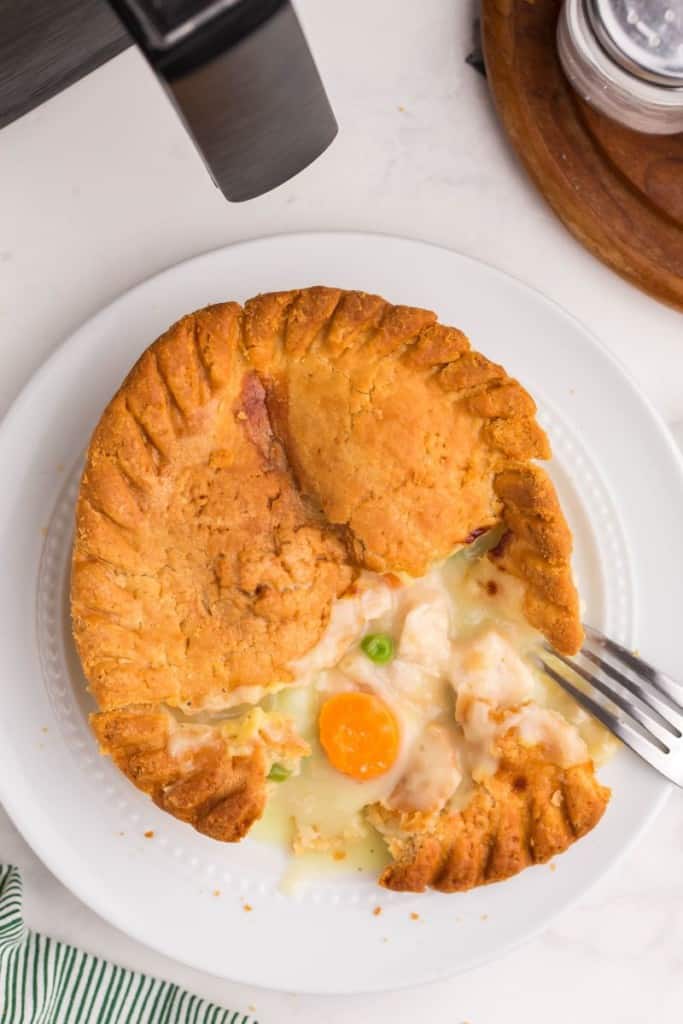
Fully Scratch Double-Crust Version
Par-Bake the Bottom Crust
This single step prevents soggy bottoms that plague air fryer pies. Roll your bottom crust 11-12 inches, fit into an 8-inch pie plate, then air fry at 360°F for 5 minutes. The par-bake sets the crust structure before filling contact, creating a moisture barrier. Cool 2 minutes before adding filling.
Assembly & Final Cook
- Fill par-baked shell with your stovetop mixture (sautéed chicken, vegetables, and thickened broth).
- Add top crust, crimp edges tightly, and cut 4 steam vents.
- Brush with egg yolk for professional shine.
- Air fry at 350°F for 15-17 minutes until deep golden brown.
Critical Check: Look for filling visibly bubbling through vents—this confirms it’s reached 165°F. Rest 5 minutes before slicing to set the filling.
Reheating Leftovers Without Ruining Them
The air fryer rescues refrigerated pot pie leftovers flawlessly:
- Temperature: 325°F
- Time: 5-7 minutes
- Technique: Cover loosely with foil for first 3 minutes to gently reheat, then uncover to re-crisp the crust.
Never microwave leftovers—it turns crusts into chewy rubber. For best results, let refrigerated portions sit at room temperature for 10 minutes before reheating to prevent thermal shock.
Troubleshooting Quick Fixes
Crust Too Dark, Center Cold
Immediately tent the pie with foil and continue cooking at 360°F. Check internal temperature every 2 minutes until it hits 165°F. If this happens repeatedly, switch to the two-step temperature method—your air fryer likely runs hot.
Soggy Bottom Solutions
- For biscuit-topped ramekins: Flip the ramekin upside-down during the final 2 minutes at 400°F. Gravity pulls moisture away from the crust.
- For double-crust pies: Remove the pie from its foil tray and place directly on the air fryer basket for 2-3 minutes at 400°F to crisp the base.
Preventing Overflow
Fill ramekins only ¾ full—bubbling fillings expand dramatically under air fryer heat. Place a sheet of foil on the basket floor beneath your pie for effortless cleanup of any spills. Never use deep casserole dishes; they restrict airflow and cause uneven cooking.
Pairing & Serving Ideas
Elevate your air fryer pot pie into a complete meal with these side dishes that cook simultaneously:
Vegetable sides:
– Toss Brussels sprouts in oil and air fry at 400°F for 10 minutes (add during the last 10 minutes of pie cooking)
– Roast asparagus bundles for 8 minutes at 400°F
– Crisp carrot sticks for 12 minutes at 380°F
Starch companions:
– Cook frozen French fries at 400°F using the same basket space after pie removal
– Reheat pre-made mashed potatoes at 325°F for 5 minutes
Dessert twist: Slide in a 6-7 oz frozen fruit pie during the final crisp phase—apple and cherry varieties use identical timing for a complete comfort food feast.
Master Your Next Pot Pie
Your air fryer has just become the ultimate pot pie appliance, whether you’re rescuing a weeknight dinner with a frozen shortcut or impressing guests with scratch-made ramekins. Remember these non-negotiables for consistent success: always verify filling temperature reaches 165°F, never skip the 5-minute rest period, and match pie size to your air fryer capacity.
Start with a 10 oz Marie Callender’s pie as your baseline—its filling-to-crust ratio performs best in air fryers. Once mastered, experiment with the semi-homemade ramekin method using Thanksgiving turkey leftovers, or freeze batches of scratch filling for instant dinners. With these precise temperatures and timing tricks, you’ll never settle for soggy, unevenly cooked pot pie again. Your golden-crusted, bubbling-filling masterpiece awaits—just press start.


