
You pull a plump chicken from the fridge while your air fryer hums to life. In 50 minutes, you’ll have golden-brown skin crackling under your fork and tender meat falling off the bone—no oven marathon, no babysitting required. This isn’t magic; it’s smart air frying. Forget dry, unevenly cooked birds. With precise timing, strategic flipping, and zero guesswork, your air fryer transforms a humble supermarket chicken into a centerpiece worthy of Sunday dinner. Whether you’re feeding a family or prepping lunches for the week, this method delivers restaurant results with minimal cleanup.
The secret? Hot air circulating at jet-engine force, rendering fat while crisping skin. Unlike roasting, there’s no waiting for an oven to preheat or basting every 20 minutes. Just set it, flip it once, and walk away. In this guide, you’ll master sizing, seasoning, and the critical flip technique that prevents burnt wings and pale patches. Let’s turn that whole chicken into your most reliable weeknight hero.
Air Fryer Size Requirements: Avoid Burnt Wings & Stuck Birds

Basket Capacity Check: Match Chicken to Quart Size
Your air fryer’s basket volume dictates success. A chicken crammed against heating elements scorches while undercooked spots risk food safety. Use these hard limits:
– 3-4 quart models: Max 3–3.5 lb chicken (common organic sizes). Never force a 4 lb bird—it will touch coils.
– 5.8 quart units: Handles standard 4 lb supermarket chickens with 1-inch clearance.
– 6–8 quart baskets: Fits 5–5.5 lb birds if grate is removed. Press breastbone gently to flatten if needed.
– 8+ quart giants: Accommodates 6 lb birds safely.
Critical visual cue: When positioned breast-down, the chicken’s highest point (usually the backbone) must sit 1–2 inches below heating elements. If wings touch the coil, trim tips or untie legs.
Countertop Oven Advantage: Skip Size Stress
Convection ovens with air-fry mode (like Breville Smart Oven or Ninja Foodi) accept any chicken size. These units circulate air like traditional ovens, eliminating basket crowding. Place birds on racks without flipping—just rotate 180° halfway.
Chicken Selection & Prep: Dry Skin = Crispy Skin
Size Guidelines: Target 3–5 Pounds for Perfect Circulation
Choose birds between 3–5 lbs. Smaller chickens (3–3.5 lbs) cook faster with less risk of dryness. Avoid 6 lb birds unless you own an 8+ quart unit—they’ll steam instead of crisp when squeezed. Pro tip: Organic chickens often weigh less; check the label.
Essential Prep Steps: Eliminate Moisture Traps
- Remove giblets from both cavities—many forget the neck tucked under wings.
- Pat completely dry inside and out with paper towels. Moisture is the enemy of crispness.
- Trim fat flaps at cavity opening with kitchen shears to prevent smoke.
- Tuck wing tips behind the back—this keeps them from charring against coils.
- Slide fingers under breast skin to rub seasoning directly onto meat (optional but game-changing).
Never skip drying: A damp chicken steams instead of crisps. Let it air-dry uncovered in the fridge for 1 hour pre-seasoning if time allows.
Seasoning Methods That Work: Beyond Salt & Pepper
Universal Base Formula: Oil, Salt, Science
Mix 1 tbsp oil (avocado or olive) with 1 tsp kosher salt per pound of chicken. The oil carries salt deep into the skin while promoting browning. Skip oil only if using a spice paste with high moisture content.
Flavor Variations: Custom Rubs That Stick
- Minimalist: Salt + pepper + ½ tsp paprika (adds color without heat)
- Italian Herb: 1 tbsp Italian seasoning + 1 tbsp poultry seasoning + 1 tsp paprika
- All-Purpose Rub: Equal parts garlic powder, onion powder, paprika, black pepper
- Store-Bought Shortcut: Nom Nom Paleo “Nomtastic Grilling” or Bosari Citrus blend
Pro tip: Season 1–48 hours ahead. Refrigerate uncovered to dry-brine—this pulls moisture from skin for extra crunch. Apply paste after drying but before positioning in basket.
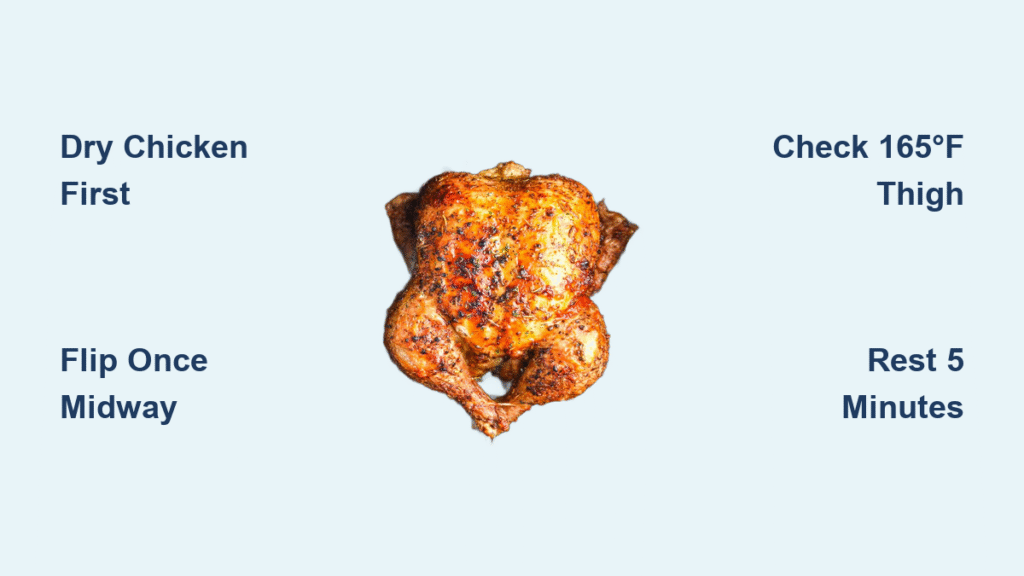
Step-by-Step Cooking Process: Flip Once, Master Timing

Temperature & Timing Chart: Weight-Based Precision
| Chicken Weight | Total Time | Breast-Down | Breast-Up |
|---|---|---|---|
| 3–4 lb | 45–55 min | 30–35 min | 15–20 min |
| 5 lb | 55–65 min | 40–45 min | 15–20 min |
| 6 lb | 65–75 min | 50–55 min | 15–20 min |
Critical Temperature Points: Beyond Guesswork
- Preheat: 350–360°F for 3–5 minutes (empty basket).
- Stage 1 (breast-down): 350–360°F—this renders back fat into breast meat for juiciness.
- Stage 2 (breast-up): 350–375°F—browns skin while finishing cooking.
- Final blast: 400°F for 2–3 minutes only if skin lacks blistering.
Thermometer Placement: Avoid Undercooked Thighs
Insert probe horizontally into:
– Thickest breast section (avoiding bone)
– Inner thigh (between leg and body)
Both must hit 165°F. Thighs can safely reach 175°F for fork-tender results. Never guess—undercooked chicken risks illness.
Flip Technique & Safety: Don’t Stick or Tear Skin
Proper Flipping Method: Wait for Release
Use silicone-tipped tongs or oven mitts. The chicken releases easily when fat renders—if it sticks, wait 2–3 more minutes. Forcing it tears skin. Flip exactly at the halfway time mark for even browning.
Visual Cues for Doneness: Beyond Thermometers
- Skin: Deep golden brown with blistered spots (not pale yellow)
- Juices: Clear when thigh is pierced (pink = undercooked)
- Leg wiggle: Thighs rotate freely in sockets
Warning: Skipping the flip causes pale breast skin and greasy meat. Flipping too early tears skin—wait for natural release.
Common Problems Solved: Smoke, Size, and Sogginess

Chicken Too Large? Flatten Without Trussing
Untie legs (if tied), press breastbone down firmly with palms, or remove basket grate. Trussing risks legs touching coils—experts debate this, but untied legs cook safer.
Excessive Smoke? Absorb Drippings Immediately
Slide 1–2 bread slices under the basket to catch fat. Never add water to air fryer bases—it creates steam, not crispness. For chronic smokers, reduce oil in seasoning paste.
Pale Skin Patches? Blast at 400°F
Center the chicken in the basket. If skin lacks color after cooking, blast at 400°F for 2 minutes. Pat skin drier next time—moisture is the #1 crispness killer.
Rest, Carve & Store: Lock in Juiciness
Resting Rules: The 5-Minute Minimum
Rest 5–20 minutes loosely tented with foil on a cutting board. Internal temp rises 5°F during carry-over cooking, redistributing juices. Carving too soon releases all moisture—resulting in dry meat.
Storage Guidelines: Zero Waste Strategy
- Refrigerate: Shredded meat in airtight containers for 3–5 days.
- Freeze: Carcass for broth (3–4 months); meat for 3 months.
- Reheat: Air fryer at 350°F for 3–8 minutes + splash of broth. Microwaves dry chicken out—avoid them.
Recipe Blocks: Exact Methods for Any Size
3½–4 lb Minimalist Chicken
- Chicken: 3½–4 lb whole
- Oil: 1 Tbsp olive oil
- Seasoning: 1 tsp salt, ½ tsp paprika, ½ tsp garlic powder, ¼ tsp pepper, pinch thyme
- Cook: 350°F—30 min breast-down, 20–30 min breast-up until 165°F
5–6 lb Italian Herb Chicken
- Chicken: 5–6 lb whole
- Oil: 3 Tbsp olive oil
- Seasoning: 1 Tbsp Italian seasoning, 1 Tbsp poultry seasoning, 1 tsp paprika, 1 tsp salt
- Cook: 360°F—45 min breast-down, 20 min breast-up
Serving & Leftover Ideas: One Chicken, Five Meals
Immediate Pairings: Effortless Sides
- Classic: Air-fried potatoes + green beans (toss in basket during last 15 min)
- Low-Carb: Salad with pulled chicken and lemon vinaigrette
- Hearty: Roasted sweet potatoes (cut into wedges, cook alongside chicken)
Leftover Transformations: Beyond Chicken Salad
- Buffalo Egg Rolls: Mix shredded chicken with hot sauce, wrap in wonton skins, air fry at 375°F for 6 min.
- Bone Broth: Simmer carcass with onion, carrot, and herbs for 4 hours.
- Enchiladas: Shred chicken, roll in tortillas with sauce, air fry at 350°F for 8 min.
Quick Reference Checklist: Avoid Last-Minute Surprises
Before starting:
– [ ] 3–5 lb chicken fits basket with 1-inch clearance
– [ ] Giblets removed and cavity dried thoroughly
– [ ] Seasoning paste applied (1 tsp salt per lb)
– [ ] Air fryer preheated to 350–360°F
– [ ] Chicken positioned breast-side DOWN
– [ ] Timer set for Stage 1 (30–55 min based on weight)
– [ ] Thermometer ready for final check (165°F breast)
Your air fryer just became the MVP of weeknight cooking. One chicken feeds four people for dinner, provides lunch protein for days, and yields rich broth for soups—all in under an hour. Master this technique, and you’ll never default to bland store rotisserie birds again. The crispy skin, juicy meat, and zero cleanup aren’t just possible; they’re guaranteed. Now fire up that basket and claim your crispy-skinned victory.


