You’re staring at your air fryer, craving ribs but dreading the 4-hour smoker session. What if you could serve fall-apart tender, crispy-edged boneless ribs faster than takeout arrives? The secret lies in understanding these aren’t actually ribs—they’re juicy pork shoulder cuts designed for rapid air frying. Forget dry, chewy results; this method delivers restaurant-quality ribs with caramelized edges and succulent centers in under 30 minutes. By the end of this guide, you’ll master the exact temperature sweet spot, sauce timing trick, and cut selection hack that transforms your air fryer into a rib powerhouse.
Skip the Rib Confusion: Select Your Pork Shoulder Cuts

Stop buying mislabeled packages—true boneless ribs don’t exist. What you need are pork shoulder blade steaks labeled “country-style” or “blade end.” This cut’s high marbling survives air frying’s intense heat, while lean loin cuts turn to cardboard. When shopping, ignore the “rib” name entirely and hunt for these specifics:
- Fat streaks are non-negotiable: Visible white marbling = built-in moisture insurance
- Thickness matters: Aim for uniform 1½-inch pieces (slice oversized chunks)
- Weight check: 6-8 oz per serving ensures even cooking
- Avoid “loin” labels: These lack fat and dry out instantly at 370°F+
Pro tip: Boneless shoulder cuts cook 1 minute faster per side than bone-in versions—no thermal buffer means quicker crisping. A 2-pound batch serves 3-4 and fits perfectly in 5-6 quart air fryers.
Prep Like a Pitmaster: The 4-Step Dry-Out Method
Cold ribs = steamed ribs. Never skip the 20-30 minute room temperature rest—this relaxes muscle fibers so heat penetrates evenly. Then execute the critical dry-out ritual:
- Pat obsessively: Use 3-4 paper towels per piece until no moisture transfers
- Trim strategically: Only remove large external fat caps (¼-inch+), never touch marbling
- Oil the meat, not the basket: Lightly coat ribs with olive oil if sticking occurs
- Uniform sizing: Cut thick sections into equal weights (6-8 oz)
Why this works: Surface moisture creates steam, sabotaging crispness. Dry ribs form an instant crust when they hit the hot basket. Skipping the oil-on-basket rule damages non-stick coatings—your ribs will release naturally once properly seared.
Dry Rubs That Actually Stick (No More Seasoning Dust)
The rub disaster fix: Moisture is the enemy. Apply seasoning only after ribs are bone-dry. Massage blends into every crevice until tacky—this creates the pellicle (flavor-adhering surface) essential for crust formation. Let rest 20 minutes for salt penetration before cooking.
The 4-Ingredient Emergency Rub (Ready in 60 Seconds)
- 1 Tbsp smoked paprika
- 2 tsp garlic powder
- 1 tsp kosher salt
- ½ tsp black pepper
Classic BBQ Blend (For Deep Flavor)
- 2 Tbsp brown sugar
- 1½ tsp smoked paprika
- 1 tsp each: garlic powder, onion powder
- ½ tsp each: cumin, oregano, dry mustard
- ¼ tsp black pepper
Critical application tip: If rub won’t stick, you missed moisture. Re-dry ribs immediately—no amount of oil compensates for wet surfaces.
Master the 370°F Sweet Spot: Timing Matrix for Perfect Crispness
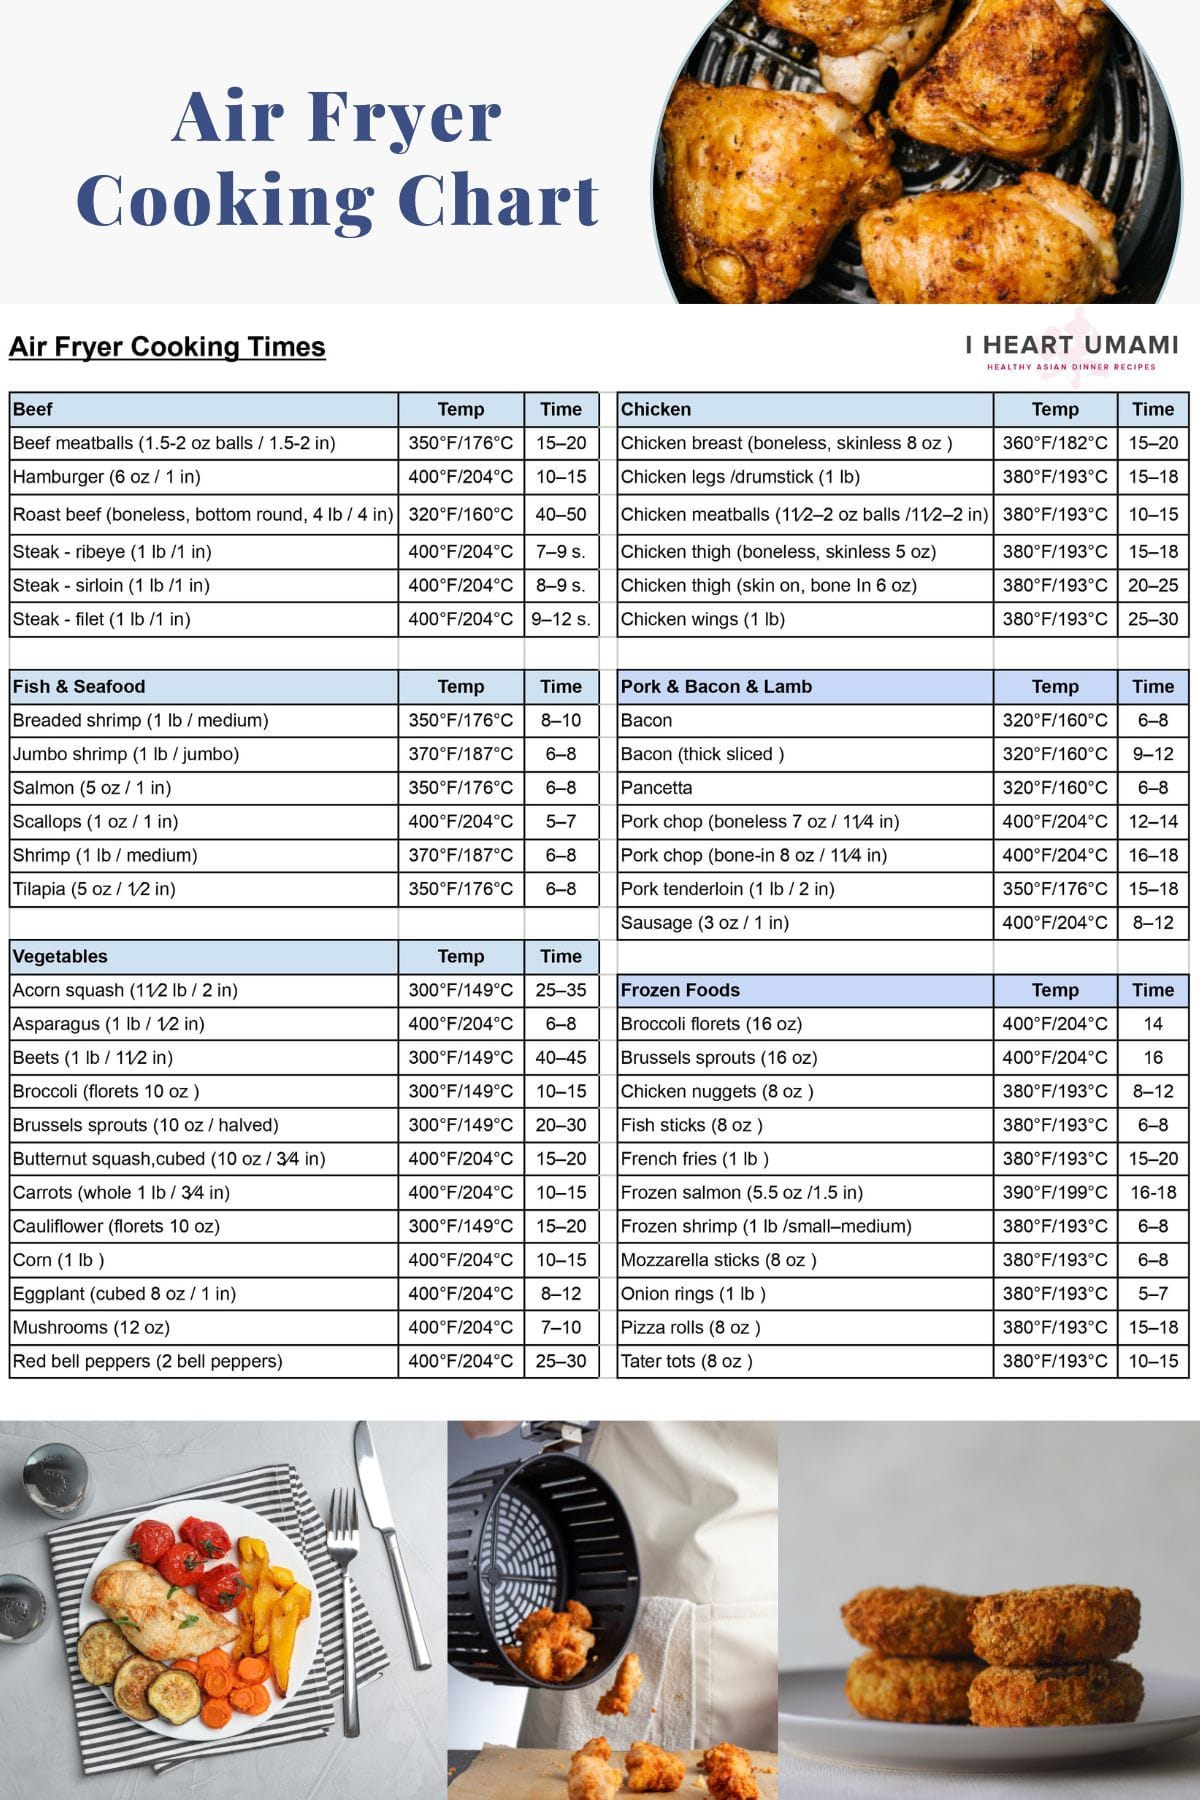
Forget 400°F myths—370-385°F is the ideal range. Higher temps scorch rubs before meat cooks through. Follow this exact timing based on thickness:
| Thickness | First Side | Flip Point | Second Side | Internal Target |
|---|---|---|---|---|
| 1-inch | 8 minutes | Golden edges | 8 minutes | 145°F (63°C) |
| 1½-inch | 10 minutes | Deep brown crust | 10 minutes | 145°F (63°C) |
Non-negotiable rules:
– Preheat 3-5 minutes (no cold-start shortcuts)
– Single layer only—½ inch spacing between pieces
– Flip ONCE at halfway mark using silicone-tipped tongs
– Insert thermometer horizontally into thickest section
Overcrowding causes steaming—not searing. If cooking >1.5 lbs, batch cook. Bone-in pieces add 1 minute per side.
Sauce Without Burning: The 140°F Golden Rule
Saucing too early = bitter, blackened ribs. Wait until ribs hit 140°F internal temperature before applying. This prevents sugar in sauces from burning during extended cooking. For perfect caramelization:
- Brush sauce only during final 2-3 minutes
- Increase temp to 400°F for intense glaze formation
- Use silicone brushes for even, non-dripping coats
Flavor-specific timing:
– BBQ sauce + honey: Apply at 140°F, caramelize 3 minutes
– Asian soy-hoisin: Wait until last 10 minutes (soy sauce burns fast)
– Spicy chipotle: Add after flip to prevent capsaicin scorching
Never submerge ribs in sauce—thin, even layers create lacquer-like finishes.
Fix These 4 Air Fryer Rib Disasters Immediately
Dry, tough ribs? You either overshot 145°F or bought lean loin cuts. Solution: Target 145°F exactly (carryover cooking adds 5°F during rest) and verify “shoulder” labeling. Shoulder cuts stay juicy up to 185°F if shredding—but not for air frying.
Uneven browning? Basket overcrowding is the culprit 9 times out of 10. Fix: Reduce batch size by 30% and space pieces like “ribs on a grill.” No touching allowed.
Burnt sauce? You added it too early or exceeded 400°F during caramelization. Prevention: Sauce only when thermometer reads 140°F and never exceed 400°F for >3 minutes.
Rub slides off? Surface moisture sabotaged adhesion. Solution: Dry ribs with fresh paper towels before reapplying seasoning—no oil fixes this.
Reheat Like It’s Fresh: The 10-Minute Revival
Never microwave ribs—you’ll destroy crispness. Instead:
– Air fryer method: 275°F for 5-7 minutes, brush with fresh sauce at 2-minute mark
– Oven backup: 275°F covered for 10 minutes, uncovered for 5
– Critical: Thaw frozen ribs overnight in fridge first—never reheat from frozen
Pro tip: Double-wrap leftovers in foil before freezing. Vacuum-sealing prevents freezer burn for up to 3 months.
Your 25-Minute Dinner Timeline (From Fridge to Plate)
0-5 min: Temper ribs while preheating air fryer to 370°F
5-10 min: Pat dry, apply rub, arrange in single layer
10-18 min: Cook first side (8 min for 1-inch pieces)
18-20 min: Flip, cook second side
20-22 min: Sauce at 140°F internal temp
22-24 min: Caramelize at 400°F
24-25 min: Rest 5 minutes (carryover cooking completes the job)
Result: Crispy, caramelized edges with juicy, pull-apart centers—all before your takeout would arrive. No preheating ovens, no outdoor grilling, no smoke alarms.
Must-Have Tools for Foolproof Ribs
- Instant-read thermometer: Non-negotiable for hitting 145°F (under $15)
- Silicone-tipped tongs: Prevents basket scratches during flips
- 5-6 quart air fryer: Minimum size for 2-lb batches without crowding
- Olive oil spray: For ribs only—never spray baskets directly
Pro secret: Lightly oil ribs (not the basket) with avocado oil if sticking occurs. Its high smoke point won’t compromise crispness.
Your air fryer just became the ultimate rib kitchen. With these exact techniques—dry ribs, 370°F precision, and 140°F saucing—you’ll serve restaurant-worthy boneless ribs faster than delivery apps. No more dry, chewy disappointments. Tonight, you’ll hear forks scrape plates clean while wondering why you ever paid $28 for takeout ribs. The secret’s out: perfect air fryer ribs take less time than setting the table. Now go fire up that countertop hero.

