
There’s nothing more frustrating than slicing into a beautifully golden chicken breast only to find it dry and stringy inside. But with your Chefman air fryer, you can consistently achieve restaurant-quality chicken with minimal effort. The rapid hot air circulation creates a crispy exterior while sealing in juices that traditional oven cooking often loses. Whether you’re using the compact 3.5L model for solo meals or the 10L XL for family dinners, mastering chicken breast cooking transforms your air fryer from a countertop gadget into your most valuable kitchen tool.
This comprehensive guide delivers precise instructions for cooking chicken breast in every Chefman air fryer model. You’ll discover exactly how long to cook chicken breast in Chefman air fryer units, the ideal temperature settings for juicy results, and professional techniques that prevent the common pitfalls of dry or unevenly cooked poultry. No more guessing games—just perfectly cooked chicken every single time.
Chefman Air Fryer Model-Specific Temperature Settings
3.5L Compact Model (1000W) Cooking Protocol
Set your temperature dial to 380°F for optimal chicken breast results in this compact unit. The smaller cooking chamber heats rapidly but requires attentive monitoring to prevent overcooking. Position the rack in the middle position to ensure even air circulation around the chicken. This model works best with one or two standard-sized breasts at a time—any more will crowd the basket and create steamed rather than air-fried results. Always preheat for 3 minutes before adding your chicken to establish proper cooking conditions from the start.
6.3L Digital Model (1700W) Precision Cooking
Maximize your digital model’s capabilities by using the dedicated “Chicken” preset function or selecting 375°F manually for precise temperature control. The digital display allows adjustments in 5-degree increments, giving you fine-tuned control over the cooking process. Unlike analog models, this unit maintains consistent temperature throughout cooking without fluctuations. Preheat for the full 3 minutes recommended in your manual—this step is crucial for achieving that perfect sear while keeping the interior moist. The larger capacity accommodates 3-4 chicken breasts without compromising air circulation.
10L XL Rotisserie Model (1700W) Family-Size Techniques
For the XL model, select 380°F on the digital panel or activate the “Air Fry” function for superior results with multiple chicken breasts. The rotisserie feature creates exceptionally even browning, but for standard chicken breast cooking, the air fry function works best. When cooking multiple breasts, rotate the tray halfway through cooking to ensure uniform exposure to the heating element. The expansive cooking space allows you to prepare 6-8 chicken breasts simultaneously without sacrificing quality—just remember to leave adequate space between pieces for proper air circulation.
Perfect Timing for Different Chicken Breast Sizes
Standard 4-6 Ounce Chicken Breast Method
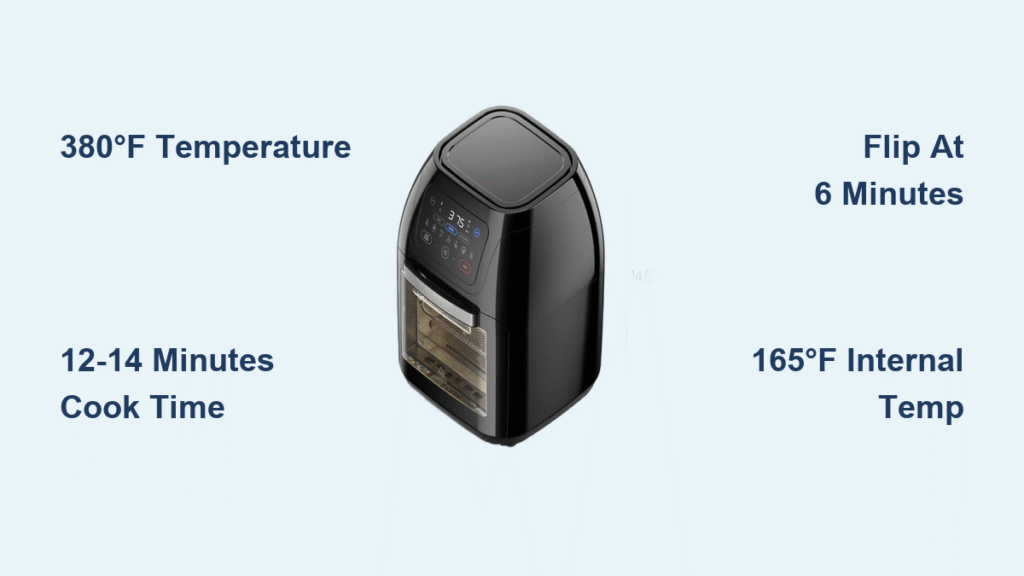
For most grocery store chicken breasts, set your Chefman air fryer to 380°F and cook for 12-14 minutes. Flip the chicken at the 6-minute mark using tongs to expose both sides to direct heat. Check internal temperature at 12 minutes with an instant-read thermometer—remove when it reaches 163°F as carryover cooking will bring it to the safe 165°F during resting. These smaller portions require minimal attention but benefit from resting 5 minutes before slicing to redistribute juices throughout the meat.
Larger 8-10 Ounce Portions Technique
Thicker, restaurant-style chicken breasts need special attention in your Chefman air fryer. Cook at a slightly lower 375°F for 16-18 minutes to prevent exterior burning before the interior reaches safe temperature. Flip the chicken twice during cooking—once at 6 minutes and again at 12 minutes—to ensure even browning. If thinner ends begin browning too quickly, shield them with small foil tabs to prevent overcooking while the thicker center finishes. Always verify doneness with a thermometer since visual cues alone can be misleading with larger cuts.
Thin Sliced Cutlets for Quick Meals
For pre-sliced cutlets or butterflied chicken breasts, increase the temperature to 400°F and cook for just 8-10 minutes. The high heat creates instant browning on these thinner pieces without drying them out. No flipping is necessary—simply arrange cutlets in a single layer with space between them. These cook so quickly that constant monitoring is essential; check at 7 minutes to prevent overcooking. Perfect for salads and sandwiches, these cook in less than half the time of standard portions.
Cooking Frozen Chicken Breast Without Compromising Quality
Direct from Freezer Cooking Method
When you forget to thaw chicken, your Chefman air fryer saves the day. Increase the temperature by 15°F and add 50% more cooking time compared to fresh chicken. For a standard 6-ounce frozen breast, set to 395°F for 18-22 minutes. Separate breasts that may have frozen together after the first 10 minutes of cooking. Hold off on seasoning until the last 5 minutes to prevent moisture loss—salt draws out liquid that evaporates in the air fryer. Always verify doneness with a thermometer since frozen chicken can appear cooked externally while remaining unsafe internally.
Quick Thaw Technique for Better Results
For superior texture, use your air fryer’s gentle heat to partially thaw frozen chicken before full cooking. Place frozen breasts in the basket at 300°F for 5 minutes, then remove and season properly. Return to the air fryer and cook at your standard temperature (375-380°F). This two-stage process prevents the common problem of dry edges with a raw center that occurs when cooking frozen chicken at high temperatures. The gentle initial warming allows for more even seasoning penetration and moisture retention.
Essential Chicken Breast Preparation Steps
Critical Pre-Cooking Setup Routine
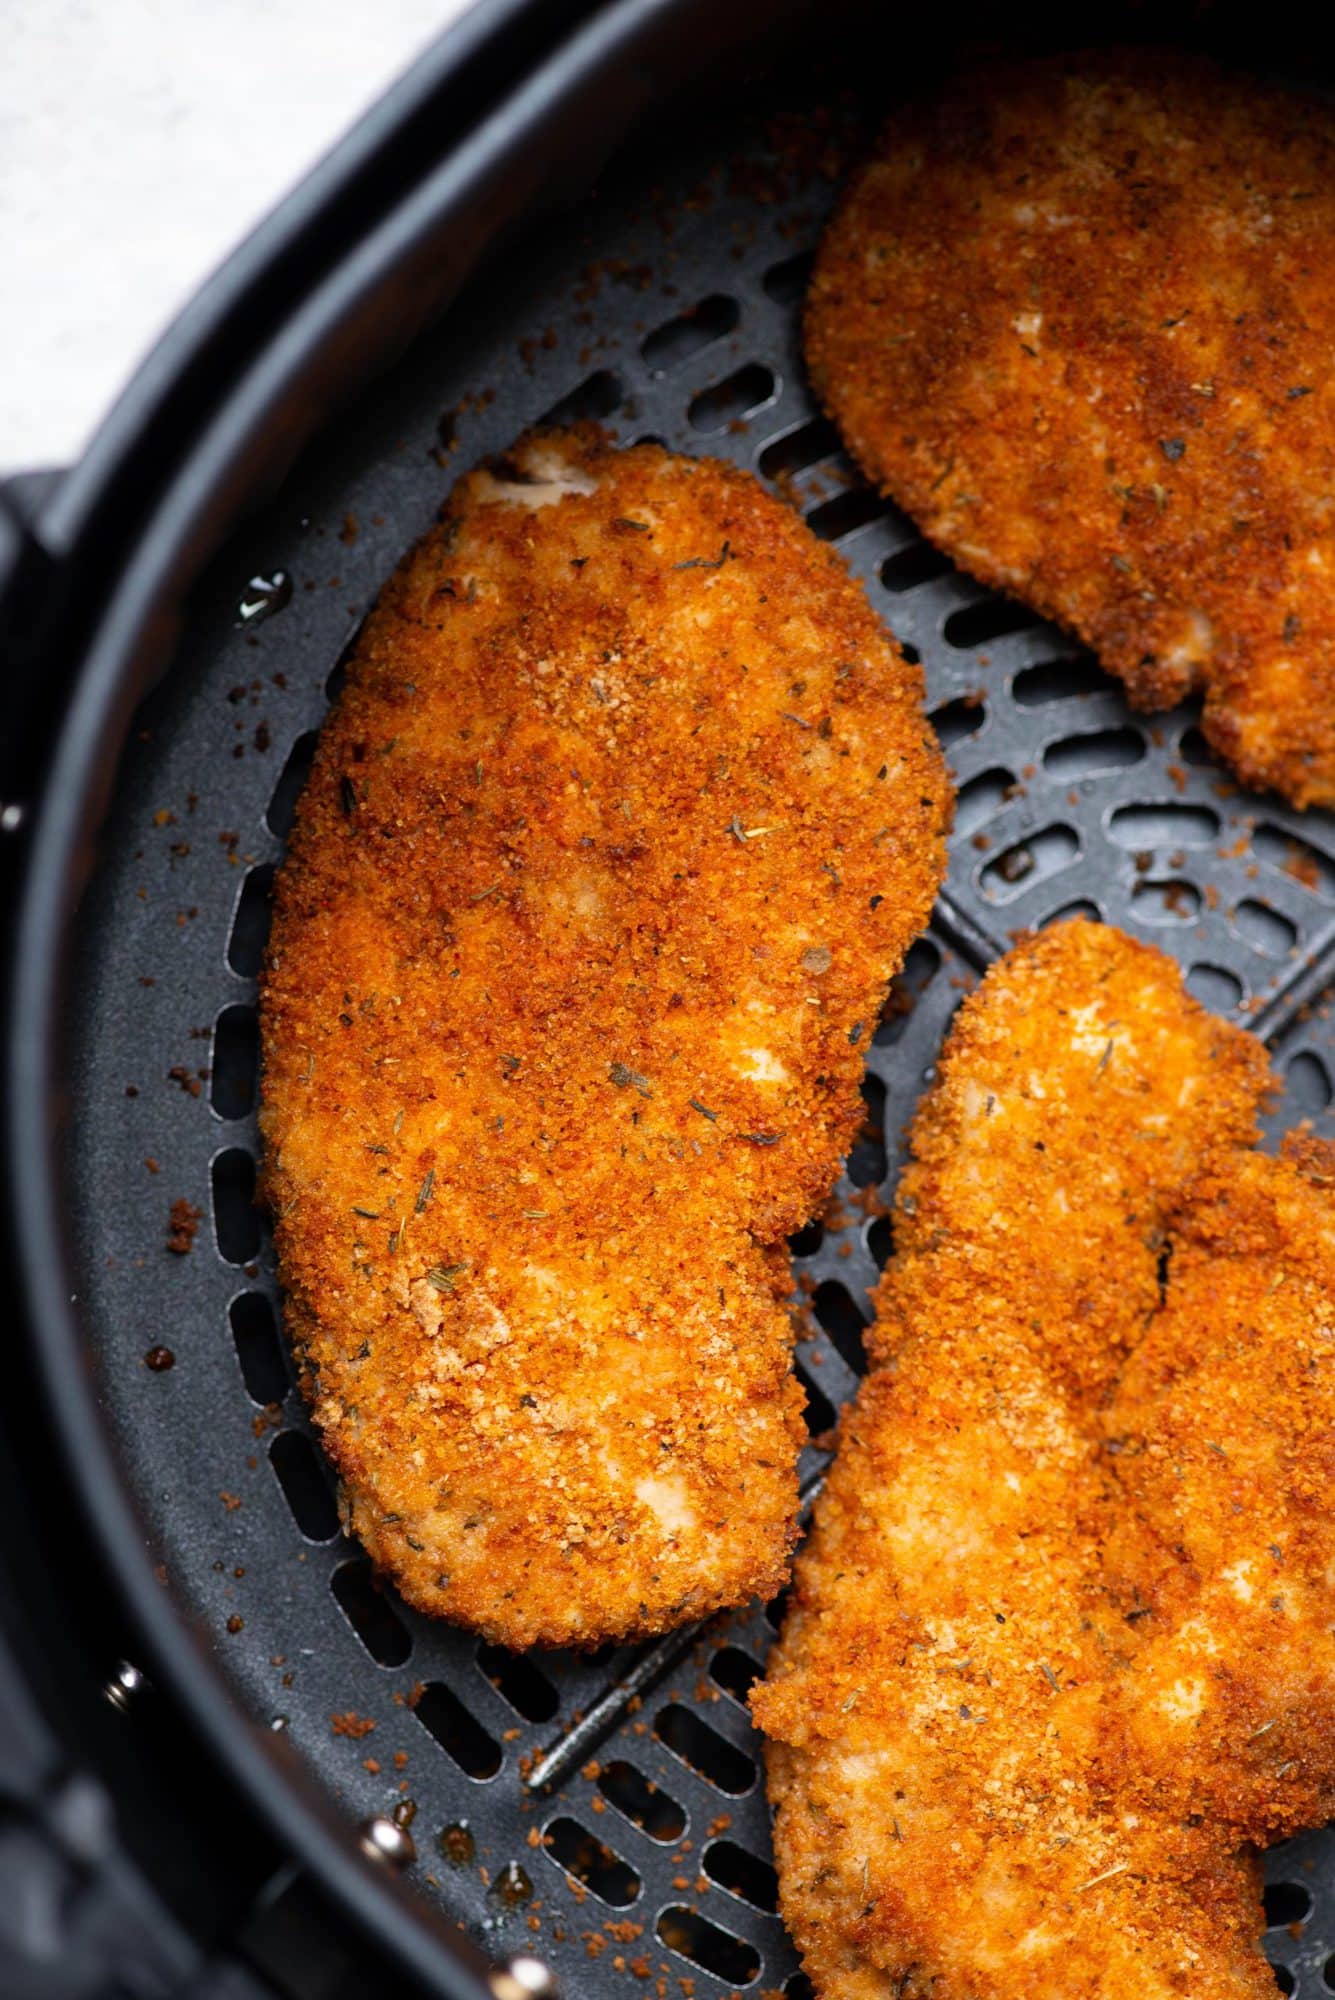
Achieving perfect results starts before the air fryer even turns on. Pat chicken completely dry with paper towels—this simple step creates the ideal surface for browning. Lightly coat both sides with exactly 1 teaspoon of olive oil per breast; too much causes smoking, too little prevents proper crisping. Season generously 15 minutes before cooking to allow flavors to penetrate the surface. Finally, preheat your Chefman air fryer for the full recommended time—this creates the immediate sear that locks in juices from the first moment.
Flavor Building Seasoning Combinations
Transform basic chicken with these chef-tested seasoning blends. For classic preparation, combine ½ teaspoon each of salt, black pepper, and garlic powder per breast. Create Italian-inspired chicken with ¼ teaspoon dried oregano, basil, and grated parmesan mixed with olive oil. Make spicy chicken by blending ½ teaspoon paprika, ¼ teaspoon cayenne, and 1 teaspoon brown sugar for caramelization. For lemon herb chicken, zest one lemon and mix with 1 teaspoon fresh thyme and rosemary before applying.
Avoiding Common Chefman Air Fryer Mistakes
Temperature Troubleshooting Guide
Setting the temperature too high (above 400°F) creates a burnt exterior with a raw center—a common mistake with impatient cooks. Conversely, temperatures below 360°F result in rubbery, steamed texture rather than properly air-fried chicken. The sweet spot for chicken breast in any Chefman model is consistently between 375-380°F. If your unit runs hot or cold (common with older models), adjust accordingly but always stay within this range for optimal results.
Timing Error Prevention Strategies
Overcooked chicken becomes dry and stringy, while undercooked chicken poses food safety risks. Never rely solely on cooking time—always use an instant-read thermometer. Remove chicken at 163°F as residual heat during resting will bring it to the safe 165°F. For visual cues, properly cooked chicken should feel firm but spring back slightly when pressed, and juices should run clear when pierced with a fork. If you see pink in the thickest part, return to the air fryer for 2-minute increments until safe.
Crispy Finish Techniques for Restaurant-Quality Results
Final Browning Boost Method
For extra-crispy skin or edges, increase the temperature to 400°F for the final 2 minutes of cooking. Watch closely through the viewing window to prevent burning—this step happens quickly. The intense final blast of heat creates professional-level browning without overcooking the interior. This technique works particularly well for skin-on chicken breasts or when preparing chicken for presentations where appearance matters.
Oil Application Secrets
The difference between mediocre and exceptional chicken often comes down to oil application. Instead of heavy brushing, lightly mist both sides with olive oil spray for even coverage without excess calories. Apply oil after seasoning to help spices adhere and create a flavorful crust. For skin-on chicken, gently lift the skin and apply a small amount directly to the meat surface for maximum moisture retention.
Proper Storage and Reheating for Leftover Chicken
Cooling Protocol for Texture Preservation
After cooking, transfer chicken to a wire rack—not a plate—to cool for 10 minutes before storing. This prevents the bottom from becoming soggy as residual heat continues to cook the meat. Cooling on a rack maintains the crispy exterior that makes air fryer chicken special. Never store warm chicken in airtight containers, as trapped steam creates a rubbery texture when reheated.
Reheating Instructions for Perfect Leftovers
Revive leftover chicken by returning it to your Chefman air fryer at 350°F for 3-4 minutes. This reheating method restores the crispy texture that microwaves destroy. Place chicken in a single layer with space between pieces for optimal air circulation. Avoid adding additional oil during reheating unless the chicken appears particularly dry. For meal prep success, store properly cooled chicken in parchment paper between layers rather than plastic containers to maintain texture.
Mastering how to cook chicken breast in Chefman air fryer units delivers consistent, healthy meals with minimal effort. The precise temperature control and rapid cooking create juicy, flavorful chicken that forms the foundation for countless meals. Once you dial in these exact settings for your specific model, perfectly cooked chicken becomes as simple as pressing a few buttons—no more dry, disappointing results. Implement these techniques tonight and transform your weeknight dinners forever.


