
Your Instant Pot air fryer just arrived, and you’re staring at two lids, three baskets, and a control panel with more buttons than your TV remote. Don’t worry—this versatile appliance isn’t as intimidating as it looks. Whether you’re craving crispy wings without the oil or want to pressure-cook then crisp a whole chicken, how to cook in an Instant Pot air fryer is simpler than you think. In just 20 minutes, you can transform frozen chicken breasts into golden perfection or roast vegetables with restaurant-quality char. This guide cuts through the confusion to deliver exactly what you need: actionable steps for flawless results every time.
Instant Pot Air Fryer Models Explained

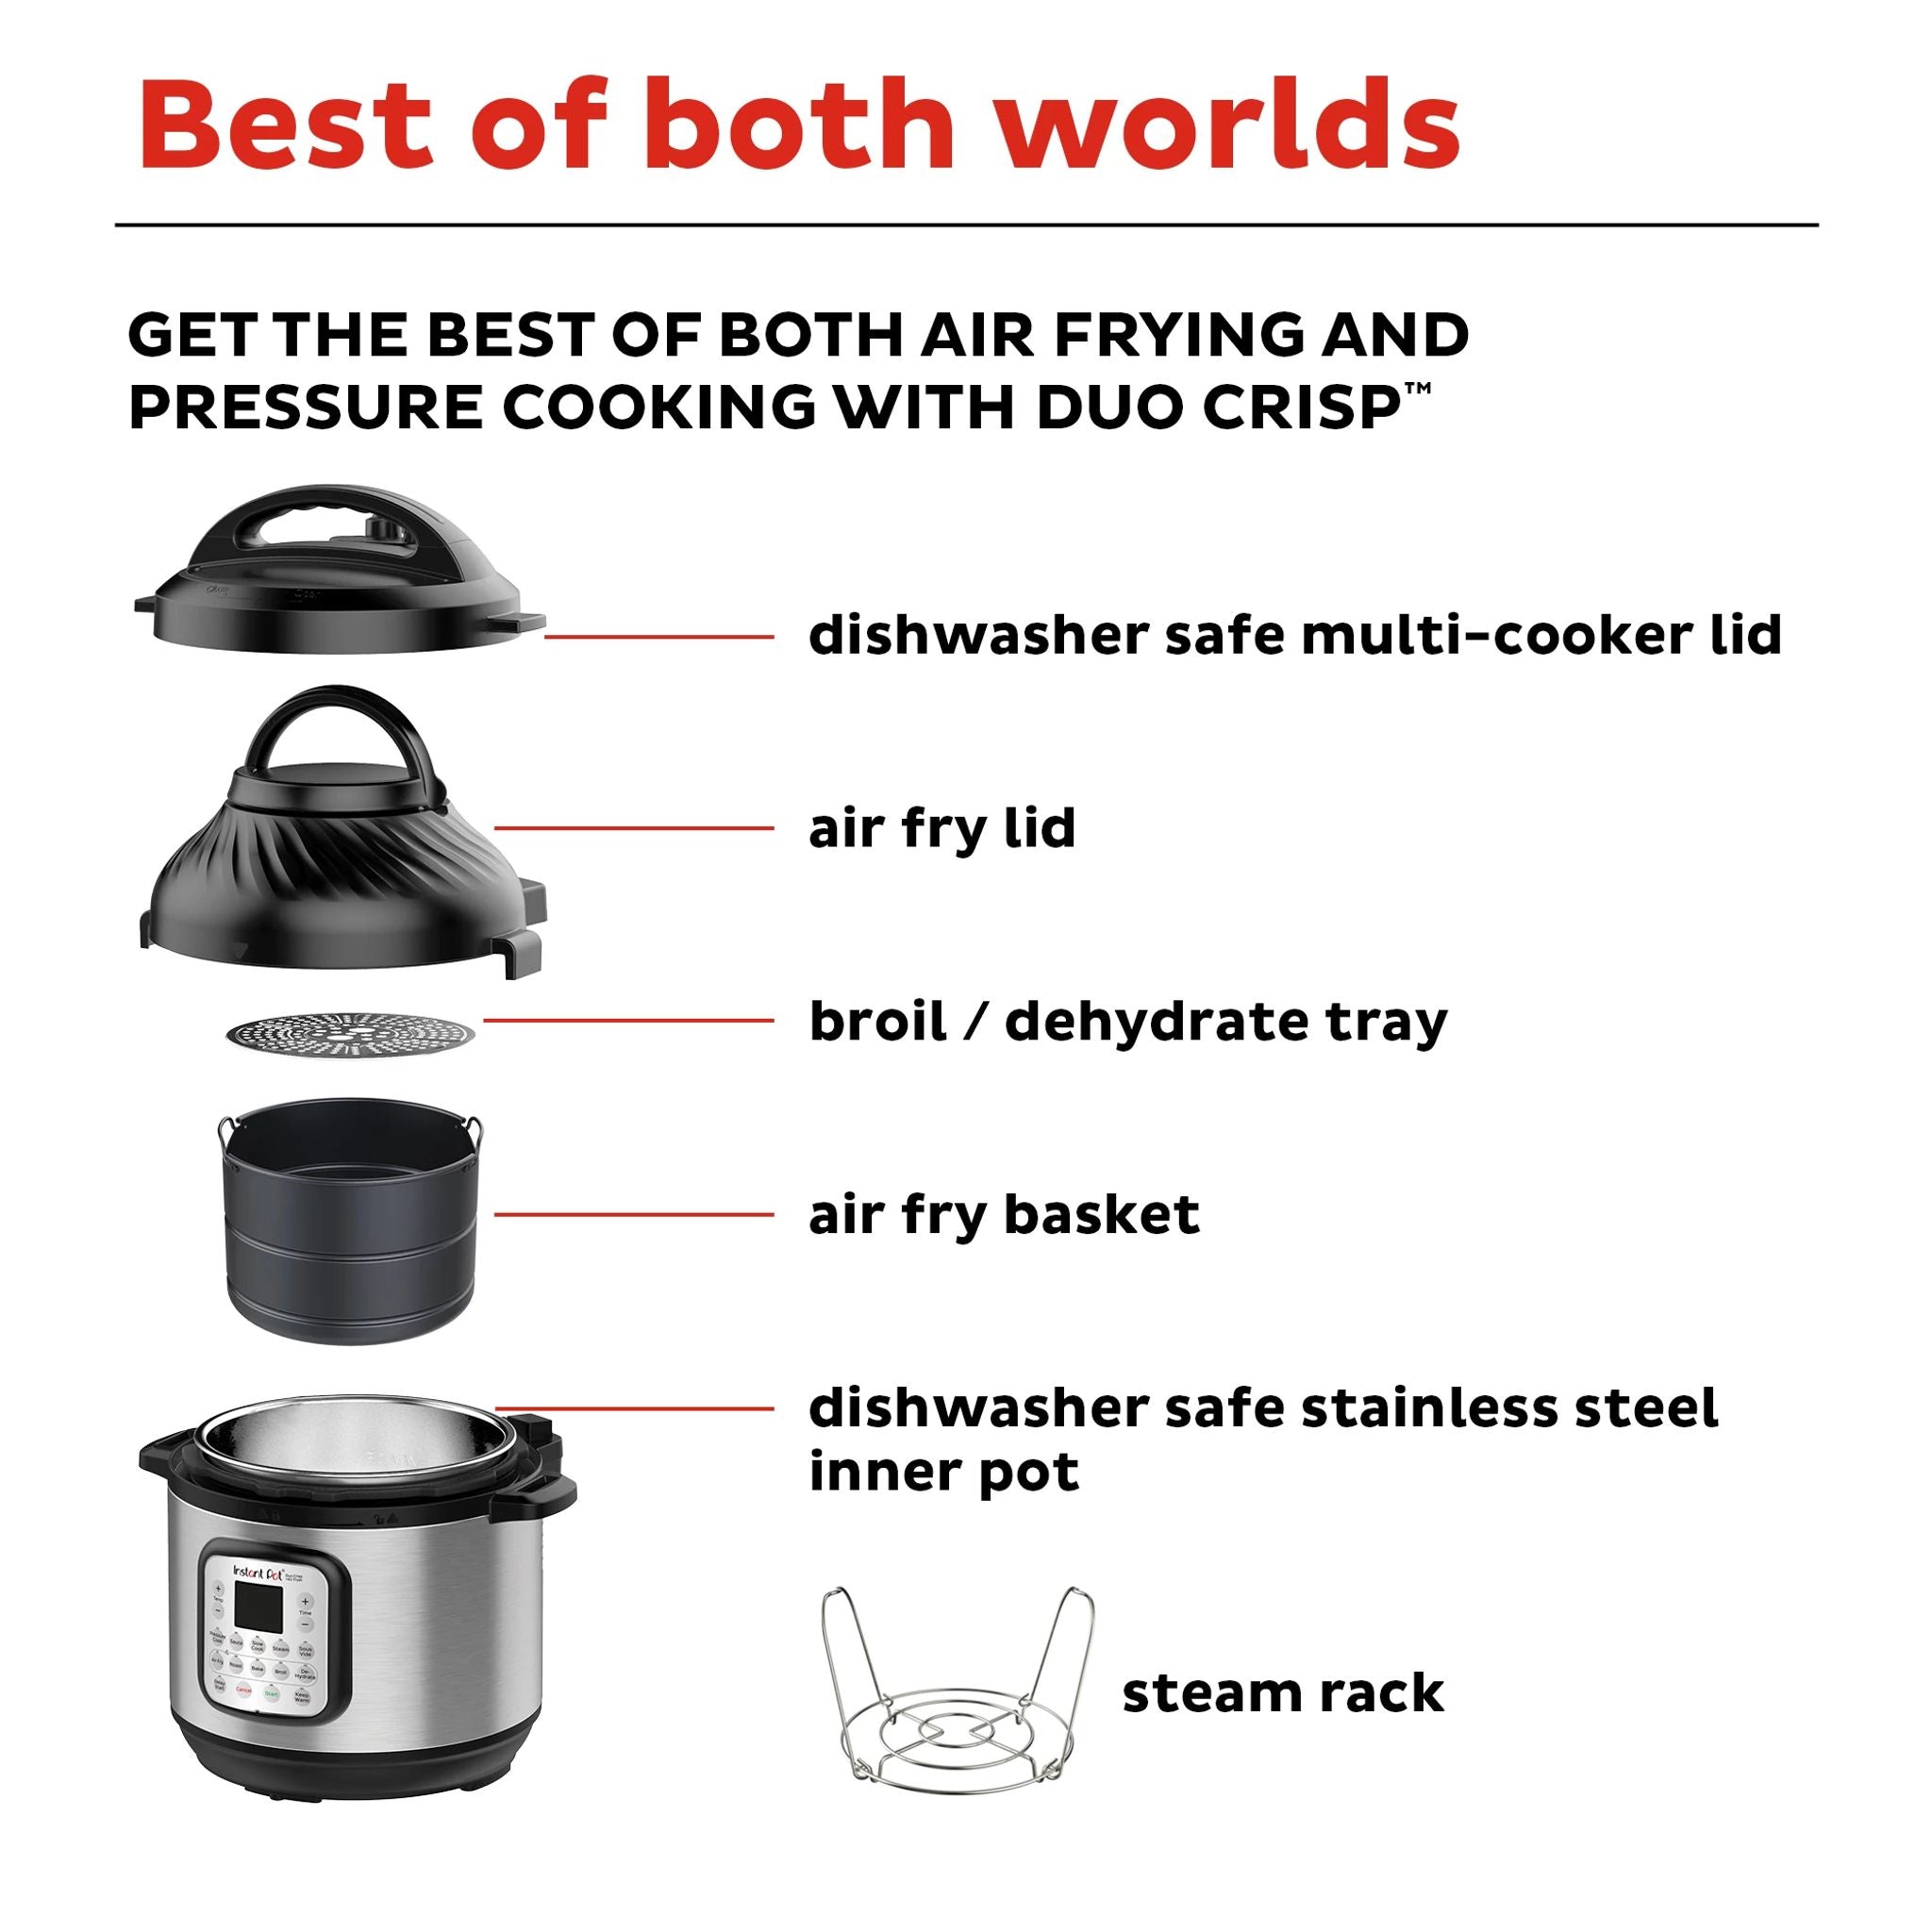
Duo Crisp vs Pro Crisp vs Air Fryer Lid
The Duo Crisp combines pressure cooking and air frying with separate lids you’ll swap between. The Pro Crisp offers the same functions with enhanced controls and a sleeker design. If you already own an Instant Pot, the Air Fryer Lid simply transforms your existing unit. For dedicated air frying, the Instant Vortex operates independently as a convection oven-style appliance. Choose based on your needs: Duo/Pro Crisp for combo cooking, Air Fryer Lid for budget flexibility, or Vortex for pure air frying power.
Essential Components Checklist
Before your first cook, verify these parts are in your box:
– Multi-level air fry basket with non-stick coating
– Basket base for stability
– Broil/dehydrating tray for second-level cooking
– Protective pad for hot lid placement
– Inner pot (same as standard Instant Pots)
Missing any piece? Contact support immediately—never substitute parts.
Safe Setup and Assembly Steps
Initial Assembly Process
Slide the inner pot into the base until it sits flush. Choose your cooking method first—this determines which accessories you’ll install. Lightly coat any basket or tray with olive oil spray to prevent sticking, even if your food contains natural oils. The air fryer lid only attaches when you’re ready to cook; never force it onto pressure-cook mode. For pressure cooking, swap lids completely—never attempt air frying with the pressure lid.
Critical Safety Rules
Every component becomes dangerously hot—use oven mitts for everything, including the protective pad. Position your unit away from cabinets and ensure 6 inches of clearance on all sides for proper ventilation. The protective pad isn’t optional; it’s your countertop’s lifeline when that 400°F lid needs a resting place. Never leave the appliance unattended during air frying cycles, and keep children at least 3 feet away.
Three Main Cooking Methods
Single-Layer Air Fryer Basket Technique
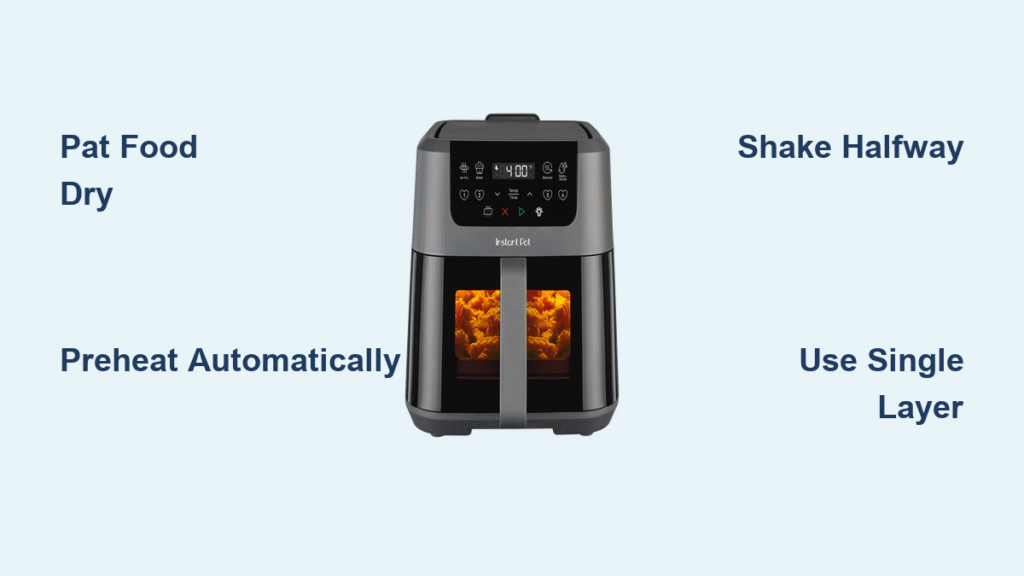
Perfect for french fries or roasting vegetables, this method maximizes crispiness. Spread ingredients in a single layer—crowding leads to steaming instead of crisping. Set temperature and time using the +/- buttons; the unit remembers your last settings. When you hear the mid-cook beep, shake or flip ingredients for even browning. Lifting the lid pauses cooking automatically, so open only when necessary.
Dual-Level Cooking with Broil Tray
Stack meat chops on the broil tray above the basket base, creating two cooking zones. This technique works brilliantly for lamb cutlets and sausages. Switch ingredients between levels halfway through cooking—bottom pieces often finish faster. The broil tray doubles as a dehydrator for making kale chips or dried fruit. For optimal results, place fattier cuts (like pork chops) on the top tray to let rendered fat drip away.
Stainless Steel Steamer Basket Method
Avoid non-stick coatings by using mesh steamer baskets positioned inside the inner pot. This brings food closer to the heating element, reducing cook times by 15-20%. Dual baskets enable cooking two different foods simultaneously—think asparagus in one, potatoes in another. Rotate baskets midway for uniform results. Best for delicate items like fish fillets that might stick to standard baskets.
Temperature and Time Mastery
Quick Reference Chart
| Food | Weight | Temp | Time |
|---|---|---|---|
| Whole chicken | 4 lbs | 400°F | 60 min |
| Chicken legs | 1.3 lbs | 374°F | 40 min |
| Lamb chops | 1.1 lbs | 374°F | 15 min |
| Sausages | 1.5 lbs | 400°F | 17 min |
| Steak (medium) | 1.25 lbs | 400°F | 16 min |
Pro Tip: For frozen foods, add 5-8 minutes to cook times. Always check internal temperatures—chicken must hit 165°F.
Preheating Protocol
Unlike traditional ovens, Instant Pot air fryers preheat automatically. Press ‘Start’ and the unit heats before the countdown begins—no manual preheating needed. This saves 5-10 minutes compared to conventional methods. Never add food during preheating; wait for the beep confirming target temperature is reached.
Cleaning Made Simple
Dishwasher-Safe Components
Everything except the cooker base and air fryer lid goes in the dishwasher:
– Inner pot
– All baskets and trays
– Protective pad
– Broil/dehydrating tray
Run on a gentle cycle with mild detergent—avoid abrasive cleaners that damage non-stick coatings.
Hand-Washing Essentials
The cooker base wipes clean with a damp cloth—never submerge it. For the air fryer lid, wait until completely cool, then wipe with a damp cloth. Remove stubborn food residue using a soft brush and mild detergent. Always dry thoroughly before reassembly to prevent moisture damage. Never use steel wool or oven cleaners.
Pro-Level Cooking Techniques
Pressure Cook Then Crisp Method
Transform tough cuts into restaurant-quality dishes. Pressure cook ribs for 30 minutes to tenderize, then air fry at 400°F for 10 minutes to caramelize the exterior. This technique works magic on whole chickens—pressure cook first for juicy meat, air fry to crisp the skin. For salmon, pressure cook 3 minutes, then air fry 5 minutes at 370°F for flaky perfection with crispy skin.
Multi-Stage Lasagna Method
Build lasagna in a 7-inch springform pan using a foil sling for easy removal. Pressure cook layers for 20 minutes, then switch to air fry mode at 500°F for 3-5 minutes until cheese bubbles and browns. The same approach creates perfect potato gratin—pressure cook sliced potatoes with cream, add cheese layer, then crisp the top. Always let pressure-cooked dishes rest 5 minutes before air frying.
Recipe Categories for Beginners
15-Minute Weeknight Meals
Start with foolproof options like frozen chicken breasts seasoned with simple spices. Air fry at 370°F for 13-15 minutes, checking doneness at the 13-minute mark. For crispy pork chops, season both sides, cook at 400°F for 20 minutes, flipping halfway through. Critical step: Pat proteins bone-dry before seasoning—moisture is the enemy of crispiness.
Side Dish Shortcuts
Roasted potatoes become effortless—cube, toss with oil and seasoning, then air fry at 400°F for 20-25 minutes, shaking twice. Brussels sprouts transform into caramelized bites at 375°F for 15 minutes with just olive oil and salt. Even baked potatoes crisp perfectly at 400°F for 35-40 minutes. Warning: Overcrowding causes steaming—use batches for best results.
Snack Attack Solutions
Frozen french fries achieve restaurant quality at 400°F for 15-18 minutes—no thawing required. Chicken wings crisp beautifully at 380°F for 25-30 minutes, finished with your favorite sauce. For healthier options, kale chips need just 300°F for 5-7 minutes with a light oil mist. Shake baskets twice during cooking for even crispness.
Troubleshooting Common Issues
Food Sticking Solutions
Always oil your baskets and food lightly—even non-stick coatings benefit from this insurance. For stubborn sticking, soak baskets in hot soapy water for 10 minutes before scrubbing gently. Never use metal utensils on coated surfaces. If food sticks mid-cook, pause the cycle and carefully loosen edges with silicone tongs.
Uneven Cooking Fixes
Avoid overcrowding; cook in batches instead. Shake or flip food at the halfway beep. For larger items like chicken breasts, rotate positions halfway through cooking since back corners often cook faster. If one side browns quicker, shield it with foil during the final minutes.
Capacity Limitations
When cooking for more than 3-4 people, embrace batch cooking. The first batch stays warm while subsequent batches cook. Alternatively, use the dual-level method with broil tray to double capacity for smaller items like cutlets or sausages. Never exceed the “MAX” line on baskets—it compromises airflow and safety.
Maintenance Schedule
Daily Care
Empty crumb tray after each use. Wipe the air fryer lid once cool to prevent buildup. Store with lid slightly ajar to prevent moisture trapping. Check heating element for grease splatters—if visible, wipe gently with damp cloth after cooling completely.
Weekly Deep Clean
Remove all accessories, dishwasher-safe parts go through normal cycle. Hand-wash inner pot if dishwasher isn’t available. Check heating element for residue and wipe gently with damp cloth. Run a vinegar-water cycle (1 cup vinegar + 1 cup water) monthly to eliminate odors.
Your First Perfect Meal: Spice-Rubbed Chicken
Ingredients:
– 2 boneless chicken breasts (6 oz each)
– 1½ teaspoons paprika
– ¼ teaspoon cayenne
– ½ teaspoon each: garlic powder, onion powder, salt
– ¼ teaspoon black pepper
– 1 tablespoon olive oil
Steps:
1. Pat chicken completely dry—moisture prevents browning
2. Mix spices in small bowl
3. Rub chicken with oil, then coat thoroughly with spice mixture
4. Place in single layer in air fryer basket
5. Cook at 370°F for 13 minutes
6. Check internal temperature reaches 165°F
7. Rest 5 minutes before serving
This yields juicy chicken with a crispy spice crust—234 calories per serving, 37g protein, perfect for meal prep.
Master how to cook in an Instant Pot air fryer by starting with these basics, then experiment with combination cooking techniques. The key lies in understanding your specific model’s quirks and embracing the two-step process: pressure for tenderness, air fry for crispiness. Within a week, you’ll wonder how you ever cooked without it.


