

That glass-like crackle when your fork pierces golden pork belly skin—it’s the sound of culinary magic happening right in your countertop appliance. Forget deep-frying messes or oven-waiting marathons; your air fryer delivers restaurant-quality pork belly with shatteringly crisp skin and melt-in-your-mouth meat in under an hour. Whether you’re craving Sunday roast elegance or game-day appetizers, mastering how to cook pork belly in air fryer unlocks crispy perfection without the grease. Discover why home cooks are swapping traditional methods for this streamlined technique that transforms humble pork belly into a showstopper.
Choose the Right Pork Belly Cut for Air Frying
Skip the butcher counter guesswork by requesting boneless, center-cut slabs with even fat-to-meat ratios. Look for thin white fat layers between muscle bands—that’s your quality indicator. For single servings, grab an 800g (1.7 lb) cut; families need 1-1.5kg (2-3 lbs). Always insist on skin-on pork belly—this is non-negotiable for authentic crackling. Skin-off versions cook faster but deliver zero shatter factor, turning into bland, chewy strips. Pro tip: Ask your butcher to score the skin in a cross-hatch pattern if you’re new to knife work. This tiny favor saves you from accidentally cutting into the meat while creating expansion points for blister formation.
Master Knife Techniques for Maximum Crisp
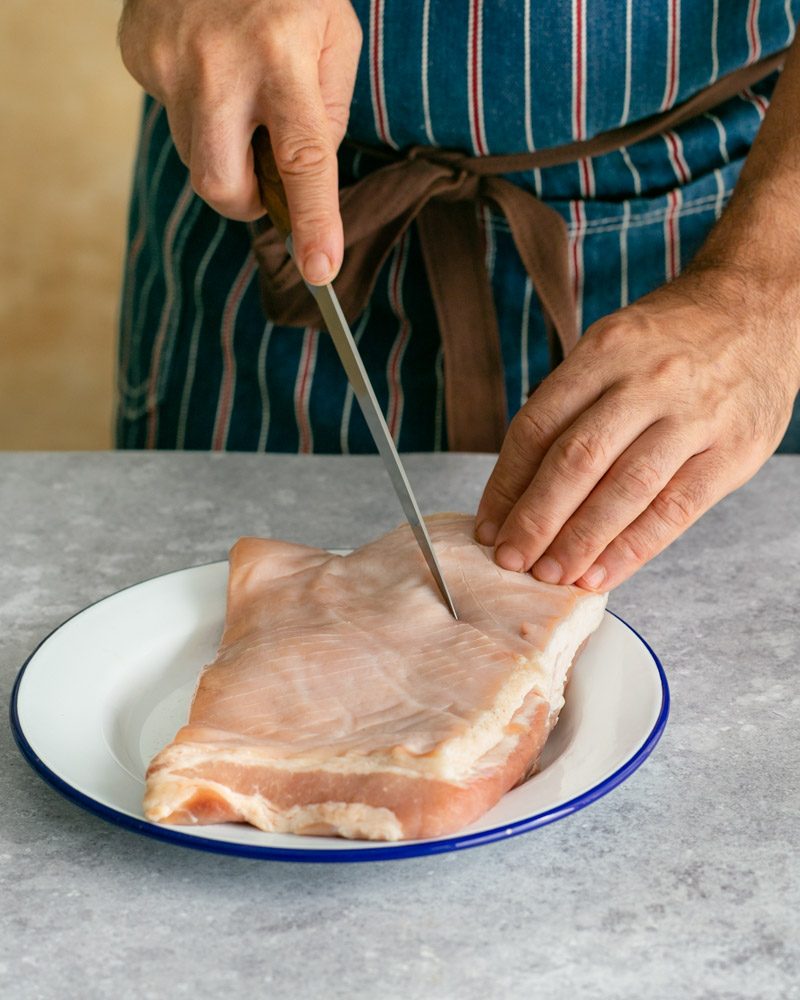
Your knife skills make or break the crackling. For whole roasts, score the skin in 1cm cross-hatch patterns using a sharp boning knife—cut only through skin and fat, never into the meat. This precision creates escape routes for steam, preventing rubbery skin. Transforming pork belly into bite-sized cubes? Cut into 2cm (1 inch) squares or 2.5cm (1 inch) strips, remembering pieces shrink 30% during cooking. For foolproof blistering, poke 100 shallow holes across the skin surface with a skewer. This “needle trick” accelerates moisture release without damaging the meat structure, giving you professional results on your first try.
Eliminate Moisture for Guaranteed Crackling
Moisture is your enemy—here’s how to defeat it. The overnight method delivers unbeatable results: Pat skin bone-dry, place skin-up on a rack, and refrigerate uncovered for 8-24 hours. This dehydrates the surface, creating dramatic puffing during cooking. Short on time? Cover skin with coarse salt for 10 minutes, then wipe and pat dry—the salt draws out moisture instantly. For a quick fix, brush skin with white vinegar before drying; it softens proteins for fluffier bubbles. Never skip this step: Skipping moisture removal guarantees chewy, disappointing skin no matter your cooking technique.
Apply Precision Seasoning Blends
Universal Base Rub for Foolproof Flavor
Combine 3 Tbsp neutral oil, 1 Tbsp brown sugar, 1 tsp kosher salt, 1 tsp garlic powder, and ½ tsp black pepper. Massage this blend into the meat side only—never the skin—to prevent burning. This ratio balances sweetness and saltiness while promoting even browning.
Chinese-Style Paste for Authentic Depth
Mix ½ Tbsp each salt, white pepper, five-spice powder, and sugar with 1 tsp Shaoxing wine. Apply exclusively to the meat surface for aromatic complexity that complements the pork’s richness without overwhelming it.
Crisp-Skin Boost Secret
After drying the skin, dust with 1 tsp baking powder mixed with 1 tsp garlic powder. The alkalinity accelerates Maillard reaction, creating blistered, golden crackling instead of pale, tough skin.
Optimize Air Fryer Setup for Even Cooking
Use 3.5-5.5qt air fryers—they handle 800g-1.2kg slabs perfectly without overcrowding. Models like Ninja Foodi excel at heat circulation, eliminating cold spots. Line the basket with a silicone mat or foil sling to catch rendered fat—cleanup takes seconds. Position the pork belly skin-side up on the rack, ensuring airflow surrounds all sides. Never skip preheating: 3 minutes at 200°C (392°F) creates immediate sizzle for superior crisping.
Execute the Two-Stage Crackling Method
Stage 1 – Low and Slow Rendering: Cook at 120°C (250°F) for 30 minutes. This gently melts fat without burning, turning rubbery layers translucent. Check for liquefied fat pooling beneath the slab.
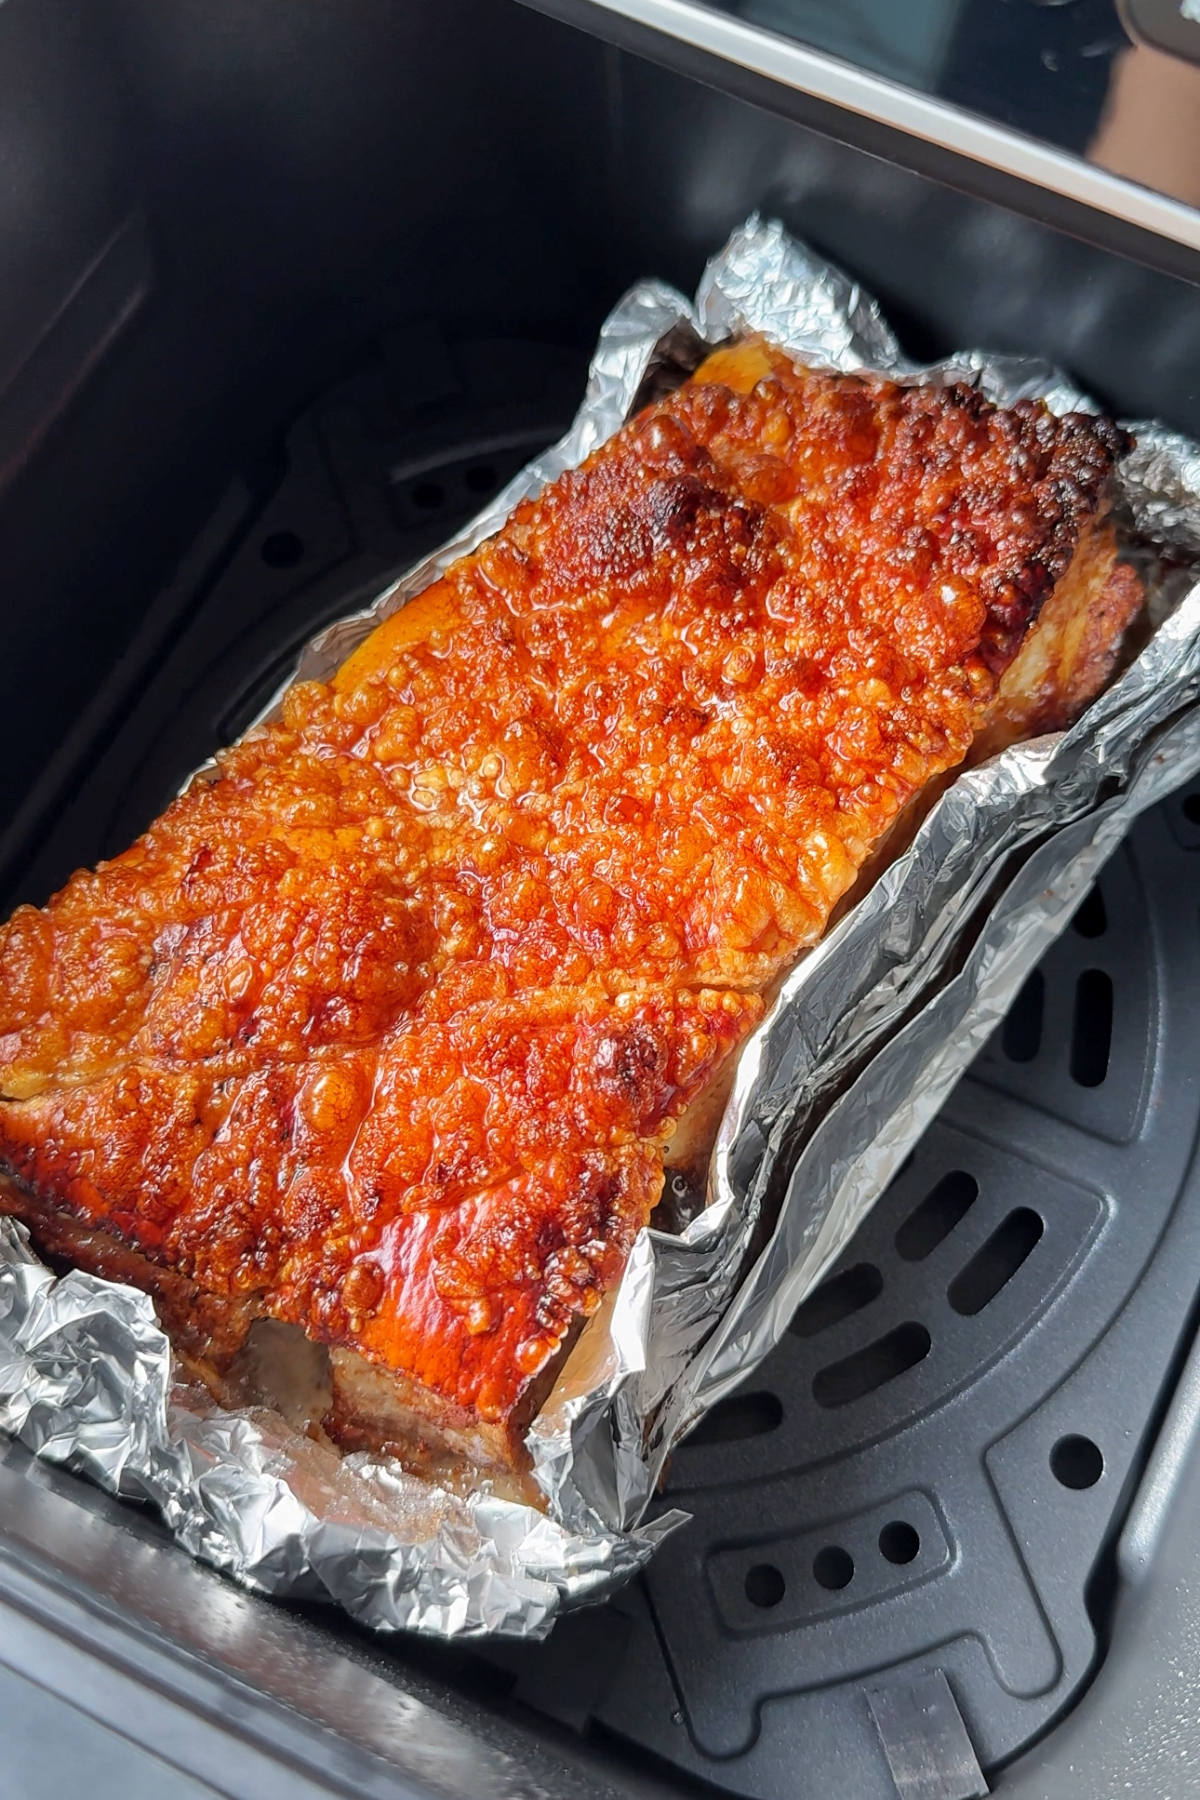
Stage 2 – High Heat Crisping: Brush skin lightly with oil, then crank heat to 200°C (400°F). Cook 30-40 minutes, checking every 5 minutes after the 20-minute mark. Skin is ready when golden, blistered, and crackling audibly when tapped.
Rest tented with foil for 10 minutes—this redistributes juices into the meat, preventing dryness. Skipping rest time sacrifices tenderness for speed.
Perfect Quick Bite-Size Pork Belly Cubes
Preheat to 200°C (400°F). Arrange 1-inch cubes in a single layer with space between pieces—overcrowding steams instead of crisps them. Cook 15 minutes total, flipping at the 7-minute mark. For caramelized edges, add 1-2 minutes at max temperature. Batch cook for consistent results: Second batches crisp faster as the air fryer retains heat. These golden morsrels make addictive appetizers—toss in honey-soy glaze during the last 2 minutes for sticky-sweet bites.
Master Australian High-Low Temperature Shortcut
This no-thermometer method delivers perfect results: Start at 200°C (392°F) for 25 minutes to blister the skin, then reduce to 160°C (320°F) for 30 minutes to tenderize the meat. Shield the sides with foil, leaving skin fully exposed. Done when juices run clear—no guesswork needed. This technique prevents burnt edges while ensuring melt-in-your-mouth texture, ideal for beginners.
Identify Doneness with Sensory Cues

Forget thermometers—use these visual and auditory checks: Skin should be uniformly golden with raised blisters that audibly crack when tapped. Press the meat—it should yield like butter with no resistance. Fat layers will appear glossy and fully rendered, not rubbery or opaque. For precision, insert an instant-read thermometer through the meat side (avoiding skin) to confirm 90-96°C (195-205°F). Under 90°C means chewy fat; over 96°C risks dry meat.
Rest and Slice for Picture-Perfect Presentation
Rest 5-10 minutes loosely tented with foil—this critical step lets juices redistribute. Slice meat-side up into ½-inch strips using a sharp knife; the skin naturally fractures along score lines. For effortless serving, cut strips into bite-sized pieces. Never slice immediately after cooking: Cutting too soon releases all juices onto your cutting board, leaving dry meat.
Customize with Flavor Variations Matrix
| Meal Style | Seasoning Swap | Serving Pairing |
|---|---|---|
| Sunday Roast | Garlic + dried herbs | Roast potatoes, apple sauce |
| Tacos | Chipotle paste rub | Corn tortillas, pickled onions |
| Ramen Topping | Five-spice + soy glaze | Ramen broth, soft-boiled egg |
| Curry Cubes | Cumin + garlic | Coconut curry sauce |
| Appetizers | Honey-soy glaze | Sesame seeds, scallions |
Reheat Like a Pro Without Losing Crunch
Refrigerate leftovers in airtight containers for 3-4 days. For crispy revival, air fry at 180°C (350°F) for 5-7 minutes—never microwave, as it turns skin leathery. Freeze pre-sliced portions vacuum-sealed for up to 3 months; thaw before reheating. Pro tip: Brush reheated pork with vinegar and return to air fryer for 2 minutes to restore shatter.
Fix Common Pork Belly Disasters
Chewy skin? You skipped moisture removal—extend the 120°C (250°F) phase by 10 minutes. Burnt spots? Shield hot zones with foil mid-cook. Rubbery fat? Temperature jumped too fast—always start low to render fat gradually. Dry meat? Overcooked past 96°C (205°F)—pull at 90°C (195°F) and rest adequately. If skin won’t blister, brush with vinegar and air fry 2-3 minutes more.
Transform your air fryer into a pork belly powerhouse with these field-tested techniques. From moisture removal secrets to precision temperature staging, you now hold the keys to crackling perfection every time. No more soggy skin or dry meat—just golden, shattering bliss that’ll make your kitchen smell like a five-star kitchen. Your guests won’t believe this showstopper came from a countertop appliance. Ready for crispy triumph? Fire up that air fryer and claim your title as pork belly maestro.


