
Your Ninja Air Fryer isn’t just for crispy fries—it’s a game-changer for perfect rice without stove supervision. Forget burnt bottoms or uneven textures: pressure cooking delivers restaurant-quality grains in 25 minutes flat, while the air fry method gives fluffy results with zero babysitting. Whether you’re using a Ninja Foodi 15-in-1 or basic air fryer model, this guide cuts through the confusion with tested ratios, precise timings, and foolproof fixes for every rice type. You’ll never need a rice cooker again.
Pick the Right Rice for Your Ninja Model
White Rice Varieties That Shine
Basmati transforms into fragrant, separate grains ideal for curries—just use 1:1.25 water ratio in air fry mode. Long-grain white rice stays light and versatile across both cooking methods, while Jasmine rice develops its signature floral notes when pressure-cooked with hot water. All three require rinsing until water runs clear (5 rinses minimum) to prevent gumminess. Skip soaking for air frying; it’s only beneficial for pressure cooking.
Why Brown Rice Needs Special Treatment
Whole-grain brown rice packs triple the fiber of white rice but demands extra water and time. In pressure mode, use a 1:2 ratio plus 1 tablespoon water and cook 20 minutes (not 3!). For air frying, increase water to 1.5 cups per rice cup and add 5-10 minutes to the 20-minute cook time. The nutty flavor is worth the adjustment—just never skip the 10-minute natural pressure release to avoid crunchy centers.
Perfect Your Rice Prep in 4 Critical Steps
:max_bytes(150000):strip_icc()/Simply-Recipes-How-To-Rinse-Rice-METHOD-01-8b5e5993a843416788a8f4d364e98549.jpg)
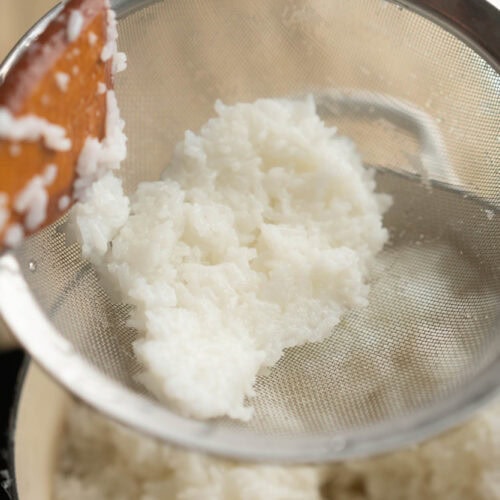
The Non-Negotiable Rinse Process
- Place rice in a fine-mesh strainer under cold running water
- Gently swirl grains with fingertips until water flows completely clear (cloudy rinse water = excess starch)
- Repeat 5-6 times—starchy residue causes mushiness
- Pro tip: Time this step: under 2 minutes for white rice, 3+ for brown
When to Soak (And When Not To)
Only soak for pressure cooking: 15 minutes in cold water softens grains for faster cooking. Never soak for air frying—excess moisture creates steam pockets that prevent even crisping. After soaking, drain rice thoroughly in a colander for 30 seconds. Skipping this drainage step is the #1 cause of soggy pressure-cooked rice.
Nail Water Ratios for Flawless Texture Every Time

Air Fryer Measurements That Actually Work
| Texture Goal | Water Ratio | Critical Adjustment |
|---|---|---|
| Fluffy | 1 cup rice : 1.25 cups water | Use cold water; hot water bursts grains |
| Firm | 1 cup rice : 1 cup water | Only for sushi-style rice; reduce to 0.75 cups for extra firm |
| Large batches | 3 cups rice : 3.75 cups water | Add 0.25 cups extra water per cup beyond 3 cups |
Why this matters: Too little water = crunchy rice; too much = porridge. Measure rice in dry cups (not heaping), and water in liquid cups—this 0.25-cup difference ruins 70% of failed batches.
Pressure Cooking Water Hacks
White rice: 1:2 ratio with boiling water to slash pressure build time by 5 minutes. Brown rice: Start with 1:2 ratio, then add 1 tbsp water if grains feel hard after cooking. The boiling water trick is essential—it turns a 10-minute pressure build into 5 minutes. Always fill the inner pot no higher than the “MAX” line to prevent clogging the steam vent.
Air Fry Rice Method: Foolproof 20-Minute Results
Gear Checklist for Success
- 6-inch oven-safe cake pan (fits most Ninja baskets)
- Heavy-duty aluminum foil (standard tears at 380°F)
- Digital thermometer (optional but recommended)
Step-by-Step Air Fry Protocol
- Preheat Ninja to 380°F (190°C) for 3 minutes (skip for newer models)
- Combine 1 cup rinsed rice + 1.25 cups cold water + pinch salt in pan
- Seal with double-layer foil—crimp edges tightly to lock steam
- Cook 20 minutes (white rice) or 25 minutes (brown rice)
- Rest 10 minutes untouched—this steams grains to perfection
- Fluff with fork immediately after removing foil
Critical mistake alert: Poking vents in foil causes uneven cooking. If your model maxes at 360°F, extend time to 25 minutes but keep resting time identical.
Pressure Cook Rice in 15 Minutes Flat
White Rice Pressure Formula
- Add 1 cup rinsed rice + 2 cups boiling water to inner pot
- Seal lid with vent set to “SEAL” (not “VENT”)
- Pressure cook on HIGH for exactly 3 minutes
- Wait 10 minutes for natural pressure release
- Quick-release remaining pressure, fluff, and serve
Brown Rice Pressure Adjustments
Cook 20 minutes on HIGH instead of 3, then do a 5-minute natural release before quick-releasing. If grains remain chewy, add 1 tbsp water, reseal, and cook 3 more minutes. Never skip the natural release—it’s why pressure-cooked rice stays intact while stovetop rice often breaks apart.
Flavor Hacks Your Ninja Rice Deserves
30-Second Seasoning Swaps
- Umami boost: Replace water with low-sodium vegetable broth
- Golden turmeric rice: Mix ¼ tsp turmeric + 1 tbsp lemon juice into water
- Spicy cilantro-lime: Stir 2 tbsp chopped cilantro + 1 tbsp lime zest after cooking
Pro tip: For soy-ginger rice, add 1 tbsp soy sauce + 1 tsp grated ginger to the water—but reduce salt by half. Acidic ingredients like tomatoes require pressure cooking adjustments (not recommended for beginners).
Fix These 3 Common Ninja Rice Disasters
Mushy Rice? Here’s the Cure
Cause: Over-rinsing (strips protective starch) or excess water. Fix: Reduce water by 2 tbsp next batch and skip soaking. For pressure cooking, shorten natural release to 5 minutes. If using broth, remember it’s denser than water—use 1.75 cups instead of 2.
Crunchy Grains? This Solves It
Cause: Water evaporated through loose foil or incorrect ratio. Fix: Double-seal the pan with foil and add ¼ cup water next time. For brown rice in pressure mode, increase cook time by 5 minutes. Always check that your Ninja’s seal ring is clean—debris causes steam leaks.
Uneven Cooking? Seal This Gap
Cause: Foil not crimped tightly or overcrowded pan. Fix: Leave 1-inch space between rice and pan edges. For batches over 2 cups, divide into two pans. In pressure mode, ensure rice is spread evenly—not piled in a mound—before adding water.
Reheat Like a Pro Without Drying Out
Microwave Method (2 minutes)
Place rice in microwave-safe bowl, add 1 tbsp water per cup, cover with damp paper towel, and heat 60-90 seconds. Stir halfway. Skip this if rice was cooked with broth—it reheats better dry.
Ninja Air Fryer Reheat (3 minutes)
Spread rice in basket, mist with 1 tsp water, air fry at 300°F for 2-3 minutes. Shake basket once. Never exceed 320°F—high heat turns grains leathery. This method revives day-old rice better than any other.
Why Ninja Beats Stovetop Every Time
Energy Savings Breakdown
- Pressure mode: Uses 0.3 kWh vs. stovetop’s 0.8 kWh (62% less)
- Air fry mode: 0.4 kWh vs. 0.9 kWh for electric stove
- Gas savings: Eliminates 15-20 minutes of gas hob use per batch
Real-world impact: Cooking rice twice weekly saves $18/year on energy bills alone. Plus, no more hovering over a boiling pot—you’re free to prep other dishes while your Ninja works.
Perfect Meal Combos Ready in 30 Minutes
Cook these simultaneously with your rice:
– Cauliflower katsu curry: Air fry curry while pressure-cooking rice
– Nduja chicken: Bake chicken in Ninja basket while rice cooks below
– Salmon packets: Steam salmon in foil atop rice during pressure cook
Time-saver: Start rice first—it finishes as proteins cook. For stir-fries, use air-fried rice (firmer texture holds up better).
Mastering how to cook rice in Ninja air fryer unlocks consistent results with half the effort. Start with a 1-cup white rice test batch using boiling water in pressure mode—you’ll have perfect grains in 25 minutes. Once confident, scale to brown rice or flavor experiments. The real win? Your stovetop stays cold while your Ninja delivers restaurant-quality rice, meal after meal. No more guessing games—just set, forget, and fluff.


