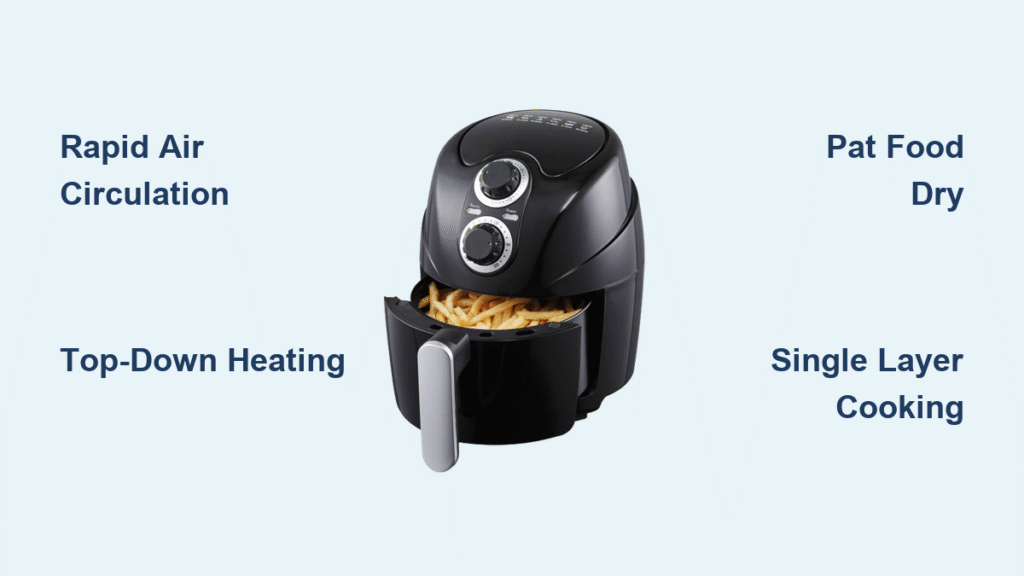
That disappointing moment when your fries emerge soggy instead of crispy usually traces back to one missed step: proper preheating. Most Cuisinart air fryer owners skip the crucial 2-5 minute preheat cycle, dooming their meals to uneven cooking and lackluster texture. When you toss food into a cold air fryer, the appliance must work harder to reach temperature, creating steam instead of the dry heat needed for perfect crisping.
This comprehensive guide reveals exactly how to preheat every Cuisinart model for optimal results, whether you own the popular TOA-60, compact AFR-25, or digital AFR-26. You’ll discover model-specific timing, visual cues that confirm readiness, and troubleshooting solutions for common preheat failures. Master these techniques to transform your air frying experience and consistently achieve restaurant-quality results at home.
Identify Your Cuisinart Model Before Preheating

TOA-60 and TOA-65 Toaster Oven Models
These versatile units require precise dial coordination for effective preheating. Start by setting the function dial to “Air Fry,” then adjust the lower temperature knob to your recipe’s specification. Twist the timer to 3-5 minutes depending on your target temperature. The heating indicator light remains illuminated until the chamber reaches your desired heat level—typically 350°F for most recipes. Never skip this step, as these combination units need time to establish proper air circulation before food enters.
Compact AFR-25 Preheat Procedure
The streamlined AFR-25 simplifies the process with its single temperature dial. Turn the dial directly to your cooking temperature (375°F works for most foods), then set the timer for exactly 3 minutes. The indicator light serves as your readiness signal—it clicks off automatically when preheating completes. Unlike toaster oven models, you don’t need to select a separate air fry function, making this model ideal for beginners who want consistent results with minimal steps.
Digital AFR-26 and Similar Models
Digital models offer the most precise preheating control. Power on the unit, then either select the dedicated “Preheat” function or manually input your temperature and time. The display shows real-time temperature progression with a countdown timer—watch as it climbs from room temperature to your target. Most foods require 2-4 minutes depending on temperature: frozen items need the full 4 minutes at 400°F, while delicate foods might only need 2 minutes at 300°F. Pro tip: Digital models often beep twice when preheating completes, so listen carefully.
Standard Preheat Steps for All Cuisinart Models
Step 1: Remove all packaging from the basket and ensure it’s completely clean and dry—any moisture creates steam that sabotages crisping.
Step 2: Place your air fryer on a heat-resistant surface with 6 inches of clearance on all sides for proper ventilation.
Step 3: Insert the empty cooking basket—never preheat without it, as this creates inaccurate temperature readings and potential damage.
Step 4: Set temperature to your recipe specification (350-400°F covers most foods).
Step 5: Set timer according to target temperature:
– 250-300°F: 2-3 minutes for delicate foods
– 325-375°F: 3-4 minutes for vegetables and reheating
– 400-450°F: 4-5 minutes for frozen foods and maximum crisping
Step 6: Wait for completion signals—indicator light turning off, digital beep, or timer completion.
Step 7: Add food immediately to prevent temperature drop—every second counts.
Temperature-Specific Preheat Guidelines

Low Temperature Range (250-300°F)
Perfect for dehydrating herbs or gently reheating leftovers, this range requires just 2-3 minutes of preheating. The shorter warm-up conserves energy while ensuring even heat distribution. Watch for steam emission from vents—when visible vapor stops, you know the chamber has reached stable temperature. Warning: Never exceed 300°F when dehydrating, as higher temperatures can cook rather than dry your food.
Medium Range (325-375°F)
This sweet spot handles 70% of air fryer recipes. Three minutes at 375°F creates the ideal environment for vegetables, chicken pieces, and reheated foods without burning edges. If you’re cooking multiple batches, maintain this temperature with a 1-minute reheat between additions to prevent temperature fluctuations that cause uneven cooking.
High Temperature Range (400-450°F)
Essential for frozen foods and achieving restaurant-quality crisping, this range demands 4-5 minutes of preheating at 400°F. The extended warm-up eliminates moisture that causes sogginess. Expect visible steam and increased fan noise during this phase—both indicate proper operation. Pro tip: For extra-crispy results, extend preheating to 5-7 minutes but monitor closely to avoid overheating.
Visual and Audio Cues That Signal Readiness
Visual Indicators
- Heating light: Illuminated during heating, turns off when temperature reached
- Digital display: Shows real-time temperature climbing toward target
- Steam cessation: Visible vapor stops emitting from vents when preheated
- Basket appearance: Metal basket develops slight sheen from consistent heat
Audio Signals
- Beep patterns: Digital models emit 2-3 beeps at completion
- Clicking sounds: Heating element cycling on/off (normal operation)
- Fan consistency: Steady whooshing indicates proper air circulation
- Timer ding: Manual models signal with mechanical timer bell
Troubleshoot Preheat Failures Fast

When Food Cooks Unevenly
Symptoms: Hot spots, undercooked centers, uneven browning
Quick fix: Rotate basket 180° halfway through preheat. Check heating element for food debris that blocks heat distribution. Ensure you’re not placing food directly against the heating element, which creates intense hot spots.
When Unit Won’t Reach Temperature
Symptoms: Extended preheat times, lukewarm basket
Solutions:
– Extend preheat by 2 minutes
– Verify 6-inch clearance around vents
– Clean heating elements with soft brush
– Check if ambient kitchen temperature is below 65°F (requires longer preheat)
When Overheating Occurs
Symptoms: Burning smells, excessive smoking
Immediate action:
– Reduce temperature by 25°F
– Ensure basket isn’t overloaded
– Check for oil residue causing smoke
– Never leave unit unattended during preheating
Food-Specific Preheat Adjustments
Frozen Foods Protocol
Always preheat to 400°F for 4-5 minutes before adding frozen items. The extreme temperature creates instant crust formation that locks in moisture. Add frozen food quickly—temperature drops 50°F when basket opens, so work fast. Critical tip: Shake basket immediately after adding frozen food to prevent sticking during the crucial first minute.
Fresh Vegetables Guide
Preheat to 375°F for 3 minutes for most vegetables. Lightly oil vegetables before adding to preheated basket to promote even browning. If edges brown too quickly during cooking, reduce cooking temperature by 25°F while maintaining the same preheat temperature for optimal results.
Meat and Protein Preparation
Follow recipe temperatures exactly—most proteins need 375-400°F preheat. Pat surfaces completely dry before adding to preheated basket. This prevents steaming and promotes proper searing. Never skip this step—moisture on proteins creates steam that prevents browning and leads to uneven cooking.
Common Preheat Mistakes to Eliminate
Temperature Errors That Ruin Food
- Too low: Results in steamed, soggy textures that lack crispness
- Too high: Burns exterior before interior cooks properly
- No adjustment: Fails to account for altitude or ambient temperature
Timing Mistakes That Waste Energy
- Skipping preheat: Guarantees uneven cooking and longer total cook times
- Excessive preheat: Wastes energy without improving results beyond 5 minutes
- Early food addition: Drops temperature 75-100°F, requiring recovery time
Operational Errors That Damage Food
- Basket overcrowding: Drops temperature immediately, creates steaming effect
- Multiple openings: Each basket removal drops temperature 25°F
- Cold food addition: Extends cook time by 2-3 minutes per batch
Maintenance Between Preheats
Pre-Preheat Checklist
- Verify basket is clean and completely dry
- Empty crumb tray (for toaster oven models)
- Check for food residue on heating elements
- Ensure proper ventilation clearance
Post-Cook Care
- Let unit cool 15 minutes before cleaning
- Wipe interior with damp cloth while warm (not hot)
- Empty and clean crumb tray after each use
- Store with basket removed for air circulation
Mastering Cuisinart air fryer preheating transforms good recipes into exceptional meals with minimal effort. The 2-5 minute investment pays dividends in texture, flavor, and cooking efficiency. Start with the standard 3-minute preheat at 375°F for most foods, then adjust based on your specific model and recipe requirements. Remember to always preheat with the basket inserted, add food immediately when preheating completes, and adjust for seasonal temperature changes. Your crispy food game just leveled up—enjoy perfectly cooked meals every time with these expert preheating techniques.


