
That pile of slimy pumpkin seeds staring at you after carving jack-o’-lanterns? Don’t toss them—they’re minutes away from becoming a crunchy, addictive snack with your air fryer. How to roast pumpkin seeds in air fryer is simpler than oven methods, cutting cooking time in half while using minimal oil. You’ll get that perfect golden-brown crunch without soggy failures or burnt batches. Plus, you’ll master the critical drying step most beginners skip (the secret to avoiding chewy disappointment).
Whether you’re using carving pumpkins or sugar pumpkins, this foolproof method transforms messy seeds into restaurant-quality bites. By the end, you’ll know exactly how to prevent common pitfalls like seeds falling through basket cracks or seasoning sliding off. Let’s turn pumpkin waste into your new favorite snack.
Scoop, Rinse, and Dry Seeds for Maximum Crunch

Remove Pulp Without the Mess
Start by scooping seeds into a large bowl filled with water. Swish vigorously—the seeds float while stringy pulp sinks. Transfer to a colander and rinse under cold water, rubbing gently to dislodge stubborn bits. Pro tip: Carving pumpkins yield larger seeds ideal for air frying, while sugar pumpkins produce smaller, tender seeds that roast faster. Never skip rinsing—pulp residue causes uneven browning.
Dry Seeds Like a Pro (Non-Negotiable Step)
Moisture is the enemy of crunch. After rinsing:
– Pat seeds vigorously with paper towels
– Spread in a single layer on parchment paper for 30–60 minutes
– Speed hack: Blast with a hair dryer on low for 2–3 minutes
Critical warning: Skipping drying guarantees soggy seeds. Steam from trapped water prevents crispness—your seeds must feel bone-dry to the touch. Store dried raw seeds in a zip-top bag in the fridge for up to 2 weeks.
Must-Have Tools for Air Fryer Pumpkin Seed Success
Essential Gear Checklist
- Air fryer (any model works; basket-style preferred)
- Parchment paper (prevents seeds from slipping through gaps—line the basket first)
- Oil mister (avocado or olive oil for even coating)
- Fine-mesh sieve (for secondary pulp removal)
Why parchment matters: Without it, seeds vanish into basket cracks. Place parchment in the basket before adding seeds—never skip this if using small seeds from acorn or spaghetti squash.
5 Savory and Sweet Seasoning Blends That Never Fail
Foolproof Flavor Ratios (Per Cup of Dried Seeds)
Toss seeds with 1–2 tsp oil first—this creates a “glue” for seasonings. Then add:
Savory Winners
– Smoky Paprika: ¼ tsp smoked paprika + ¼ tsp garlic powder + ¼ tsp salt
– Everything Bagel: ½ tsp everything seasoning blend
– Ranch Power: ½ tsp dry ranch mix (add 1 tbsp grated parmesan after cooking)
Sweet Shortcuts
– Cinnamon Sugar: 1 tsp sugar + ¼ tsp cinnamon + pinch of salt
– Maple Danger Zone: Lightly coat with maple syrup (watch constantly—burns in 60 seconds!)
Expert note: Add sugar or parmesan immediately after cooking while seeds are still hot. Oilless seasonings slide right off.
Exact Air Fryer Settings for Perfectly Roasted Seeds
Temperature & Time Cheat Sheet
| Temp | Time | Shake Frequency | Best For |
|---|---|---|---|
| 320°F | 15 min | Every 5 min | Foolproof even browning |
| 350°F | 10–15 min | At 5 min & 10 min | Speedy batches |
| 370°F | 15–20 min | Twice | Deep golden color |
Doneness Test You Can’t Ignore
Seeds are ready when:
– They make a hollow “tick” sound when dropped on your counter
– Biting reveals zero chewiness (test after 5 minutes of cooling—they crisp further off-heat)
– Color shifts from pale yellow to uniform golden brown
Never walk away: At 350°F+, seeds burn in 90 seconds. Set timer reminders!
7-Minute Air Fryer Method for Crispy Seeds
Step 1: Oil and Season Correctly
In a bowl, combine dried seeds, oil, salt, and spices. Toss until every seed glistens—no dry patches allowed. Alternatively, place seeds on parchment-lined basket, spritz with oil, then sprinkle seasonings and shake gently.
Step 2: Load Without Overcrowding
Spread seeds in a single layer—max 1 cup per batch. Overcrowding = steamed, soggy seeds. If your basket has large gaps, remove the crisper plate first.
Step 3: Shake for Even Cooking
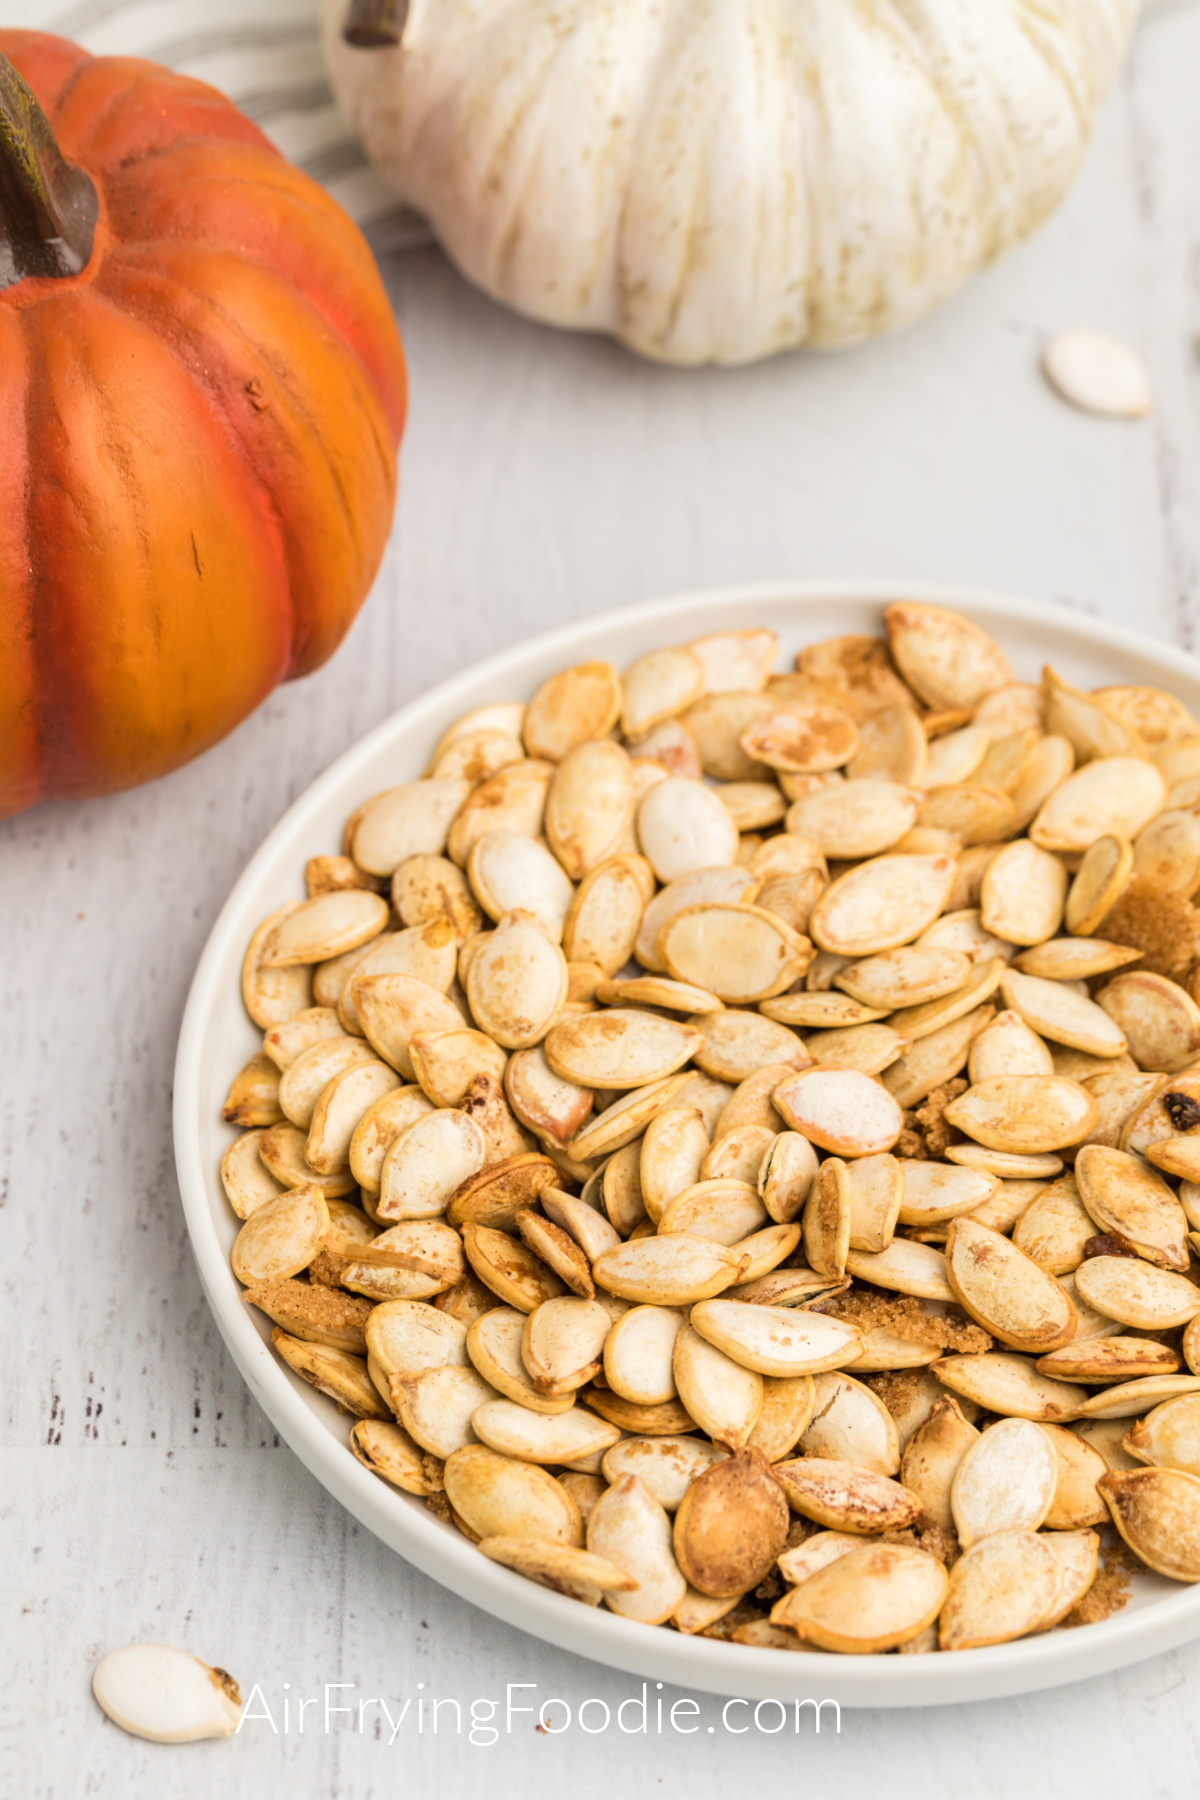
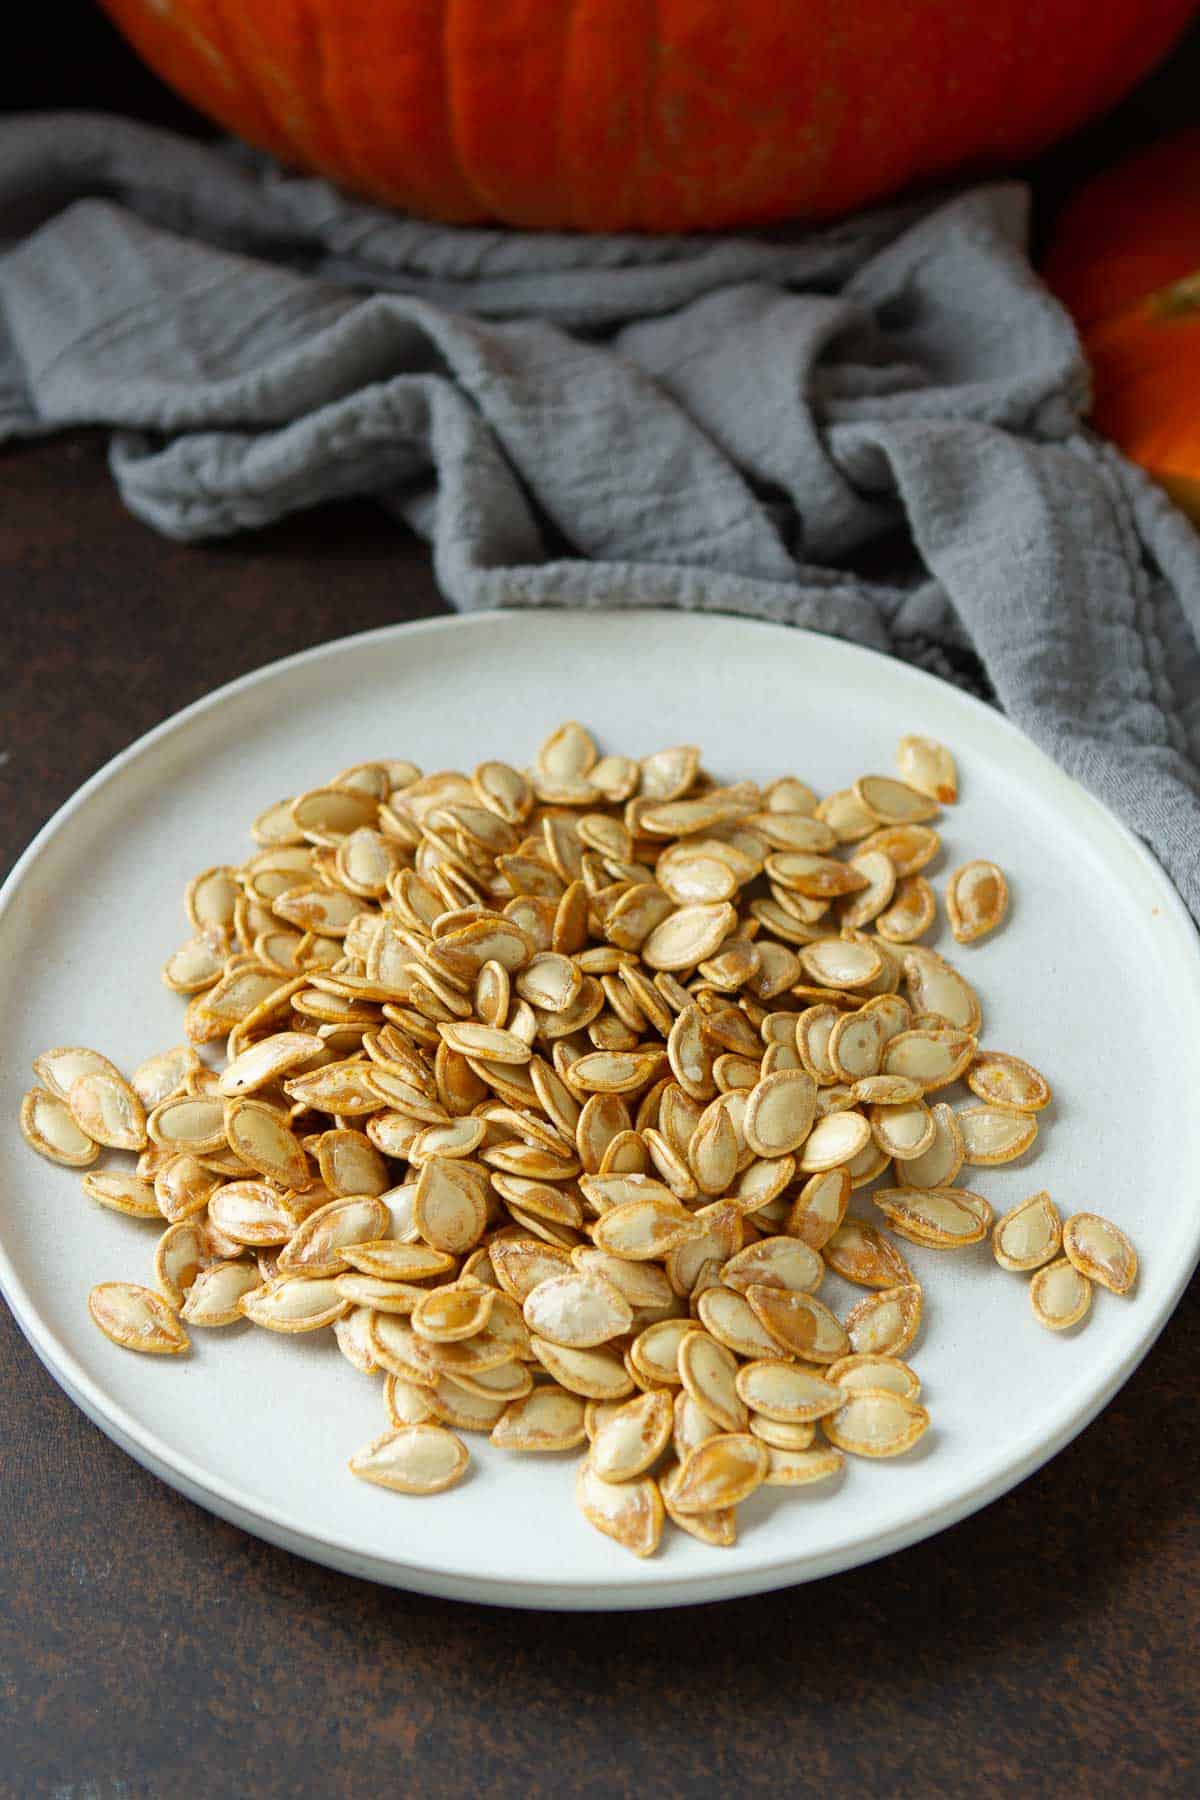
At 320°F, shake basket every 5 minutes. You’ll hear rapid popping (normal!). Stop when seeds turn golden—underdone beats burnt. They’ll crisp as they cool.
Step 4: Cool Completely Before Storing
Transfer to a plate immediately. Wait 5 minutes before tasting—this rest period is crucial for maximum crunch.
Why Your Seeds Turned Chewy (and How to Fix It)
Soggy Seed Emergency Kit
Problem: Seeds stay rubbery after cooling
Cause: Incomplete drying or oil overdose
Fix: Pat seeds drier next time; reduce oil to 1 tsp per cup
Problem: Burnt outside, raw inside
Cause: Temperature too high + overcrowded basket
Fix: Drop to 320°F; roast ½ cup batches; shake every 3 minutes
Problem: Seasoning slides off
Cause: Adding spices before oil
Fix: Always coat seeds with oil first—this creates essential adhesion
Store Raw Seeds for 2 Weeks: Pro Batch Strategies
Make-Ahead Raw Seed Protocol
- Dry seeds thoroughly (30+ minutes)
- Store in zip-top bag with paper towel (absorbs moisture)
- Refrigerate up to 14 days—no freezer needed
Roasted Seed Lifespan Hacks
- Cool completely before storing (trapped heat = sogginess)
- Use airtight containers with silica packet
- Shelf life: 7 days at room temperature (add 3 days with paper towel liner)
Never refrigerate roasted seeds—condensation ruins crispness.
Beyond Snacking: 4 Unexpected Ways to Use Roasted Seeds
Elevate Everyday Meals
- Soup secret weapon: Sprinkle smoky seeds over butternut squash soup
- Salad crunch boost: Toss cinnamon-sugar seeds with kale + goat cheese
- Yogurt parfait upgrade: Layer with Greek yogurt and diced apples
- Trail mix hero: Mix spicy seeds with dark chocolate chunks
Pro move: Double your batch—roasted seeds freeze beautifully for 3 months. Thaw at room temperature for instant crunch.
15-Minute Cheat Sheet: Perfect Air Fryer Pumpkin Seeds
Your foolproof path to success:
1. Scoop seeds → rinse in water → dry 30+ minutes
2. Toss with 1 tsp oil + ¼ tsp salt per cup
3. Air fry 320°F for 15 min, shaking every 5 min
4. Cool 5 minutes before eating
Skip boiling: Tests prove it doesn’t improve flavor or texture—just wastes time.
Critical reminder: Drying isn’t optional. Wet seeds = steamed mush. Pat dry until no moisture transfers to your towel.
Master this once, and you’ll never buy store-bought pumpkin seeds again. The air fryer’s speed means fresh, hot, crunchy seeds are always 15 minutes away—perfect for impromptu guests or midnight snack attacks. Next time you carve a pumpkin, grab that air fryer and transform waste into golden, addictive treasure. Your new favorite snack habit starts now.


