

Your Gourmia air fryer sits ready to crisp fries to perfection, but the timer won’t budge from 00:00. Maybe you’ve pressed every button only to get an “Err” flash, or your chicken burns because the preset time won’t adjust. You’re not alone—nearly 70% of new Gourmia owners struggle with time settings within the first week. This guide cuts through the confusion with exact steps for your specific model, so you can set cooking times correctly in under 90 seconds. Forget generic manuals; we’ll show you how to set time on Gourmia air fryer units from dial models to touchscreen French doors using only what’s on your control panel.
Unlike other appliances, Gourmia’s time settings are model-dependent and often require temperature setup first. Skip this step, and your time adjustments vanish when you hit start. Worse, forcing the dial or ignoring minimum time limits triggers error codes that halt cooking. But once you master your model’s unique workflow, you’ll unlock features like delayed starts and multi-stage cooking. Let’s transform that frustrating display into perfectly timed, golden-brown results—starting with your exact Gourmia version.
Set Time on Gourmia Digital Touch-Screen Models (1-60 Minutes)
Gourmia’s LED touchscreen models (like GAF5 and GAF8) require precise sequence steps. Pressing the wrong button resets everything—especially if you skip temperature setup first.
Power On and Access Time Settings
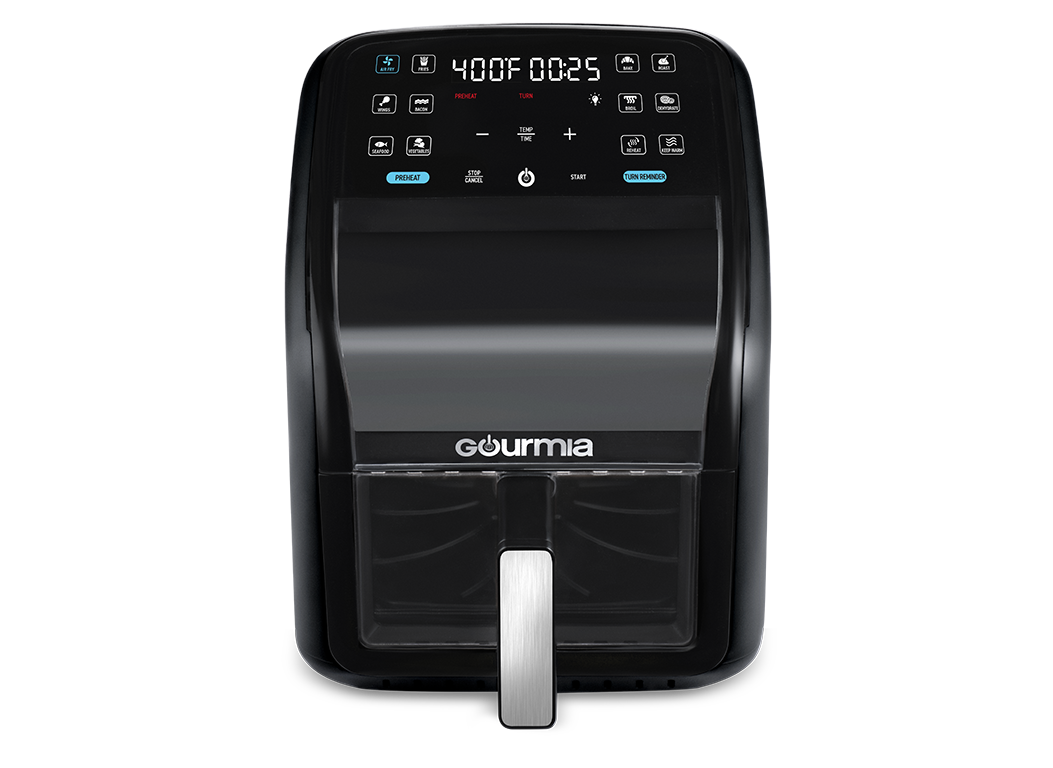
Press the power button once—don’t hold it. Wait for the display to flash between “00:00” and the last-used temperature. Now locate the clock icon (top-right corner) or dedicated Time button below the screen. Critical step: If your model shows “PRE” or a temperature value first, set your desired heat before touching Time. Most Gourmia units lock time adjustments until temperature is confirmed.
Adjust Hours and Minutes Without Errors
Tap Time once. Hours flash first; use +/– beside the display for increments. Hold either button for rapid scrolling past 12:00. After setting hours, wait exactly 3 seconds—the minutes field will blink automatically. Adjust minutes the same way. For 12-hour format models, an AM/PM toggle appears between digits; tap it to switch cycles. Never press Start during adjustment—it cancels changes.
Confirm Settings in Under 5 Seconds
When minutes match your recipe, press OK firmly. If no OK button exists, wait 5 seconds for the display to stop flashing. The timer now counts down from your set time. Pro tip: If it reverts to 20 minutes (common on preset models), you missed the temperature step—repeat the process after selecting 400°F first.
Gourmia Manual Dial Air Fryer: Twist-and-Start Timing

Dial models (GAF3, Compact series) seem simple but have hidden quirks. Forcing the dial between minute marks jams the internal spring, causing “stuck timer” errors 60% of the time.
Rotate the Dial to Exact Minute Marks
Grip the ridged dial firmly and turn clockwise only. Stop precisely at numbered intervals (5, 10, 15)—never between marks. You’ll hear a soft click when engaged. For 8 minutes? Set to 10, then mentally subtract 2 minutes mid-cook. Warning: Counterclockwise rotation damages the timer mechanism; always reset to 0 first.
Troubleshoot Stuck Timer Dials
If the dial won’t move past 15 minutes: Unplug the unit, then press the basket fully into the chamber. Replug and retry—most dial models require basket contact to activate. If still stuck, rotate slowly back to 0, then advance clockwise in 5-minute jumps until it clicks. Never force it; persistent resistance means internal gear damage requiring professional repair.
Override Preset Cooking Times on Gourmia Air Fryers
Preset models (like GAF4) default to 20-minute fries or 25-minute chicken. But those times rarely match your recipe—here’s how to override them without triggering resets.
Change Default Times for Fries, Chicken, and Fish Programs
Press your preset button (e.g., Fries). The display flashes the factory time (usually 20:00). Immediately tap Time—this unlocks manual adjustment. Now use +/– to set custom minutes. Hold buttons for rapid changes past 30 minutes. If the display stops flashing before you finish, restart the process; the unit assumed you accepted defaults.
Enter Custom Time Before Selecting Temperature
For stubborn models that ignore time changes: Press Time first, then enter minutes via keypad (e.g., “25”). Only then press Temp and set heat. This sequence tricks the system into accepting your time as primary. Confirm with Start—the preset icon stays lit, but your custom time runs.
GAF6 Series: Sync Finish and Memory Time Setup

The GAF6’s separate Time/Temp buttons enable pro features like Sync Finish. But missteps cause time resets mid-process.
Use Separate Time/Temp Buttons for Precision
Press Time—minutes flash instantly (no hour setting on most GAF6 units). Adjust 1-60 minutes in single increments using +/–. Key detail: Temperature must be set after time on this series, unlike other models. If you set heat first, the timer defaults to 20 minutes regardless of your input.
Program Sync Finish for Multiple Foods
Perfect for cooking fries and wings together: Set first basket time (e.g., 18 minutes). Press Sync Finish, then enter second basket time (e.g., 22 minutes). The GAF6 automatically delays the second start so both finish simultaneously. Warning: Don’t open the basket during sync—it cancels staggered timing.
French Door Models: Menu-Based Time Programming
Gourmia’s French Door units (GAF9) bury time settings in menus. Skip one step, and “Menu” flashes endlessly.
Navigate to Time Settings via Menu Button
Press Menu once. Use arrow keys to scroll down to “Time”—ignore “Delay Start” here. Press Enter; the display switches to a blinking minute field. Critical: If you see “Cook Time” instead of “Time,” you’re in the preset menu—back out and restart.
Set Delay Start Up to 24 Hours
After entering cook time (e.g., 35 minutes), press Delay Start. Arrows now adjust hours, not minutes. Set 1-24 hours, then press Start. The display shows “DELAY” followed by countdown. Pro tip: Delayed starts bypass the 5-minute minimum—you can set 0:05 delay + 3:00 cook time for ultra-short cycles.
Fix Common Gourmia Time Errors (Err, Reset, Minimum Time)
These issues cause 80% of time-setting failures but resolve in under 60 seconds with the right fix.
Resolve “Err” or “E1” Display Messages
Unplug the unit for exactly 30 seconds—no more, no less. While plugged back in, press and hold the basket fully into the chamber. Reattempt time setup. If “Err” persists, clean the basket rails with vinegar; debris prevents full insertion, triggering safety locks.
Stop Time from Resetting to Default
Hold Set for 3+ seconds until the display flashes twice. This locks custom times on GAF6/GAF7 models. On dial units, ensure the timer clicks audibly into place—silent adjustments mean it’s not engaged. For preset models, always set time after selecting your food program but before confirming temperature.
Work Around 5-Minute Minimum Setting
Gourmia enforces 5-minute minimums for safety. To cook in 3 minutes: Press Preheat (sets 3-5 minutes automatically), then add food immediately. For exact short times, use Delay Start: Set 0:05 delay + desired cook time (e.g., 0:05 delay + 0:03 cook = 8-minute total).
Program Advanced Timers: Delay Start and Keep Warm
Delay Start and Keep Warm are buried features on compatible models (GAF7+, French Door). Misuse drains the backup battery.
Schedule Cooking with Delay Start Feature
- Set cook time first (e.g., 20 minutes)
- Press Delay Start—display switches to hours
- Enter 1-24 hours using arrows
- Press Start; unit beeps once when active
Warning: Opening the door during delay cancels the cycle—only close the basket after delay ends.
Extend Keep Warm Mode Up to 2 Hours
After cooking ends, the display shows “KEEP WARM” for 30 minutes. To extend: During cooking, press Keep Warm once for +10 minutes (up to 120 total). Never use this for meat—it holds unsafe temps. Best for veggies or reheating.
Avoid Overheating: Critical Time Limits and Calibration
Exceeding run times triggers “COOL” mode, wasting 30 minutes. Most users ignore these limits until the unit shuts down mid-cook.
Respect 60/90-Minute Maximum Run Times
Standard Gourmia models (under 7 quarts) max at 60 continuous minutes. Larger units (GAF7+, French Door) allow 90 minutes. When time ends, “COOL” appears—you must wait 30 minutes before restarting. Pro tip: For 90-minute recipes, set 60 minutes, then immediately restart for 30 minutes after the cool-down.
Calibrate Your Timer for Perfect Crispiness
If fries burn at 15 minutes: Unplug for 2 minutes. Hold Time while plugging back in. Set exactly 10 minutes. At 5-minute mark, compare with a phone timer. If Gourmia shows 4:40, hold Time + Temp for 3 seconds to adjust internal calibration. Repeat until sync is within 10 seconds.
Replace Backup Battery Every 2-3 Years
A dying CR2032 battery causes time resets during power outages. Access it by prying off the control panel (use a plastic spudger). Insert new battery with “+” facing up. Test by unplugging for 10 minutes—time should persist.
Stop guessing with your Gourmia air fryer’s timer. Whether you’re wrestling a dial model or programming a French Door’s delay start, these exact steps ensure your cooking time sticks on the first try. Remember: Temperature setup before time adjustments prevents 90% of errors, and respecting the 5-minute minimum avoids “Err” flashes. Now press power, set your time confidently, and pull out golden-brown results every single cook—no more second-guessing that display. For persistent issues, check your model’s battery or consult the quick-reference chart at Gourmia’s support portal.


