
You’ve just pulled perfectly golden fries from your air fryer—until you peek inside the basket and see a greasy, stuck-on disaster requiring elbow grease and steel wool. This frustrating cleanup ritual stops the moment you master how to use air fryer liners correctly. These thin heat-resistant barriers transform your air frying experience by catching drips and preventing stubborn residue while maintaining the crucial airflow that creates crispy magic.
Unlike conventional oven liners, air fryer versions must withstand intense circulating heat without blocking the fan’s powerful gusts. The wrong technique turns liners into fire hazards or soggy food traps. But when you select the right material, size, and placement method, you’ll slash cleanup time by 90% while achieving restaurant-quality results.
This guide reveals exactly how to use air fryer liners for every food type and model—avoiding common mistakes that sabotage crispiness. You’ll learn to prevent dangerous “liner lift-off,” choose between parchment and silicone based on your cooking habits, and troubleshoot greasy disasters before they happen.
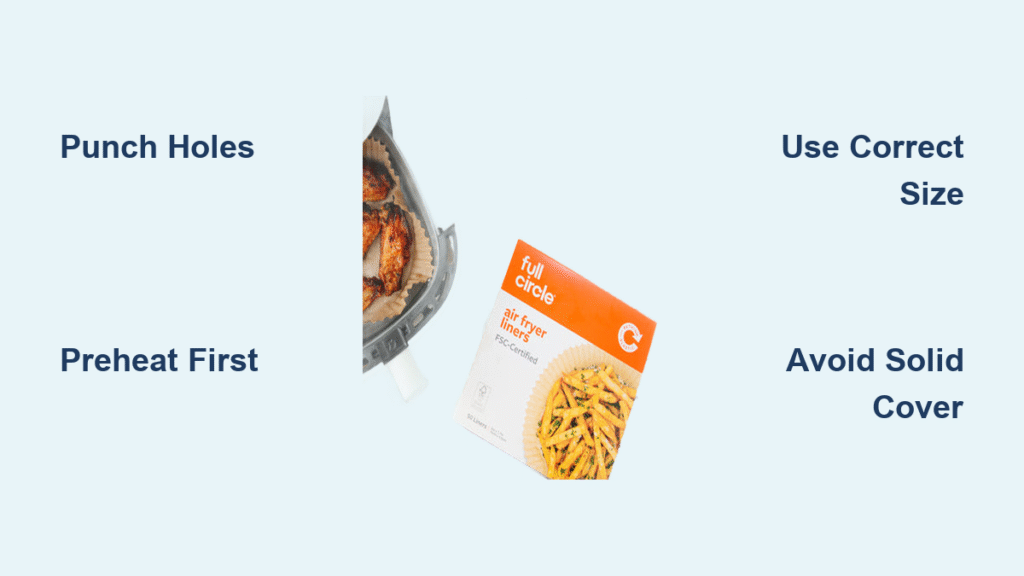
Select Your Ideal Liner Material for Crisp-Preserving Results
Parchment Paper for Effortless Single-Use Cleanup
Parchment paper liners deliver the ultimate convenience for weeknight dinners. These ultra-thin sheets (about 0.1mm thick) cost pennies per use and compost easily when unsoiled. Pre-cut circles fit most round baskets perfectly, while roll parchment lets you customize shapes for rectangular models like Ninja Foodi.
Critical technique: Always punch 6-8 holes with a skewer before use—solid parchment traps steam, creating soggy bottoms. Never place wet-battered foods like tempura directly on parchment; the moisture tears the paper mid-cook. For lightweight items like herbs, anchor the liner under a metal trivet to prevent fan-induced lift-off.
Silicone Liners for Daily Air Fryer Warriors
If you use your air fryer more than three times weekly, silicone liners pay for themselves in under a month. These durable mats (1-2mm thick) withstand 1,000+ cooking cycles and dishwasher cleaning. Walled silicone baskets protect entire basket interiors, while flat mats suit oven-style models like Cosori.
Pro tip: Expect 5-15% longer cook times with thick silicone. Compensate by increasing temperature 10°F or adding 2 minutes to recipes. For stubborn turmeric stains, soak overnight in baking soda paste—never use abrasive scrubbers that damage the non-stick surface. Replace silicone when warped edges exceed 3mm or corners tear.
Aluminum Foil for Custom Heat Reflection
Foil shines when you need precise heat control—like achieving extra-crispy pizza crusts through strategic reflection. Mold it to fit any basket shape, then punch 10-12 holes spaced 1 inch apart to maintain airflow. It’s particularly effective for high-fat foods like bacon, where rendered grease drains through perforations.
Warning: Never cover the entire basket bottom with solid foil—this blocks airflow and creates dangerous hotspots. Discard foil after cooking greasy meats; reuse only for dry foods like reheating bread. Sharp foil edges can scratch non-stick coatings, so smooth all corners before insertion.
Avoid Fire Hazards with Critical Safety Protocols
Never Exceed 400°F with Parchment Paper
Most parchment paper liners (including Reynolds Kitchens) melt or ignite above 400°F. Silicone and heavy-duty foil handle higher temps, but always verify manufacturer labels. Crucially, air fryers run hotter than conventional ovens—your “375°F” setting may actually hit 400°F internally. When in doubt, choose silicone for temperatures above 375°F.
Prevent Liner Lift-Off Disasters
The #1 liner mistake? Letting the fan turn your parchment into a flaming projectile. Always preheat the empty air fryer first, then immediately slide in the liner and load food to weigh it down. Never cook with an empty lined basket—this guarantees contact with heating elements. For featherlight foods like garlic slices, secure liner corners with toothpicks anchored under food.
Essential Material Safety Checklist
- Banish these immediately: Wax paper (melts at 200°F), cardboard, plastic containers
- Always perforate: Solid liners cause steaming instead of crisping
- Verify “air fryer safe” labels: Oven parchment often lacks airflow optimization
Match Liner Size to Your Exact Air Fryer Model

Basket-Style Air Fryers Need Precision Fitting
Measure your basket’s base diameter with a ruler—most range from 8-10 inches. Pre-cut liners should sit flat without curling up walls. If using roll parchment, trim 0.5 cm smaller than basket dimensions to prevent folding during cooking. Oversized liners create airflow dead zones, causing uneven browning on one side.
Pro tip: For square baskets (like Instant Vortex), choose rectangular liners instead of round. Round liners leave dangerous gaps in corners where grease pools and smokes.
Oven-Style Models Require Border Airflow
Flat silicone mats or cut parchment sheets work perfectly for shelf-style air fryers like GoWISE. Leave a 1 cm border around all edges to allow hot air circulation—this prevents the “steam pocket” effect that softens crusts. Store multiple sizes for different rack positions; a 9×13 inch mat fits most full-size models.
Paddle-Type Air Fryers Demand Special Handling
Models with rotating paddles (Tefal ActiFry) require flat perforated liners only. Walled silicone baskets block paddle movement, damaging both liner and appliance. Cut foil or silicone to the exact paddle diameter—any overhang catches on the mechanism mid-cook. Never use solid liners; the paddle needs unobstructed grease drainage.
Perfect Your Liner Technique in 3 Critical Steps
Preheat Empty Then Insert Liner
Start by preheating your air fryer to recipe temperature (typically 350-400°F). While heating, prepare your liner: punch holes in parchment or ensure silicone sits flat. Never skip preheating—cold liners warp when hit with sudden heat. After preheating, quickly insert the liner and load food within 10 seconds to prevent fan lift-off.
Load Food Strategically for Maximum Crisp
Place food in a single layer directly on the liner—this weight anchors it securely. For dense items like steak, press gently to ensure full contact. With high-fat foods like bacon, pour accumulated grease from the drip tray halfway through cooking to prevent overflow. Adjust times: add 1-3 minutes when using thick silicone liners.
Cleanup Without Messy Leaks
For parchment, let grease solidify for 2 minutes before folding liner inward—this traps drips during disposal. Compost only unsoiled parchment; greasy sheets belong in trash. Silicone liners rinse clean under hot water or go in the dishwasher’s top rack. For baked-on cheese, soak in vinegar solution for 15 minutes before scrubbing.
Food-Specific Liner Hacks for Perfect Results
Frozen Foods That Stick Without Liners
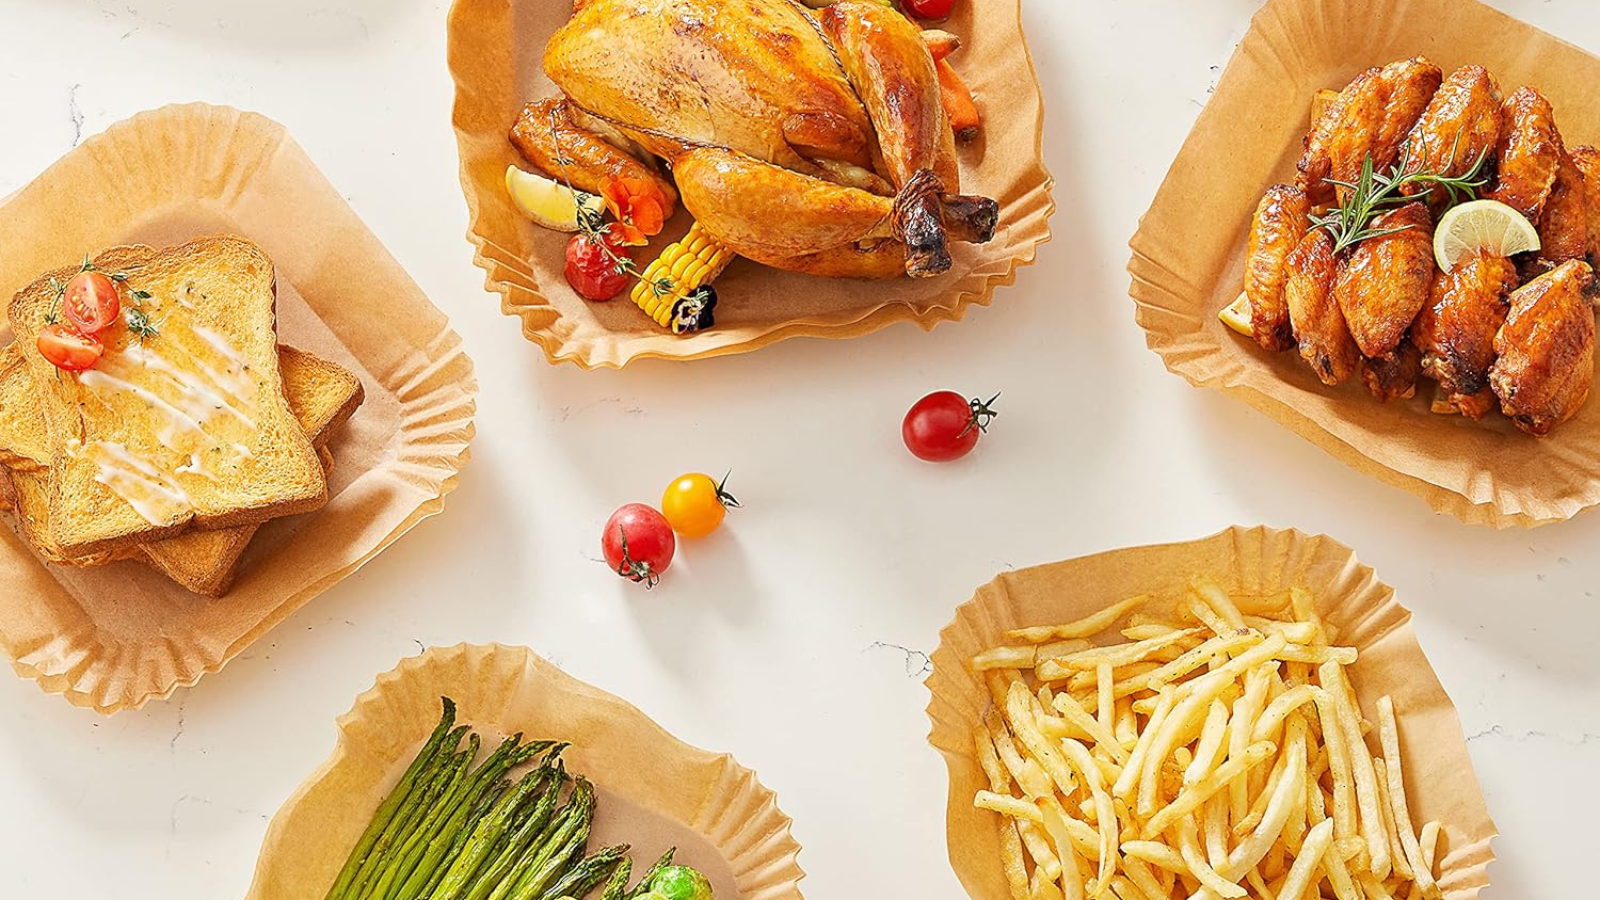
French fries, nuggets, and mozzarella sticks release cleanly from perforated parchment. No extra oil needed—the liner catches seasoning fallout while maintaining crispiness. For delicate items like empanadas, parchment prevents tearing during the crucial mid-cook flip.
Proteins That Stick Like Glue
Salmon fillets cook flawlessly skin-side down on parchment—the skin releases without tearing. Steak benefits from parchment’s juice-catching ability; cook 10-12 minutes at 400°F for 1-inch thickness. With bacon, use foil to catch rendered fat and prevent smoking—pour off grease between batches for consistent crispness.
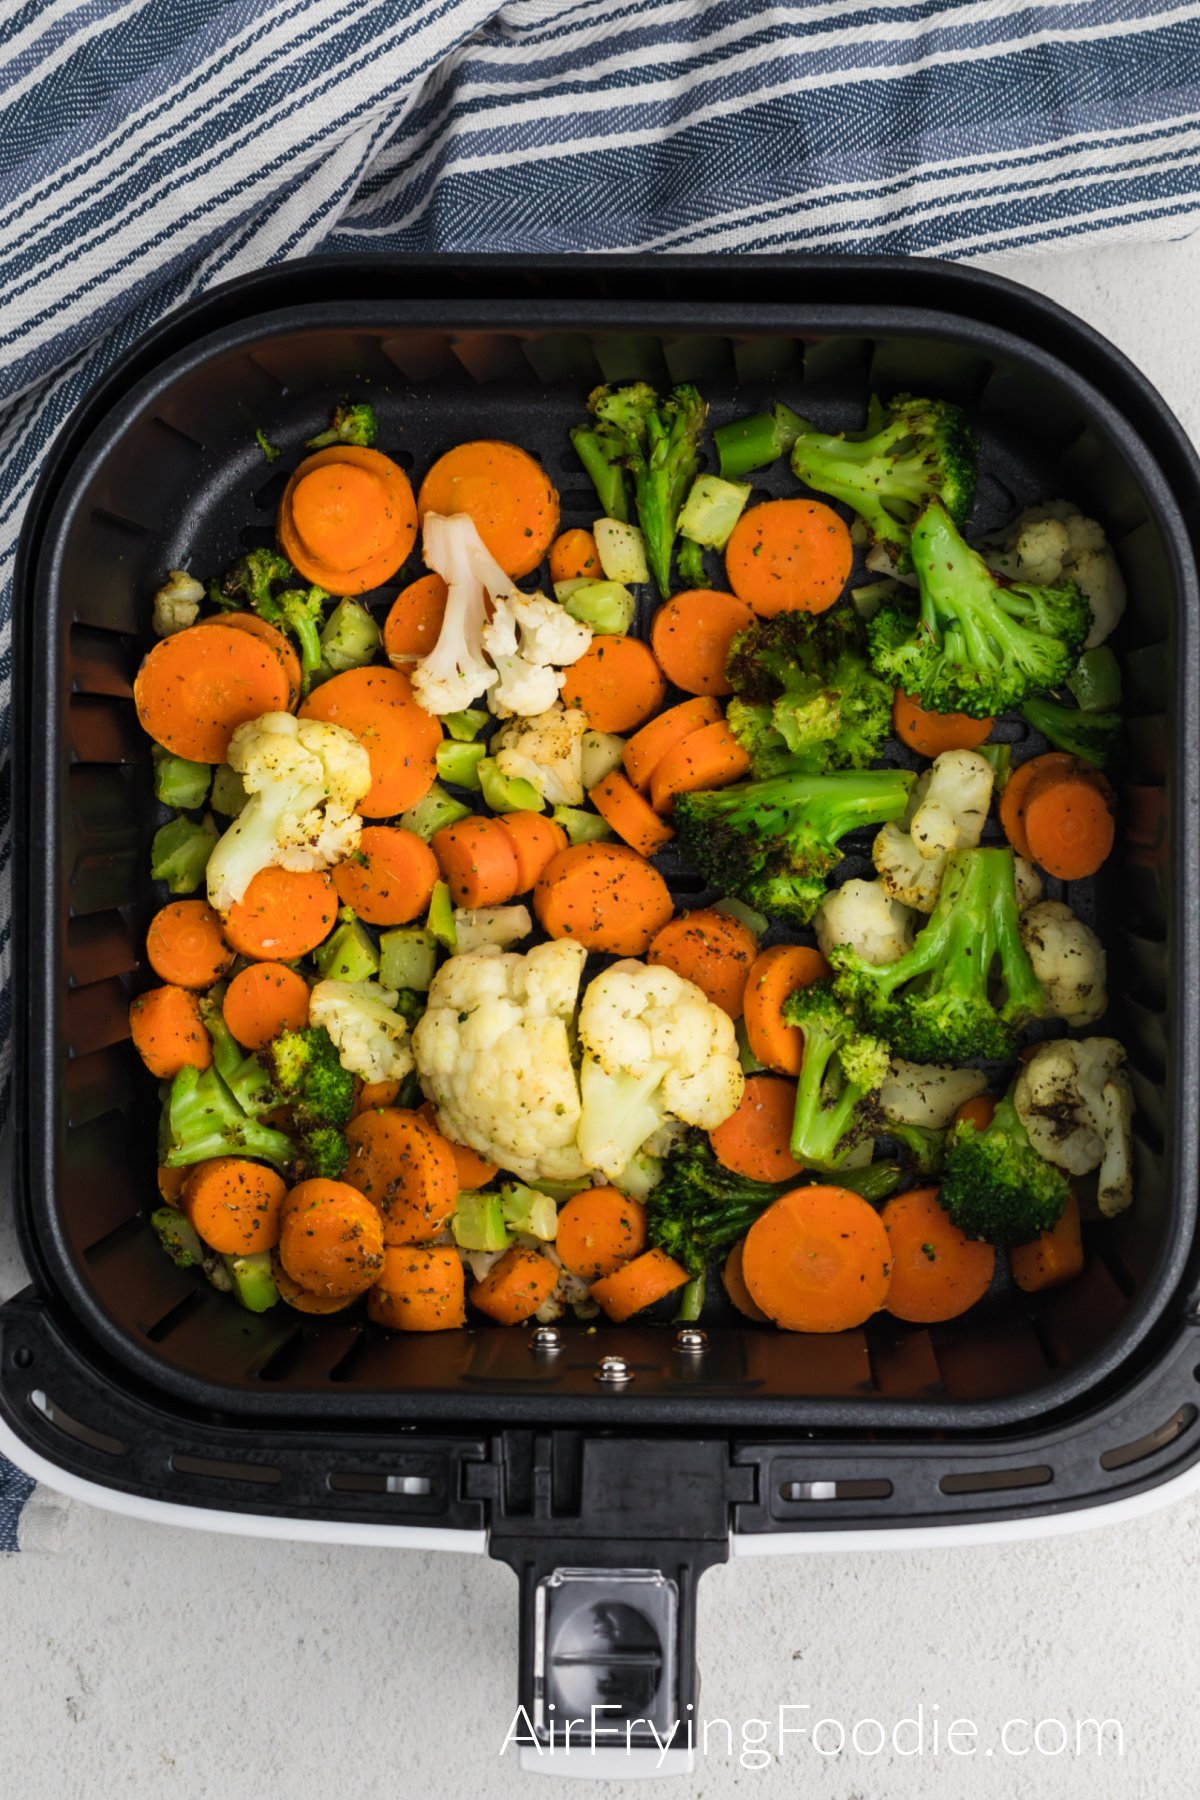
Vegetables That Create Basket Nightmares
Roasted broccoli and carrots leave charred residue that’s nearly impossible to scrub. Toss veggies with 1 tsp oil directly on liner for perfect caramelization without basket damage. For roasted garlic, place foil-wrapped bulbs on liners—30 minutes at 400°F yields soft cloves with zero cleanup.
Fix Liner Problems Before They Ruin Your Meal
Stop Uneven Browning Immediately
If one side of food stays pale, your liner is blocking airflow. Switch to perforated versions or reduce food quantity by 25%. For oven-style models, rotate the liner 180 degrees halfway through cooking—this counters hot spot patterns unique to your appliance.
Eliminate Grease Pooling Under Liners
Solid liners trap fat beneath food, creating soggy zones. Poke additional holes spaced 1 inch apart, or switch to perforated parchment. With bacon or sausage, empty the drip tray midway through cooking to prevent overflow that causes smoking.
Remove Stubborn Silicone Stains Safely
Turmeric and tomato sauce cause orange stains but don’t affect safety. Soak stained silicone overnight in 3 parts baking soda to 1 part water. Avoid bleach—it degrades the material over time. Cosmetic stains fade with regular dishwasher use.
Calculate Your True Cost and Eco-Impact
Budget Breakdown Per Cooking Session
Parchment costs $0.05-$0.10 per use—ideal for occasional cooking. Silicone walled baskets ($15-$25 upfront) drop to $0.002 per use after 500 cycles. For daily users, silicone pays for itself within 20 uses.
Eco-Friendly Choice Depends on Your Habits
Frequent cooks should choose food-grade silicone—it offsets manufacturing emissions after 20 uses. For weekly cooking, unbleached compostable parchment minimizes landfill impact. Never reuse parchment for greasy foods; disposal is safer than fire risks from oil-soaked paper.
Mastering how to use air fryer liners transforms your appliance from chore to joy. You’ll achieve consistently crispy results while slashing cleanup from 15 minutes to 15 seconds. Whether you choose budget parchment for frozen fries or durable silicone for daily salmon, proper technique ensures your air fryer stays pristine and your meals perfectly cooked. The next time you see grease threatening to ruin your basket, remember: the right liner placed the right way is your shortcut to effortless air frying.


