
That sleek Cosori Air Fryer Toaster Oven sitting on your counter isn’t just another appliance—it’s your ticket to faster, healthier meals with professional results. Many new owners waste weeks figuring out why their chicken wings aren’t crispy or why the toast burns unevenly. This guide cuts through the confusion with precise instructions so you can expertly operate every function from day one. You’ll transform from hesitant user to confident chef by understanding exactly how to use your Cosori air fryer toaster oven for perfect results every time.
Unlike traditional appliances, this 12-in-1 powerhouse requires specific techniques to unlock its full potential. Whether you’re air-frying frozen fries or dehydrating homemade jerky, proper setup and operation make all the difference between kitchen hero and culinary disaster. By the end of this guide, you’ll know precisely which rack position to use, when to preheat, and how to troubleshoot common issues—saving you time, wasted ingredients, and frustration.
Initial Setup Requirements
Unbox and Clean Before First Use
Your Cosori arrives with protective films and manufacturing residues that must be removed before cooking. Carefully unpack all components: main oven unit, crumb tray, wire rack, food tray, fry basket, and recipe booklet. Peel away every bit of plastic film from interior surfaces and accessories—these residues create unpleasant odors when heated. Wash all removable parts in warm soapy water using non-abrasive sponges, then dry completely. Wipe interior walls and heating elements with a barely damp microfiber cloth to remove factory oils. Never immerse the main unit in water—this damages electrical components.
Position for Optimal Performance and Safety
Place your Cosori on a flat, heat-resistant surface with 5 inches of clearance on all sides—this isn’t optional. The top vents release intense heat during operation, so keep it away from cabinets, curtains, and walls. Position it where you can easily access both front and sides during cooking. Ensure your countertop supports 30-50 pounds when loaded with food. Avoid placing near sinks or stovetops where splashes or steam could damage electronics. Critical safety note: Never operate with less than required clearance—this causes overheating and fire hazards.
Eliminate Manufacturing Odors with Burn-Off Cycle
Before cooking edible food, run a 15-20 minute burn-off cycle at 450°F on Bake mode with the door closed. You’ll likely see smoke and smell chemical odors—this is normal as factory residues burn off. After cooling completely, wipe the interior again with a damp cloth. Skipping this step transfers manufacturing chemicals to your food, creating off-flavors and potential health risks. This one-time process ensures your first actual meal tastes exactly as it should.
Control Panel Navigation Made Simple
Decode the LED Display for Perfect Results
Your Cosori’s display shows four vital pieces of information simultaneously: current temperature (top left), selected cooking mode (top center), remaining time (bottom), and preheat status (“PrE” when preheating). The color coding provides instant feedback—blue means standby, orange indicates preheating, and red confirms active cooking. Pro tip: When “PrE” disappears and the temperature stabilizes, your oven is fully preheated and ready for food placement.
Button Functions You Need to Know
- Power: Single press turns unit on/off—no need to hold
- Mode Dial: Rotate to cycle through all 12 functions (Air Fry, Bake, Roast, etc.)
- Temperature/Time: Adjust in precise 5°F and 1-minute increments
- Light: 30-second illumination to check food progress
- Start/Stop: Press once to begin—oven automatically preheats if required
Common mistake: Pressing Start/Stop multiple times—it only needs one firm press. The oven beeps to confirm activation.
Quick-Start Sequence for Busy Cooks
Select your desired mode using the central dial, then adjust temperature and time with the +/- buttons. Press Start once—the oven handles the rest. Most modes preheat in 3-7 minutes with automatic transition to cooking time. Time-saving shortcut: For frequently used settings (like Air Fry at 375°F), memorize the button sequence to start cooking in under 15 seconds.
Cooking Modes Decoded for Perfect Results
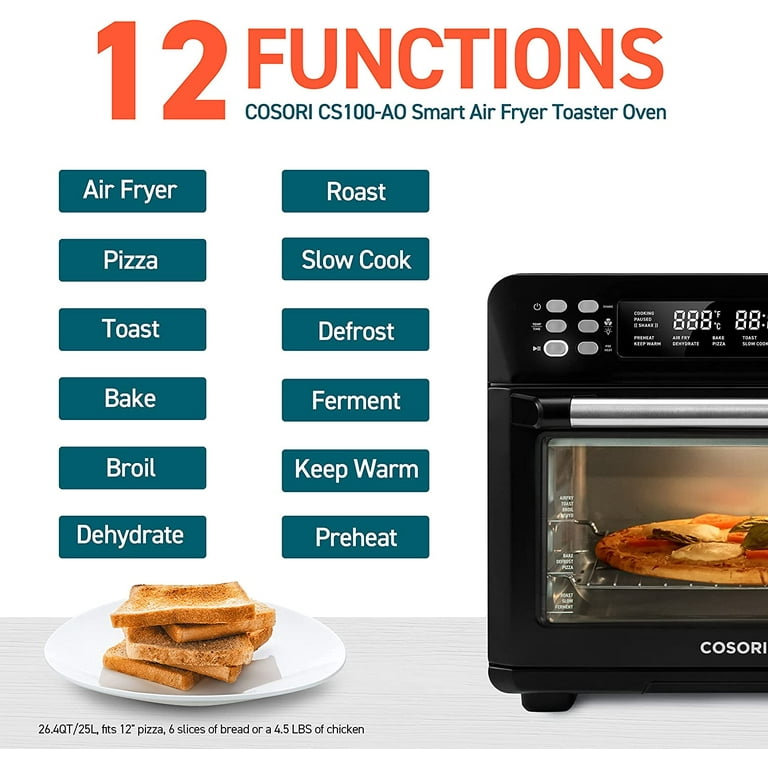
Air Fry Mode Secrets
This mode circulates super-heated air at high velocity for deep-fried texture with minimal oil. Optimal setup: Position fry basket on wire rack at position 4 or 5. Critical step: Preheat 3-5 minutes at target temperature—this creates the immediate sear needed for crispiness. Maximum capacity is 2-3 pounds; overcrowding steams instead of crisps food. Pro tip: Shake the basket halfway through cooking for even browning on all sides.
Bake Mode Precision
Traditional baking with top and bottom elements requires proper placement: position wire rack at level 3 with food tray directly below to catch drips. This configuration prevents spills from burning on the oven floor. Key insight: Reduce conventional oven temperatures by 25°F and expect 20-30% faster cooking times. Always verify cake doneness with a toothpick test at the minimum recommended time.
Roast Mode for Juicy Proteins
Combine top and bottom heating with fan circulation for golden exteriors and moist interiors. Optimal rack position: Level 2 for whole chickens or large roasts. Temperature secret: Start at 400°F for 15 minutes to sear, then reduce to 325°F for even cooking. Essential step: Place a meat thermometer probe through the door’s temperature port to monitor internal doneness without opening the door.
Broil Mode for Perfect Finishing
Intense top heating creates restaurant-quality browning in minutes. Position rack at level 4 or 5—just 3-4 inches from the element. Critical safety step: Always use the food tray below to catch drips—fat splatters cause smoke and potential fire. Never leave unattended during broiling; check every 60-90 seconds after the 3-minute mark.
Toast and Bagel Mode Mastery
Toast handles 6 slices simultaneously with 7 darkness levels. For bagels, position halves cut-side up on the wire rack at level 3. Pro tip: For frozen bread, add 30-60 seconds to the timer. If one side browns faster, rotate the bread 180 degrees halfway through the cycle.
Accessory Placement Strategy
Rack Position Science
Your oven’s 5 rack positions (1=bottom, 5=top) dramatically impact results:
– Position 1: Best for 12-inch pizzas and deep casseroles
– Position 3: Ideal for cookies and standard baking
– Position 5: Maximum crisping for air frying and close broiling
Visual cue: When air frying, position food no more than 2 inches below the heating element for optimal crisping.
Fry Basket Techniques
Lightly spray the non-stick basket before adding food. Arrange items in a single layer with space between pieces—this allows air circulation critical for crispiness. Pro tip: For frozen foods like fries, toss with 1 teaspoon of oil before cooking for extra crunch. Shake the basket halfway through for even results, but avoid opening too frequently—each peek adds 30-60 seconds to cooking time.
Troubleshooting Quick Fixes
Temperature Inconsistency Solutions
If food cooks unevenly, first verify your rack position matches the cooking mode. Avoid opening the door more than absolutely necessary—this drops internal temperature by 25-50°F each time. Quick test: Place an oven thermometer inside to verify accuracy. If discrepancies exceed 25°F, contact Cosori support.
Smoke Production Prevention
Excessive smoke indicates debris on heating elements or oil accumulation. Immediate action: Turn off oven, remove food, and clean thoroughly. For fatty foods like bacon, reduce temperature by 25°F and place a water-filled food tray below to catch drips. Never ignore smoke—this can damage your oven permanently.
Safety First Protocol
Operational Safety Essentials
Always use oven mitts when handling hot accessories—surfaces reach 400°F+ during operation. Keep flammables at least 12 inches from vents. Activate child lock by holding Temperature+ and Time- for 3 seconds (display shows “Loc”). Critical reminder: Allow 30 minutes cooling time between extended cooking sessions to prevent overheating.
Food Safety Verification
Use a food thermometer to verify safe internal temperatures: poultry 165°F, ground meats 160°F, whole cuts 145°F. Never guess doneness—undercooked food risks foodborne illness. For warm mode, never leave perishables longer than 2 hours to prevent bacterial growth.
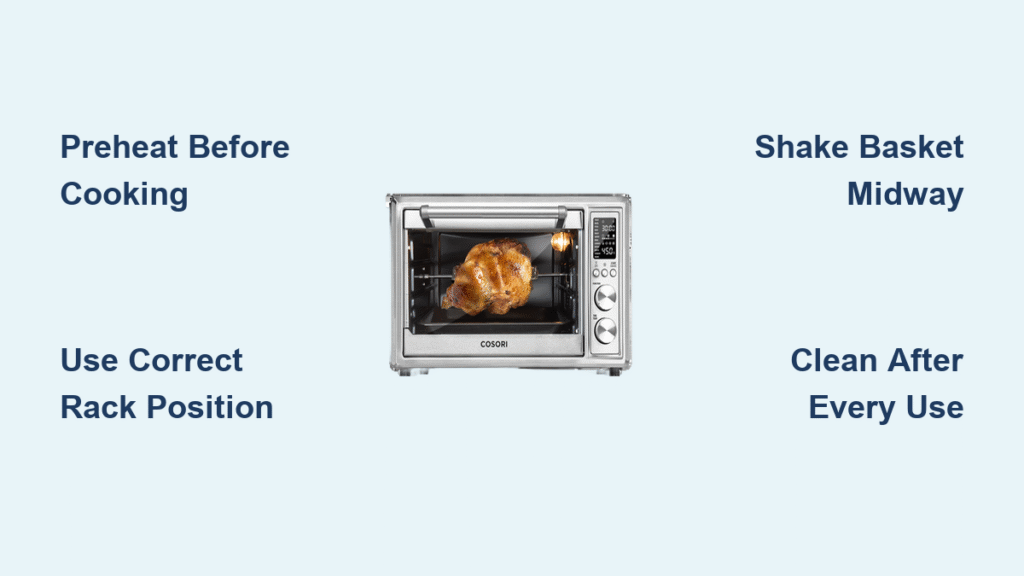
Your Cosori Air Fryer Toaster Oven is now ready to revolutionize your cooking routine. Start with simple recipes like air-fried vegetables to build confidence, then gradually explore all 12 functions. Remember these three keys to consistent success: always preheat for convection modes, position food at the correct height for each function, and clean after every use. For persistent issues, contact Cosori directly at 1-888-402-1684—your 1-year warranty covers manufacturer defects when registered within 14 days of purchase. With these techniques mastered, you’ll achieve restaurant-quality results that make every meal feel special.


