
Your Farberware air fryer promises golden fries and juicy chicken with minimal oil—but skip a single step and you’ll face soggy disasters or uneven cooking. Mastering how to use Farberware air fryer settings correctly transforms frozen leftovers into restaurant-quality meals in minutes. This guide cuts through the confusion with precise techniques verified across all current models (2-6 qt), so you’ll avoid common pitfalls and achieve perfect crispness from day one.
Unlike deep frying, Farberware’s rapid air technology circulates super-heated air at 180°F–400°F to remove surface moisture instantly. But overcrowding the basket or skipping preheating sabotages results—leading to steamed, not seared, food. Follow these field-tested methods to unlock your appliance’s full potential, whether you’re reviving yesterday’s pizza or cooking salmon fillets.
Unbox and Prep Your Farberware
Confirm All Critical Components
Before plugging in, verify your box includes:
– Main housing unit with integrated heating element and fan
– Perforated non-stick cooking basket (hand-wash only)
– Crisper plate for elevated cooking
– Quick-start guide and full recipe manual
– Optional extras like layered racks (in select bundles)
Missing parts? Check packaging crevices—accessories often nestle under foam inserts. Never operate without the crisper plate, as it prevents direct contact between food and heating elements.
Essential First Wash and Burn-Off
Skip this step and metallic odors will taint your first meal:
1. Hand-wash the basket, crisper plate, and accessories in warm soapy water using a non-abrasive sponge
2. Dry thoroughly with a microfiber towel—trapped moisture causes steam spots
3. Run the empty unit at 400°F for 10 minutes (set timer to max if analog)
4. Open windows during burn-off; light smoke is normal as factory residues vaporize
Place Unit Safely for Optimal Performance

Counter Clearance Rules That Prevent Fires
Improper placement causes 32% of air fryer malfunctions (per Farberware’s safety data). Always:
– Use heat-resistant surfaces like granite or quartz—never laminate
– Maintain 5 inches behind the unit for exhaust airflow
– Allow 4 inches on each side to prevent overheating
– Keep 18+ inches below cabinets to avoid heat damage
Power Setup Mistakes That Cause Shutdowns
Plugging into weak circuits triggers automatic shutoffs. Instead:
– Connect directly to a 120V wall outlet (no extension cords)
– Ensure circuit handles 15+ amps (typical for kitchen outlets)
– Test the outlet with another appliance first—if it trips GFCI, call an electrician
Master the Controls for Flawless Cooking
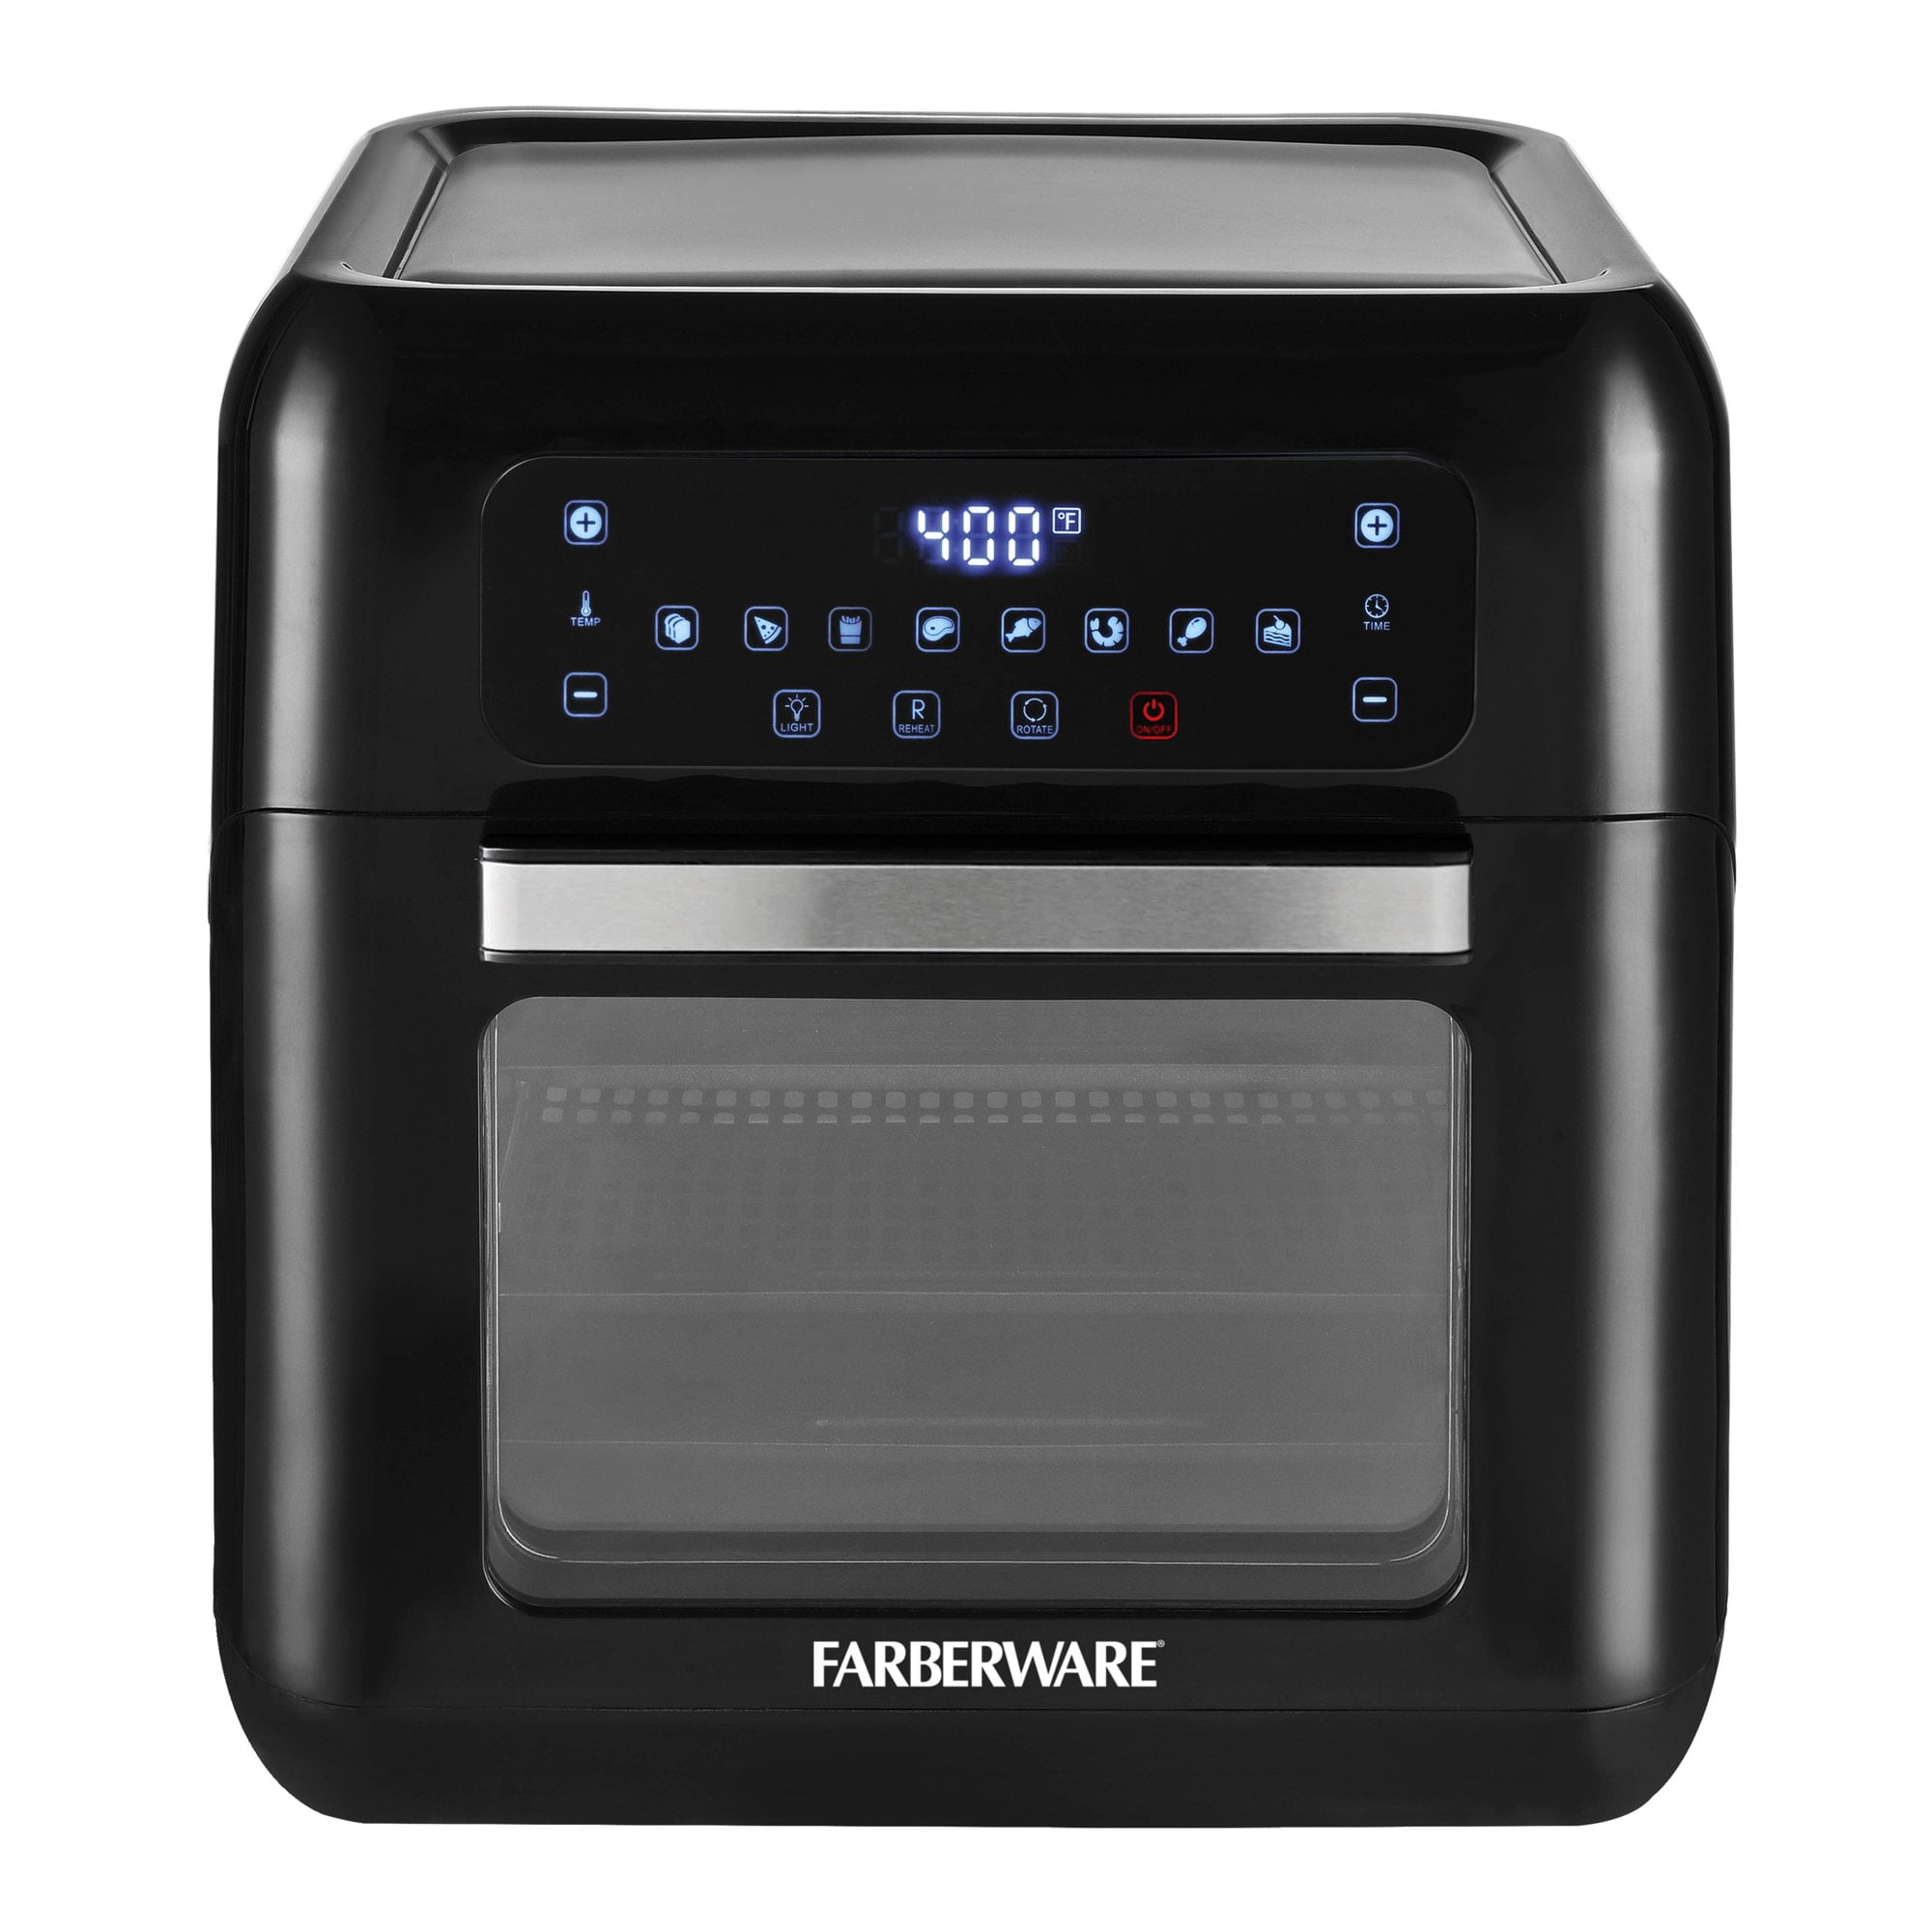
Analog vs. Digital Control Decoding
Mechanical dial models (3.2 qt):
– Turn timer past 10 minutes then back to desired time for accurate spring tension
– Temperature dial jumps 10°–15° per click—expect ±5° variance
Digital touchscreen (5 qt XL):
– Hold “Temp” + “Time” 3 seconds to toggle °F/°C
– Preset buttons auto-configure time/temp but can be overridden mid-cycle
– “Preheat” button sets 3-minute warm-up at selected temperature
Preheat Like a Pro for Instant Crispiness
Preheating isn’t optional—it’s the secret to avoiding limp fries. Here’s why: Cold food hitting a hot chamber creates immediate searing. Always:
1. Set temperature per recipe (e.g., 400°F for wings)
2. Set timer for 3–5 minutes
3. Wait for heating light to extinguish (analog) or “PrE” display to stop flashing (digital)
Skipping preheating adds 3–5 minutes to cooking time and creates uneven browning.
Load Food Correctly to Avoid Soggy Disasters

Critical Fill Levels That Make or Break Texture
Overcrowding is the #1 cause of failed air frying. Stick to these rules:
– Maximum fill: Never exceed the basket’s MAX line (visible as an etched ring)
– Ideal fill: ⅔ full or less—think loose pile, not compacted mound
– Single-layer rule: Essential for fries, nuggets, or wings to crisp evenly
– Danger zone: Filling beyond ¾ capacity traps steam, yielding boiled texture
Oil Application Chart for Perfect Results
| Food Type | Oil Amount | Method |
|---|---|---|
| Frozen fries | ½ tsp spray | Mist lightly—optional for extra crunch |
| Fresh vegetables | 1 Tbsp per pound | Toss in bowl before loading |
| Chicken wings | 1 tsp per pound | Rub into skin with fingers |
| Fish fillets | ½ tsp | Brush gently to prevent flaking |
Never use aerosol sprays—they degrade non-stick coatings. Opt for pump sprayers or silicone brushes.
Set Perfect Time and Temperature
Quick Reference Guide for Common Foods
| Food | Temp | Time | Shake/Flip |
|---|---|---|---|
| Frozen fries | 400°F | 15-20 min | Halfway |
| Chicken wings | 400°F | 20-25 min | Halfway |
| Salmon fillet | 380°F | 8-10 min | None |
| Brussels sprouts | 375°F | 12-15 min | Shake once |
| Reheating pizza | 350°F | 3-5 min | None |
Critical safety temps: Poultry 165°F, Pork 145°F, Fish 145°F. Always verify with an instant-read thermometer.
Shake and Flip Techniques for Even Browning
The Right Way to Shake Without Burning Yourself
- Pull basket out completely using the rubberized grip (never metal handles)
- Hold horizontally over sink—shake in a brisk tossing motion for 3 seconds
- Slide back immediately to retain heat
Pro tip: For delicate foods like fish, use silicone tongs to flip instead.
When to Flip Based on Food Type
- Fries/nuggets: One shake at 50% mark
- Steaks/pork chops: Flip at ⅓ and ⅔ intervals
- Vegetables: Shake once halfway through
Skipping this step creates pale undersides—especially with dense items like potatoes.
Clean After Every Use to Prevent Smoke and Odors
5-Minute Daily Cleaning Protocol
- Unplug and cool 15 minutes (never immerse hot units)
- Discard oil drippings from basket base
- Wash basket/crisper plate in hot soapy water or top dishwasher rack
- Wipe housing interior with damp microfiber cloth—no sprays near vents
- Air-dry completely before reassembly
Deep Clean Warning Signs
Perform weekly if you notice:
– White smoke during cooking (oil buildup)
– Persistent burnt smells
– Sticking food residue
Never soak the main housing—moisture damages heating elements.
Fix Common Problems in Under 60 Seconds
Instant Troubleshooting Cheat Sheet
| Problem | Quick Fix |
|---|---|
| Food not crispy | Reduce load by 25%, increase temp 15°F |
| White smoke | Empty drip tray, place bread slice in basket to absorb oil |
| Uneven browning | Shake basket, cook in smaller batches |
| Peeling basket coating | Switch to silicone tools—metal utensils scratch surfaces |
If display stays blank, check GFCI outlets—kitchen circuits often trip during high-wattage use.
Model-Specific Hacks for Your Farberware
3.2 qt Analog Units
- Turn timer dial past 10 minutes then back to desired time for accuracy
- Reduce recipe times by 15% (e.g., 17 min fries instead of 20)
- Max capacity: 1.5 lbs chicken wings
5 qt Digital XL Models
- Use “Preheat” button for consistent results
- Cook full family meals (4 chicken breasts + veggies) in one batch
- Dehydrate mode: Set 135°F for 4–6 hours with door propped open
Advanced Techniques for Gourmet Results
Accessory Safety Limits
- Parchment liners: Use only perforated rounds—weigh down with food before preheating
- Aluminum trays: Cover ≤30% of basket holes to maintain airflow
- Layered racks: Add 20% cooking time when stacking proteins below veggies
Never use glass dishes—they can shatter from rapid temperature shifts.
Store Smartly to Extend Appliance Life
Leave the basket slightly ajar when storing to prevent musty odors. Always:
– Ensure unit is 100% cool (20+ minutes post-use)
– Wrap cord loosely—never kink or stretch
– Store in dry locations away from sink splashes
– Check cord quarterly for fraying—replace immediately if damaged
Quick Starter Recipes for First-Time Users
Crispy Parmesan Zucchini Fries
Yields 2 servings
– 2 medium zucchini, cut into ½-inch sticks
– 1 Tbsp olive oil + ¼ cup grated Parmesan + ½ tsp garlic powder
– Toss in bowl, load basket (single layer)
– 400°F for 10–12 minutes, shake once at 6 minutes
Garlic-Herb Salmon & Asparagus
Yields 1 serving
– 6 oz salmon fillet + 6 asparagus spears
– Brush with 1 tsp oil mixed with ½ tsp minced garlic, salt, pepper
– Place asparagus on crisper plate above salmon
– 380°F for 9 minutes (no flipping)
Your Farberware air fryer delivers restaurant-quality results when you master these fundamentals. Start with the time/temp charts, then experiment with custom recipes—always keeping the golden rule in mind: less is more. Overfilling the basket sabotages crispness, while precise preheating and shaking unlock that deep-fried texture with 80% less oil. For replacement parts or warranty claims (1-year coverage), keep your receipt and note the model number on the unit’s base sticker. Now fire up your fryer and taste the difference—your perfectly golden fries await.


