

Tired of air frying in frustrating single batches? Your Instant Pot Duo Crisp’s multi-level air fryer basket solves this exact problem by doubling your cooking capacity without compromising crispiness. This two-tier system transforms your pressure cooker into a powerhouse that handles 40% more food than standard air fryers—perfect for feeding families or meal prepping crispy favorites like fries, chicken, and veggies simultaneously. Within 30 seconds of assembly, you can cook a complete meal with proteins on one level and vegetables on another, all while achieving that coveted golden-brown finish. Stop wasting time with multiple cooking cycles and discover exactly how to leverage this game-changing accessory for restaurant-quality results every time.
30-Second Multi-Level Basket Assembly (No Fumbling!)

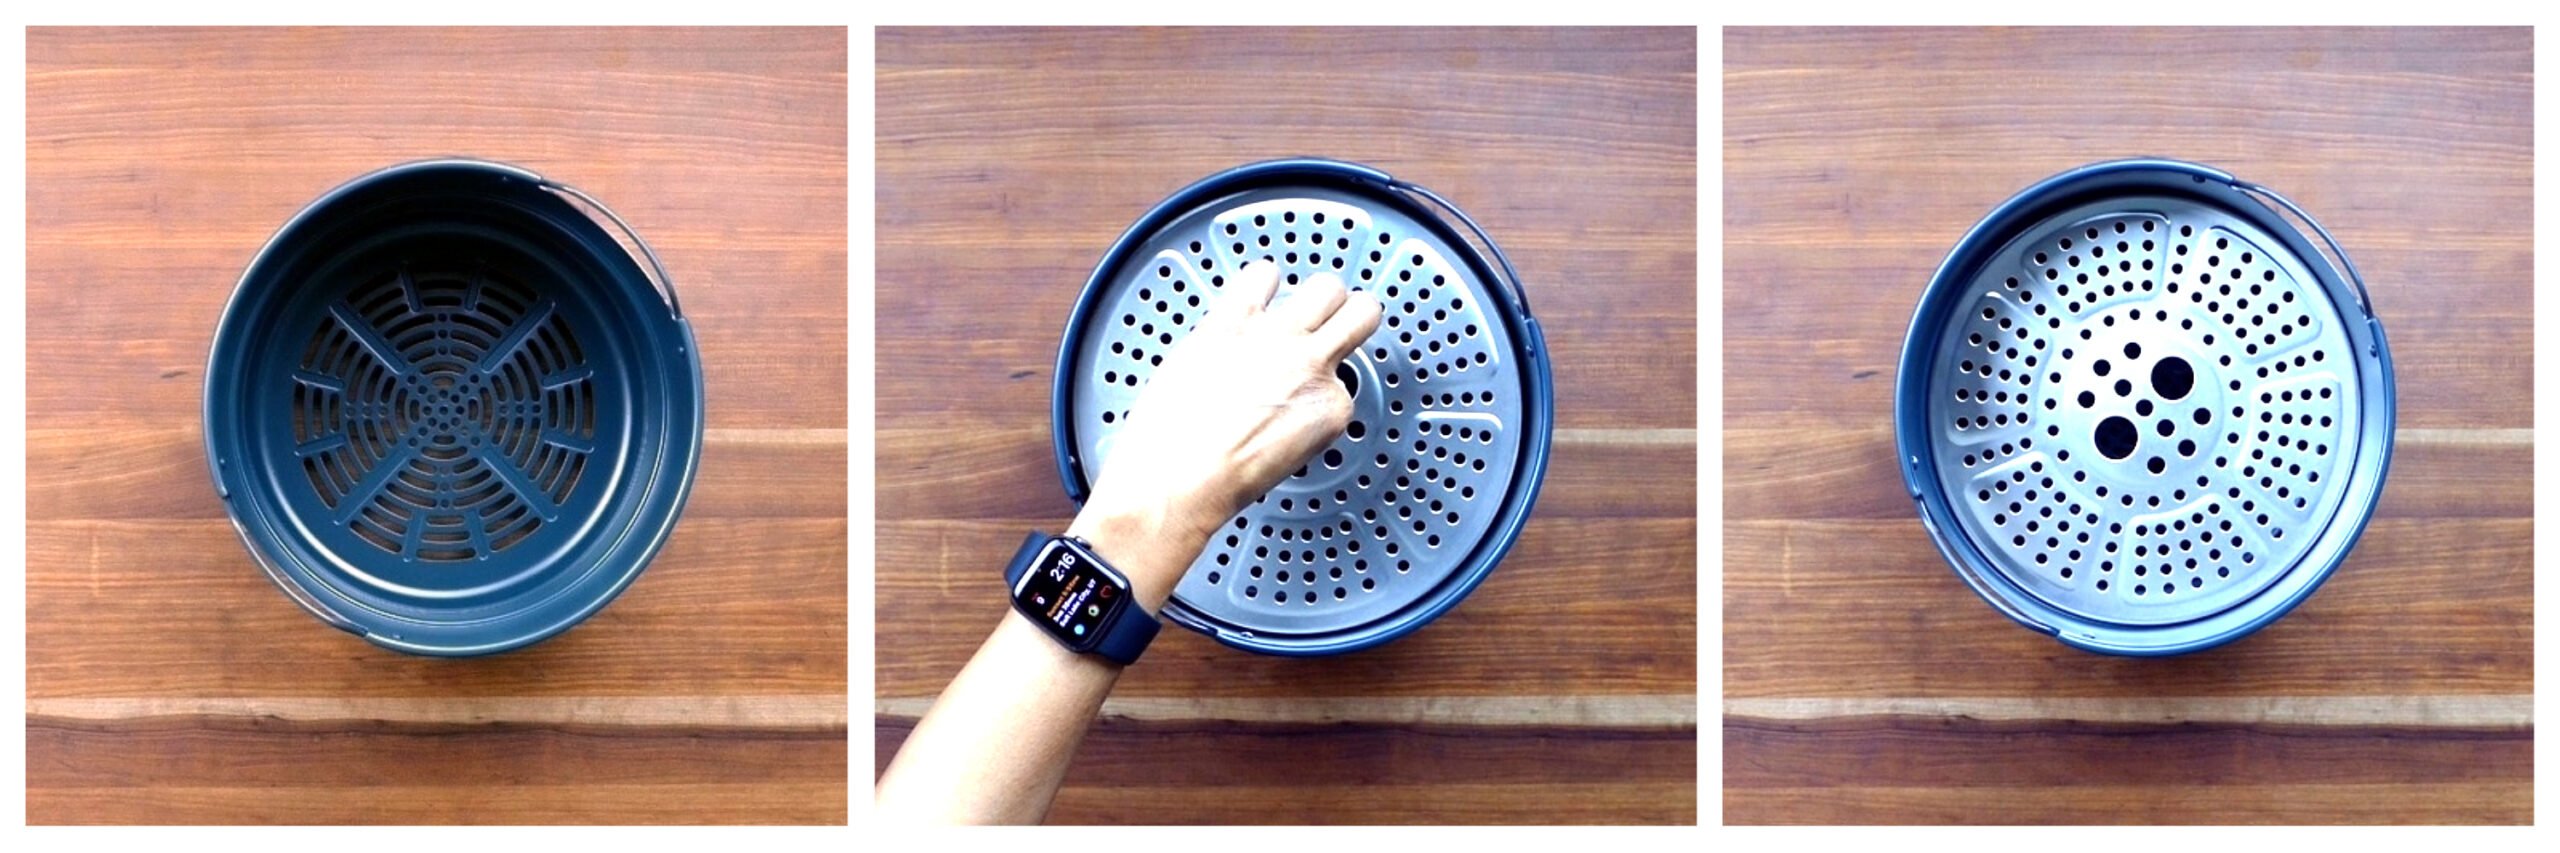
Skip the confusing manual pages—here’s the foolproof setup that works every time. First, place your inner pot securely in the cooker base. Then snap the Multi-Level Air Fry Basket directly onto the Air Fryer Basket Base (the flat mesh disc with legs). This combined unit drops straight into the inner pot like a puzzle piece. For three-level cooking, add the Broil/Dehydrating Tray on top of your first ingredient layer. Never skip the critical oil step: spray all basket surfaces with olive oil using a fine mist 6-8 inches away—this prevents 90% of sticking issues before they start.
Two-Level Setup for Everyday Meals
- Assemble basket base + multi-level basket in inner pot
- Lightly oil all surfaces (bottom, sides, and divider)
- Add first ingredient layer (e.g., chicken thighs) in a single layer
- Secure the Air Fryer Lid—listen for the click confirming full seal
- Press “Air Fry,” set temp/time, then hit Start
Three-Level Configuration for Complete Dinners
For meals like roast chicken with potatoes and asparagus:
– Bottom level: Denser items (potatoes, carrots)
– Middle level: Proteins (chicken pieces)
– Top level: Delicate veggies (asparagus, broccoli)
Pro tip: Place the Broil/Dehydrating Tray directly on the chicken halfway through cooking to maximize vegetable browning without overcooking meat.
Strategic Food Placement for Perfect Crispiness Every Time
Where you position food makes or breaks your results. The lower level receives gentler, more even heat—ideal for dense items like thick-cut sweet potatoes or 1.5-pound pork chops needing 20 minutes at 400°F. Conversely, the upper level blasts food with direct heat for rapid crisping—reserve this spot for French fries, fish fillets, or reheating leftovers. Ignore this hierarchy, and you’ll end up with charred fries and raw chicken.
Lower Level: Your Slow-Cooking Powerhouse
Place foods requiring longer cook times here:
– Whole chicken (4 lbs at 400°F for 60 mins)
– Root vegetables (potatoes, beets)
– Thick meat cuts (pork steaks, lamb chops)
Critical mistake to avoid: Overcrowding. Leave ½-inch space between items for air circulation—otherwise, you’ll steam instead of fry.
Upper Level: The Crisping Accelerator
Maximize this prime real estate for:
– French fries (1.5 lbs at 400°F for 17 mins)
– Fish fillets or shrimp
– Reheated pizza or wings
Pro tip: Spray upper-level foods with oil after placing them—gravity ensures even coating without pooling.
Mid-Cycle Management: Why Ignoring the Beep Ruins Your Meal
That halfway beep isn’t optional—it’s your crispiness insurance. For fries and similar items, lift the lid (cooking pauses automatically) and shake the basket vigorously for 10 seconds. This breaks up clumps and exposes new surfaces to the heat. During multi-level cooking, switch positions: move bottom-level chicken to the top tray and vice versa. Skipping this step guarantees uneven results—bottom items stay soggy while top items scorch.
Handling the Turn Prompt Like a Pro
- For proteins: Rotate pieces 180 degrees instead of swapping levels
- For fries: Toss with tongs if shaking isn’t possible
- Critical warning: Never ignore the beep for meat—internal temps vary by 20°F between levels
Avoid These 3 Costly Cleaning Mistakes
Most users damage their baskets within weeks by making these errors. First, never soak the Air Fryer Lid—its heating element is water-sensitive. Instead, wipe it with a damp microfiber cloth after 30 minutes of cooling. Second, skip dishwasher detergent pods—they leave residue that causes smoking. Use liquid detergent for dishwasher-safe parts (basket base, trays, inner pot). Third, never reassemble damp components—moisture trapped between layers breeds mold. Air-dry all pieces on a rack for 2 hours minimum.
Dishwasher vs. Hand-Wash Cheat Sheet
| Component | Cleaning Method | Pro Tip |
|---|---|---|
| Multi-Level Basket | Dishwasher top rack | Place upside down to avoid water pooling |
| Broil/Dehydrating Tray | Dishwasher safe | Load vertically for better spray coverage |
| Air Fryer Lid | Hand-wash only | Clean underside with soft sponge—no scrubbing |
| Cooker Base | Damp cloth only | Unplug first—never wipe while warm |
Temperature & Timing Mastery (Steal This Chart)

Stop guessing cook times—this verified chart works for all Duo Crisp models. Key insight: multi-level cooking adds 5-8 minutes versus single-level due to air displacement. Always reduce time by 3 minutes if using three tiers.
| Food | Weight | Temp | Time | Level Placement |
|---|---|---|---|---|
| Chicken drumsticks | 1.3 lbs | 374°F | 35 mins | Bottom (flip at 17 mins) |
| French fries | 1.5 lbs | 400°F | 15 mins | Top (shake at 7 mins) |
| Lamb chops | 1.1 lbs | 374°F | 12 mins | Broil tray (no flip needed) |
| Brussels sprouts | 1 lb | 390°F | 18 mins | Top (toss with bacon fat) |
Critical adjustment: For frozen foods, add 7 minutes and spray with oil after the first shake.
Troubleshooting: Fix Sticking & Uneven Cooking Now
Problem: Food welds to the basket despite oiling
Solution: You’re using aerosol spray. Switch to a pump-style olive oil mister—aerosols contain propellants that gunk up surfaces. Hold 6 inches away and spray in short bursts.
Problem: Bottom layer undercooked while top burns
Fix: Rotate levels at the beep and reduce top-level temp by 25°F. For example, cook chicken at 375°F on bottom while fries run at 400°F on top.
Problem: Smoke during cooking
Cause: Oil pooling in basket crevices. Solution: After oiling, run the basket empty at 400°F for 5 minutes to burn off excess before adding food.
Pro Power User Secrets for Restaurant Results
Preheating isn’t optional—it’s non-negotiable for crispiness. When you press Start, the unit preheats for 3-5 minutes before the timer counts down. Never add food during this phase; wait for the audible “ready” tone. For meats, always verify doneness with a thermometer—multi-level cooking creates hot spots. Insert probes into multiple pieces: chicken should hit 165°F in the thickest part, while pork steaks need 145°F.
Batch Cooking Hack for Meal Preppers
Cook double batches without quality loss:
1. Cook proteins on bottom level (e.g., chicken thighs)
2. At the beep, remove cooked chicken to plate
3. Add new chicken to bottom level + frozen fries to top
4. Reset timer for 80% of original time
Result: Two full batches with identical crispiness in under 45 minutes.
Mastering your Instant Pot multi-level air fryer basket means never sacrificing crispiness for capacity again. Start with simple two-tier combos like chicken thighs and broccoli before advancing to three-level feasts. Remember the golden rules: oil all surfaces pre-cooking, rotate foods at the beep, and verify temps with a thermometer. Within three uses, you’ll consistently pull out golden-brown fries, perfectly seared chops, and roasted veggies—all cooked simultaneously. The real secret? This system isn’t just convenient—it’s your shortcut to becoming the crispy-food hero your family deserves. Grab your basket, spray that oil, and fire up your next family meal in half the time.


