
Tired of scrubbing cheese-laden debris from your air fryer basket after every use? That sticky residue clinging to metal surfaces isn’t just annoying—it’s wasting precious time you could spend enjoying meals instead of cleaning. A silicone basket solves this exact problem by creating a non-stick cooking surface that slips right into your air fryer, transforming tedious cleanup into a 10-second wipe-down.
Imagine effortlessly removing delicate fish fillets without them tearing apart or cooking marinated chicken without worrying about sauce dripping through basket holes. These flexible, heat-resistant liners withstand temperatures up to 450°F while protecting your appliance and delivering perfectly cooked food. Whether you’re battling stuck-on breakfast potatoes or wrestling with melted cheese disasters, this guide reveals exactly how to use silicone baskets properly to maximize cooking results and minimize cleanup time.
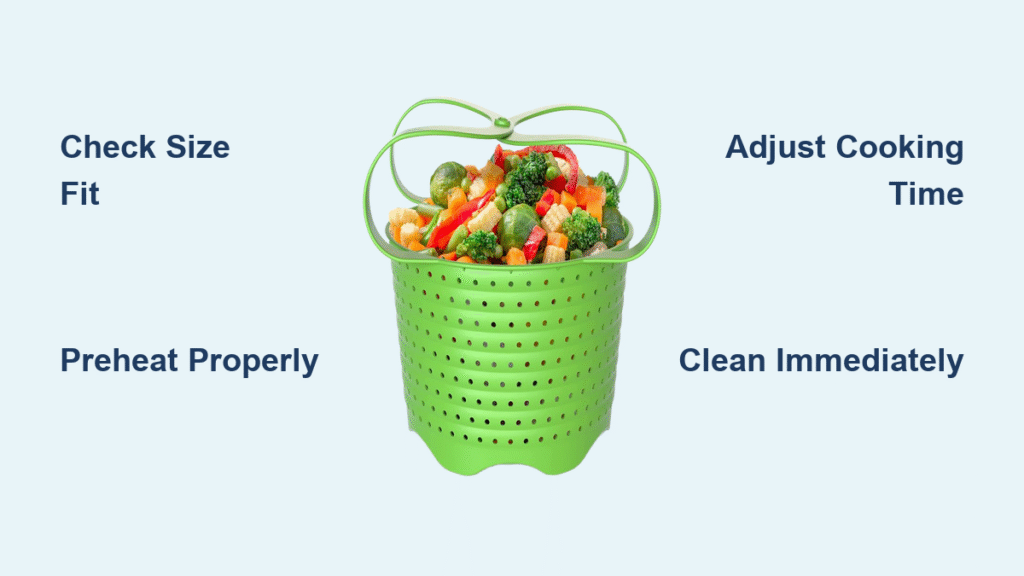
Choose the Right Silicone Basket
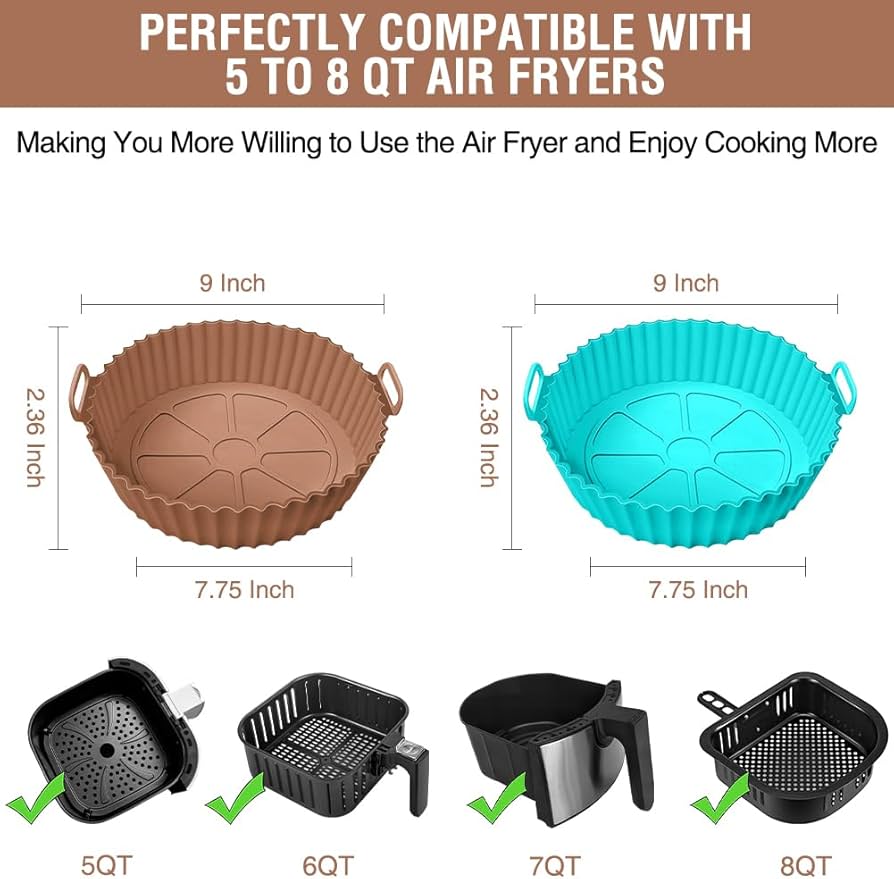
Size Compatibility Check
Measure your air fryer basket before purchasing to avoid costly mistakes. Silicone baskets come in specific sizes—3-quart, 5-quart, and 6-quart options dominate the market. A properly sized basket fits flat against the bottom with 1-2 inches clearance around edges for optimal air circulation. Your silicone liner should cover 80-90% of the basket floor but never extend so high that it blocks critical air channels. Too small, and food will stick to exposed metal; too large, and it will impede the convection flow that makes air frying work.
Quality Markers to Look For
Inspect for food-grade silicone certification before buying. FDA-approved or LFGB-certified products guarantee safety at high temperatures without leaching chemicals. Quality baskets withstand 450°F (232°C) without warping or releasing odors. Avoid thin, flimsy options that buckle under food weight or show visible seams—these will degrade quickly. Press the silicone; it should feel substantial yet flexible, returning to shape without leaving fingerprints.
Basket vs Pot vs Mat Selection
- Silicone basket: Best for most foods with shallow sides (½-1 inch) that allow easy flipping
- Silicone pot: Deep sides (2-3 inches) for casseroles, lasagnas, or liquid dishes
- Silicone mat: Flat perforated surface ideal for cookies, flatbreads, or French toast
Pre-Use Preparation Steps
Initial Cleaning Protocol
Wash new silicone baskets in warm, soapy water before first use. This removes manufacturing residues and conditions the surface. Use a soft sponge—never abrasive scrubbers that create micro-scratches. Rinse thoroughly and air dry completely; any moisture creates steam during cooking that can cause warping. Avoid dishwashers for the first cleaning to prevent potential chemical reactions with manufacturing residues.
Temperature Verification Test
Check your air fryer’s maximum temperature against the basket’s rating. Most quality baskets handle 450°F, but verify this match. Test with a 3-minute empty run at 400°F to ensure no warping occurs. Place the silicone basket in a cold air fryer, set to 400°F for 3 minutes, then inspect for any distortion. If it warps, return it—quality silicone maintains shape even at high heat.
Basket Placement Technique
Place silicone basket in the air fryer before preheating. Ensure it lies flat without folds or creases by smoothing from center outward. The basket should cover 80-90% of the bottom surface—never block all air holes. If your liner has perforations, align them with the air fryer basket holes for maximum airflow. Gently press edges against the basket wall to prevent shifting during operation.
Load Food Correctly

Weight Distribution Method
Add heavier items first to anchor the lightweight silicone. Distribute food evenly across the surface—clumped food creates uneven cooking and potential liner movement. For loose items like chopped vegetables, spread in a single layer with space between pieces. Never pile food higher than 1½ inches; overcrowding traps steam and prevents proper crisping. If cooking multiple items, place denser foods toward the basket’s outer edge where heat concentrates.
Food Placement Order
- Add food directly onto silicone surface—never preheat empty
- Leave 1-inch border around edges for air flow
- Avoid overloading—food should fit comfortably with space between pieces
- For sticky items like cheese, apply light oil spray before adding food
Special Considerations
For cheese or sticky foods, light oil spray on silicone surface prevents initial sticking. This won’t affect the non-stick properties but provides extra insurance for delicate items. When cooking saucy foods, place a paper towel underneath the silicone liner to absorb excess liquid without blocking airflow. For foods requiring maximum crispiness on both sides, flip halfway through cooking using silicone-tipped tongs to avoid scratching the liner.
Adjust Cooking Settings
Time Modification Rules
Expect 1-3 additional minutes when using silicone baskets. The material’s insulating properties slow initial heat transfer. Start checking doneness 2 minutes before original recipe completion time. For example, if fries normally cook in 15 minutes, check at 13 minutes when using silicone. Keep a log of adjustments for your most-cooked foods—this becomes your personalized silicone cooking guide.
Temperature Adjustments
Increase temperature by 10-15°F for foods requiring crisp bottoms. Alternatively, remove silicone basket for final 2-3 minutes of cooking to achieve maximum crispiness. For items like chicken wings where crisp skin matters most, cook directly in the metal basket for the first 80% of cooking time, then transfer to silicone for easier cleanup during the final phase.
Visual Cues to Watch
Monitor food color more closely during first uses. Silicone creates more even browning—look for consistent golden edges as doneness indicators rather than dark spots. Foods may appear slightly less brown on the bottom surface compared to direct basket cooking. This is normal—the silicone creates gentler, more even heat distribution. Check internal temperatures with a meat thermometer for accuracy.
Clean Silicone Baskets Properly
Immediate Post-Cooking Care
Let silicone cool 5-10 minutes before handling. Hot silicone remains flexible but can burn fingers. Once warm, invert basket over trash to release loose particles—most debris will fall out naturally. For stubborn residue, fill the silicone liner with warm water immediately after cooking to loosen stuck-on food. Never submerge hot silicone in cold water; thermal shock can cause cracking.
Hand Washing Method
Use warm water and mild dish soap. The flexible material allows easy inside-out flipping for thorough cleaning. Work soap into the surface with your fingers or a soft sponge—avoid abrasive scrubbers that damage the non-stick surface over time. Pay special attention to the bottom surface where oil and food particles accumulate. Rinse under running water until completely clear.
Dishwasher Protocol
Place silicone baskets on the top rack only. High heat from bottom elements can cause warping. Use normal wash cycles—sanitize settings aren’t necessary and may degrade silicone faster. Avoid placing near sharp utensils that could puncture the material. After washing, inspect for any trapped food particles in creases before air drying completely.
Troubleshoot Common Issues
Basket Movement Solutions
If silicone shifts during cooking, add a teaspoon of oil to the basket bottom before food. This creates slight adhesion without affecting non-stick properties. Alternatively, use heavier foods as anchors—place chicken breasts or steak first, then surround with lighter items. For persistent movement, consider trimming oversized liners to fit your specific basket dimensions.
Uneven Cooking Fixes
Food undercooked on bottom? Remove silicone basket halfway through cooking. This allows direct heat contact for crisping while maintaining easy cleanup benefits. For items like roasted vegetables that need browning on all sides, flip foods halfway and consider removing the silicone for the final minutes. Always rotate the basket 180 degrees midway through cooking for even exposure.
Odor Elimination Techniques
Persistent smells develop over time. Soak baskets in baking soda solution (1 tablespoon per cup warm water) for 30 minutes. Rinse thoroughly and air dry completely before next use. Avoid using vinegar or bleach solutions that can degrade silicone quality. For stubborn odors, try sun-drying the liner for a few hours—UV rays naturally eliminate smells without chemicals.
Maximize Basket Performance
Best Foods for Silicone Use
- Perfect matches: Fish fillets, cheesy dishes, marinated meats, small vegetables
- Avoid: French fries, chicken wings, foods requiring maximum crispiness
- Middle ground: Flip foods halfway for balanced results
Multi-Level Cooking Setup
Use multiple small silicone baskets in larger air fryers. Create separate zones for different foods—cook vegetables in one, protein in another simultaneously without flavor mixing. This technique works particularly well for meal prep when cooking multiple components at once. Ensure adequate space between baskets for proper air circulation.
Recipe Adaptation Strategy
Start with original recipe settings. Adjust based on visual cues during first attempt. Document successful modifications for future reference. For example, if salmon normally cooks in 12 minutes directly in the basket, try 14 minutes at the same temperature with silicone. Note the exact time and temperature that works best for your specific air fryer model and silicone liner combination.
Mastering silicone basket use transforms air fryer cooking from messy chore to effortless meal preparation. Start with these fundamentals, then experiment with your favorite recipes. The time saved on cleanup alone makes silicone baskets indispensable for daily air fryer users. Remember to verify temperature compatibility, distribute food weight properly, and adjust cooking times slightly for optimal results. Within a few uses, you’ll develop an intuitive sense for how your specific silicone basket interacts with your air fryer model, turning what seemed like an extra step into your most valuable kitchen shortcut.


