

Your Instant Pot air fryer lid refuses to lock, leaving you staring at frozen fries while dinner plans go up in smoke. This frustrating issue affects thousands of home cooks daily, but most locking problems can be solved in under 20 minutes without professional help. Whether you’re dealing with a brand new unit or one that’s served faithfully for months, understanding why your lid won’t lock is the first step toward getting back to crispy chicken wings and perfectly roasted vegetables.
The locking mechanism in your Instant Pot air fryer lid is more sophisticated than it appears. Three stainless steel pins must extend precisely 12mm into their receptors while multiple sensors verify proper alignment and temperature. When any part of this delicate system fails, the entire unit refuses to operate—a safety feature that’s working exactly as designed, even when it feels like your dinner plans are ruined. This guide delivers proven solutions to get your Instant Pot air fryer lid locking properly again.
Food Debris Blocking Locking Pins
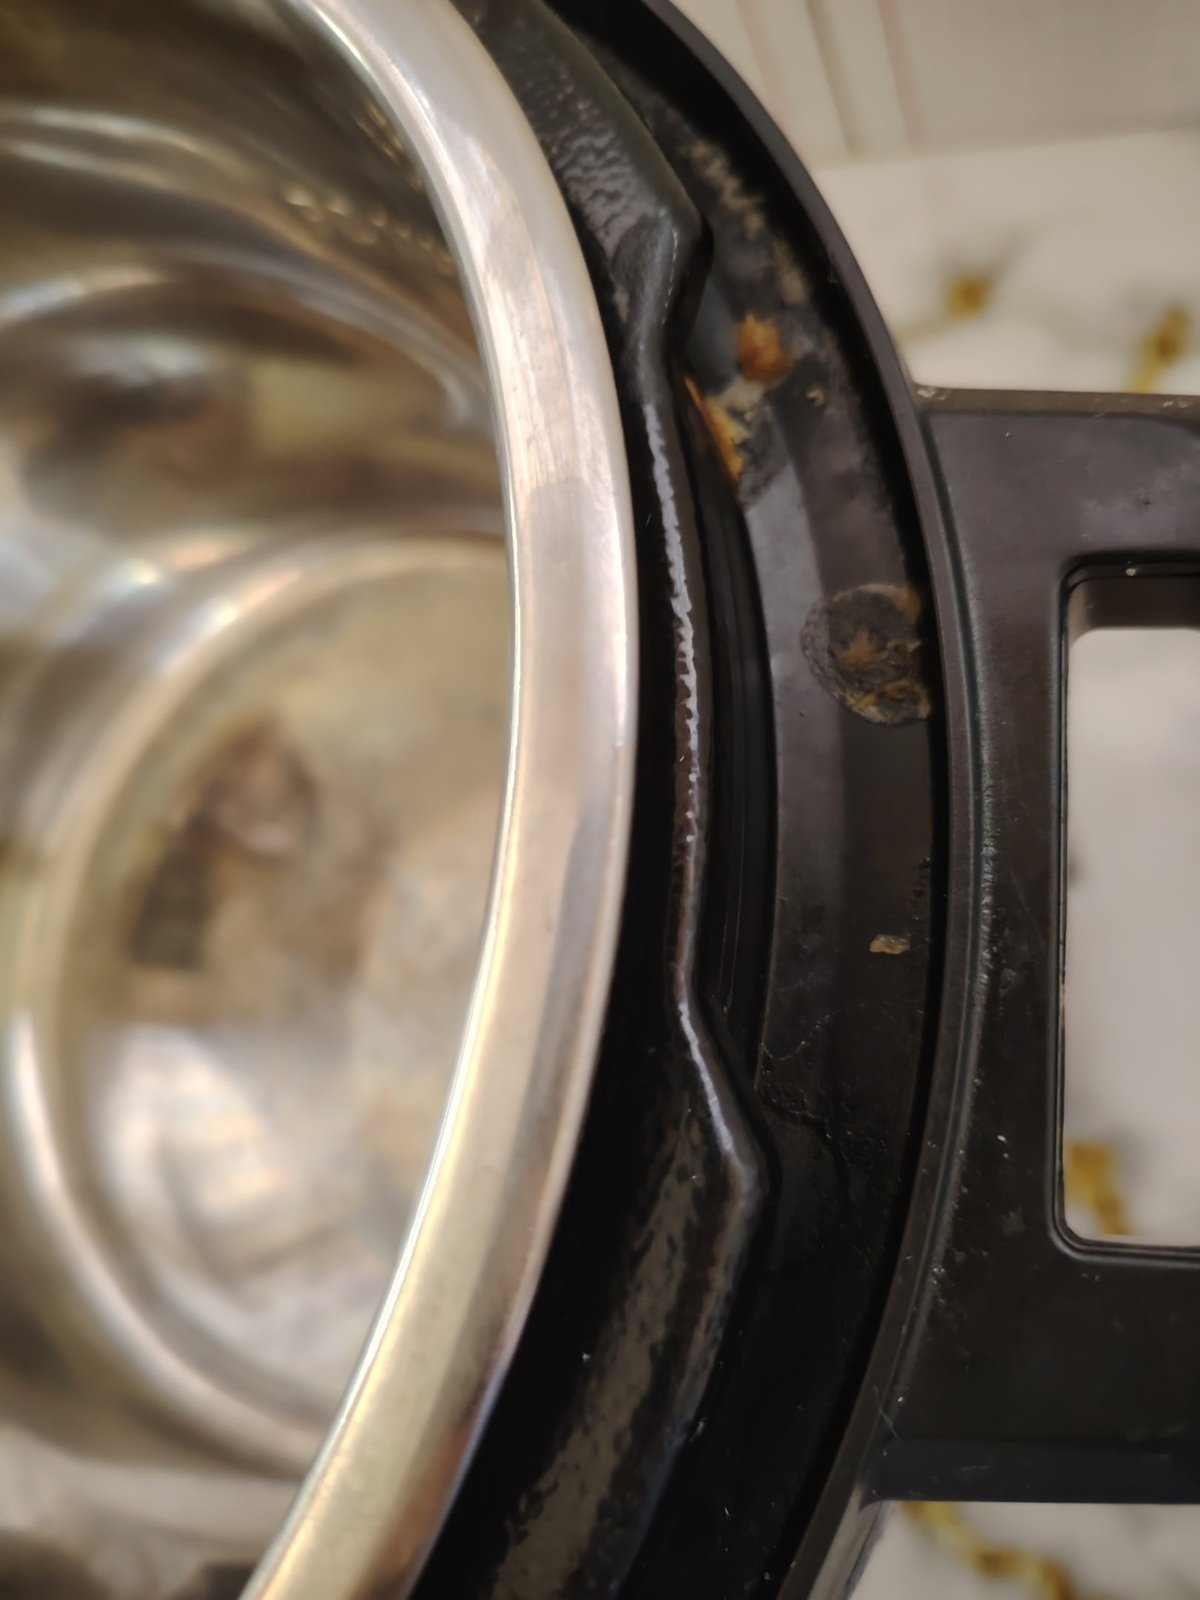
Critical Areas Prone to Buildup
Tiny food particles and grease accumulation cause 70% of Instant Pot air fryer lid not locking issues. The 6mm locking pin channels, safety sensor windows, and alignment grooves are particularly vulnerable to clogging. Even microscopic debris can prevent the pins from extending fully into their secured positions.
Most problematic areas to inspect:
– Perimeter grooves where lid meets base unit
– Rectangular sensor windows on lid underside
– Three locking pin channels (visible as small holes)
– Base unit’s locking receptors
Effective Cleaning Without Damage
Before you begin: Ensure the lid is completely cool and disconnected from power. Never submerge electrical components in water.
- Remove the lid from base unit and place upside down on a protected surface
- Brush away loose debris using a soft-bristled brush or old toothbrush
- Swab sensor windows with cotton tips dipped in warm, soapy water
- Clean pin channels by inserting damp cotton swab and rotating gently
- Rinse carefully using barely damp cloth—avoid excess moisture
- Dry completely with lint-free cloth, ensuring no moisture remains
- Test mechanisms by manually checking pin movement before reassembly
Pro tip: Use a wooden toothpick wrapped in cloth for stubborn debris in narrow channels, but never use metal tools that could scratch components or damage sensors.
Precision Lid Alignment Techniques That Work
Step-by-Step Alignment Process
Your air fryer lid requires precise 2-degree alignment tolerance. When the lid rotates even slightly off-center, the locking pins can’t find their receptors. This often happens when users force the lid without checking alignment arrows, or when the base unit shifts during cooking vibrations.
Proper positioning sequence:
1. Clear the workspace around your Instant Pot
2. Verify base stability—unit shouldn’t wobble or shift
3. Find alignment arrows on both lid and base rim
4. Position arrows pointing directly at each other
5. Lower vertically without any rotation
6. Listen for click indicating initial engagement
7. Rotate smoothly clockwise until resistance increases
8. Stop immediately when firm resistance is felt
Common Alignment Mistakes That Cause Damage
Avoid these errors:
– Forcing rotation when resistance is high (can bend pins)
– Ignoring the positioning click (indicates misalignment)
– Attempting to lock with misaligned arrows (causes sensor errors)
– Applying downward pressure during rotation (warps components)
– Checking alignment from standing position—kneel to eye level
Sensor Malfunction Troubleshooting Guide
Identifying Sensor Problems
When functioning correctly, your display should illuminate within 2-3 seconds of lid positioning. Any delay indicates sensor problems. Watch for these specific error codes:
- E4: Lid detection failure (most common with locking issues)
- E6: Temperature sensor malfunction
- No display: Power or connection issue
Sensor Cleaning and Testing
To clean sensors safely:
– Locate the small rectangular windows on lid underside
– Use cotton swabs dipped in isopropyl alcohol (90%+)
– Gently clean window surfaces without applying pressure
– Allow 5 minutes drying time before testing
Basic sensor functionality test:
1. Position lid correctly without locking
2. Observe display for illumination within 2-3 seconds
3. If display doesn’t activate, sensors need cleaning
4. If error code appears immediately, sensor may be damaged
Replace Damaged Locking Components Properly
Signs You Need Replacement Parts
Persistent locking failures after cleaning and realignment suggest component damage. Look for these specific signs:
Visible damage checklist:
– Bent or deformed locking pins (should be perfectly straight)
– Cracked sensor housings (visible as hairline fractures)
– Frayed or damaged wiring (check connection points)
– Broken alignment tabs (prevents proper positioning)
– Warped locking bracket (visible gap when lid is positioned)
Getting Genuine Replacement Parts
Contact Instant Pot customer service at 1-800-828-7280 with your model number and serial number. Replacement locking assemblies are model-specific and require professional installation for warranty coverage. Standard delivery takes 3-5 business days.
Information needed for parts order:
– Complete model number (found on unit bottom)
– Serial number and purchase date
– Description of specific failure
– Previous troubleshooting attempts
Prevent Future Locking Issues With Simple Maintenance
Weekly Maintenance Routine
Establish a simple maintenance schedule to prevent 90% of locking problems. This takes just 3 minutes after each use:
Post-use checklist:
– Wipe lid perimeter with damp cloth while warm (not hot)
– Check locking pins for visible debris
– Clear sensor windows with dry cotton swab
– Verify smooth rotation when storing
Monthly Deep Cleaning Protocol
Once monthly, perform a thorough mechanism cleaning:
– Remove lid completely
– Clean all accessible mechanism areas
– Dry thoroughly before reassembly
– Test locking function without heat
Pro tip: Keep your Instant Pot air fryer lid not locking problems at bay by establishing this routine immediately after purchase—don’t wait until problems appear.
Warranty Coverage and Professional Repair Options
Standard 12-Month Protection Details
Your Instant Pot air fryer lid locking mechanism carries a 12-month warranty covering:
– Mechanical failures of locking system
– Sensor malfunctions
– Electrical connection issues
– Component defects in materials
When to Seek Professional Service
When DIY efforts fail, authorized service centers offer comprehensive diagnostics. Service includes:
– Specialized testing equipment
– Genuine replacement parts inventory
– 5-7 business day turnaround
– Warranty preservation for covered repairs
Service preparation checklist:
– Backup all food settings
– Clean unit thoroughly
– Include original purchase receipt
– Note specific error codes observed
Quick Fix Summary: Your Action Plan
Your Instant Pot air fryer lid not locking problem typically stems from three solvable issues: debris buildup, misalignment, or component wear. Start with cleaning the locking mechanism using warm soapy water and cotton swabs. Verify alignment by matching arrows precisely before rotating. If problems persist after these steps, check for visible component damage and contact customer service for replacement parts.
Immediate action steps:
1. Clean the locking mechanism thoroughly
2. Align lid using the 2-degree precision method
3. Test sensor response and check for error codes
4. Replace damaged components if necessary
5. Maintain with weekly cleaning to prevent recurrence
Remember that this safety feature protects you from high-temperature accidents. Taking 10 minutes for proper maintenance prevents 90% of locking failures and keeps your air fryer functioning perfectly for years of crispy, delicious meals. Most Instant Pot air fryer lid not locking issues can be resolved without professional help—armed with this guide, you’re now equipped to fix your air fryer and get back to cooking.


