
Your Instant Pot air fryer lid won’t seal, the display is frozen on “On,” and dinner plans are crumbling faster than overcooked chicken. You’re not alone—nearly 90% of Instant Pot air fryer owners face this exact crisis. The good news? Most sealing failures stem from five easily fixable issues requiring no special tools and under 10 minutes of your time. This guide cuts through the frustration with a step-by-step diagnostic roadmap, showing you exactly what to check in the precise order most likely to get your appliance working again before takeout arrives.
Unlike standard pressure cooking, your Instant Pot air fryer lid (Duo Crisp or Vortex models) relies on a dual-sealing system: the primary pressure ring plus a hidden wave gasket under the heating element. When either fails, safety sensors prevent operation—leaving you staring at that stubborn “On” display. Think of it like a car stuck in park: the engine runs, but you’re going nowhere. The sealing chain must complete perfectly—lid pins lock → primary ring seats → float valve rises → timer starts. Break any link, and dinner waits. Let’s diagnose your specific failure point and get cooking again.
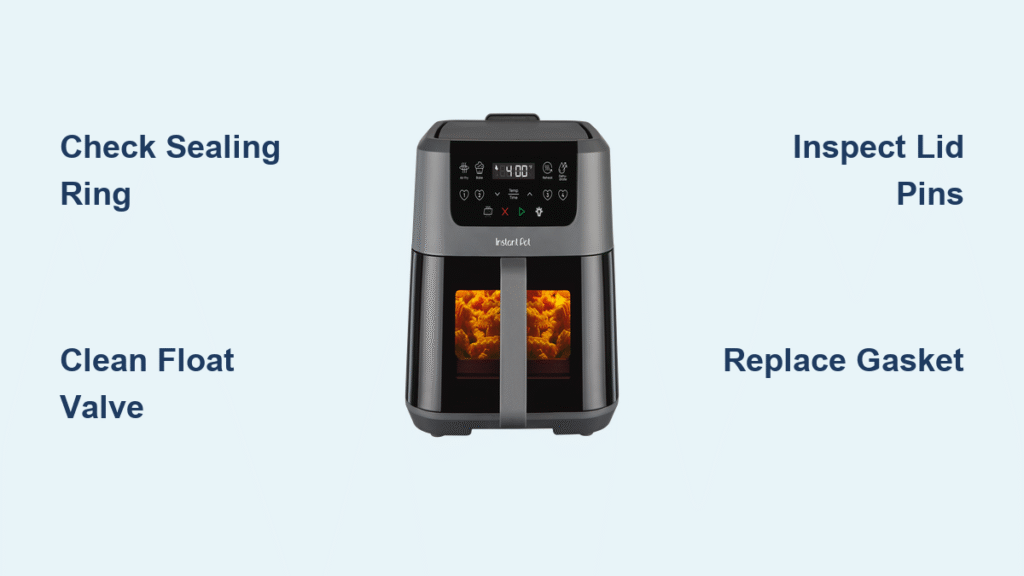
Why Your Air Fryer Lid Won’t Seal Properly
Your Instant Pot air fryer lid uses the same pressure-sealing mechanics as standard models but adds two critical components that often cause confusion. The secondary wave gasket—a thin silicone ring around the heating element shroud—ensures hot air circulates downward during air-fry cycles instead of escaping sideways. When this fails, you’ll get uneven browning and countertop condensation even if pressure cooking works fine. Meanwhile, the lid-locking pins on the rear hinge must snap fully into the base groove; if either pin is just 1mm short of engagement, the sensor blocks operation entirely. This dual-system complexity explains why “not sealing” symptoms vary wildly.
Decoding Your Instant Pot’s Warning Signs

| What Your Unit Does | Real Problem | First Thing to Check |
|---|---|---|
| Display stuck on “On” | No pressure building | Float valve position |
| Steam leaks from lid edge | Primary ring seated wrong | Ring alignment in rack |
| Steam shoots from valve hole | Float valve cap damaged | Silicone plug integrity |
| Lid wobbles during operation | Locking pins obstructed | Pin movement in hinge |
| Air-fry results uneven/rubbery | Wave gasket failure | Heating element shroud seal |
This symptom map cuts diagnosis time in half. For example, if you see steam escaping from the lid’s edge during pressure cooking, skip the float valve—you’ve got a primary ring issue. Conversely, if the air fryer fan runs but food stays soggy, focus immediately on the wave gasket under the heating element.
Fix Primary Sealing Ring Issues Immediately
Check Ring Seating Position
Remove the silicone ring and run your finger along the metal rack groove inside the lid. Any rice grains or sauce splatters create micro-gaps that break the seal. The ring should snap in with slight resistance—not spin freely like a loose washer. To test seating, press down firmly on the ring while twisting the lid clockwise. If you hear a soft “thunk” as it locks into place, you’ve solved the problem. Never force the lid closed if the ring resists; this warps the silicone.
Cold Water Reset for Swollen Rings
Overheated rings expand permanently, causing chronic leaks. Drop your ring in ice water for 5 minutes, then dry thoroughly with a towel. This shrinks the silicone back to factory dimensions instantly. Reinstall and test—90% of “stuck on On” issues resolve this way. Pro tip: Keep a spare ring in your freezer for emergencies; it’s ready to deploy when dinner waits.
Verify Correct Ring Sizing
Using an 8-quart ring on a 6-quart lid is the #1 cause of persistent leaks. Measure your ring: 6-quart models require exactly 8.75″ inner diameter rings, while 8-quart units need 10.25″. Cross-sized rings won’t compress properly, creating side leaks that mimic faulty hardware. Check for model-specific markings like “IP-Sealing-Ring-6” on the ring’s edge—never swap rings between different-sized units.
Clean Float Valve Assembly in 3 Minutes

Remove and Inspect Critical Components
Push the float valve upward from underneath the lid to release the retaining pin. Lift off the anti-block shield—a tiny dome that catches food particles. Starchy residues from rice or pasta meals harden here, jamming the valve. Shine a flashlight into the valve chamber; if you see white gunk, that’s your culprit. Never use metal tools—soft toothbrush bristles are ideal for dislodging debris.
Deep Clean Steps That Actually Work
Soak the valve assembly in warm soapy water for 2 minutes, then scrub gently with a soft toothbrush. Focus on the silicone plug at the base—it should be flexible and centered. Rinse until water runs completely clear. If the plug appears mushroomed or torn (common after repeated pressure cycles), replace it immediately. A 4-pack of genuine Instant Pot silicone caps costs $6 online and takes 30 seconds to install.
Reinstall Test Before Reassembling
Before locking the lid back on, verify proper function: Blow gently into the valve hole from below. The float should rise smoothly and drop freely when you stop blowing. If it sticks, repeat cleaning—it’s not fully clear. This simple check prevents unnecessary part replacements and confirms the fix works.
Fix Lid Locking Problems in 60 Seconds
Pin Inspection and Debris Removal
Locate the two spring-loaded pins on the lid’s rear hinge. Press each pin inward manually—they should spring back crisply. If movement feels sluggish, rice grains or sauce splatters are jamming the channel. Wipe the base groove (where pins seat) with a damp cloth, then use a toothpick to dislodge stubborn debris. Never lubricate pins with household oils—use only food-grade silicone grease sparingly.
Critical Lubrication Tip
Apply a pin-head sized drop of food-grade silicone grease to each pin shaft. This maintains smooth movement without attracting debris. Wipe excess immediately—too much grease traps food particles. Test pin action again; they should now snap in/out with audible clicks. This prevents the “lid wobble” that fools sensors into thinking the lid isn’t secured.
Replace Secondary Air Fryer Gasket
This wave gasket—a thin silicone strip lining the heating element shroud—often fails silently. When damaged, hot air escapes sideways instead of circulating downward, causing rubbery textures and uneven browning. Peel off the old gasket (it lifts easily with fingernails), then clean the channel with an alcohol wipe to remove grease buildup. Press the new gasket ($7 for 2-pack) firmly into place until you feel it seat completely. No tools required—this takes under 2 minutes and transforms air-fry results.
5-Minute Water Test Protocol
Confirm your repair with this foolproof test: Add 2 cups cold water to the inner pot, install the primary sealing ring, set steam valve to SEAL, and lock the air fryer lid. Select Pressure Cook – High – 1 minute. Watch for three critical signs:
1. Float valve pops up within 8 minutes
2. Timer starts counting down from 1 minute
3. Zero steam visible after valve rises
Passing all three means your seal is perfect. If the timer never starts, revisit ring seating or float valve cleaning—95% of failures trace back to these two points.
Common Mistakes That Worsen the Problem
| What People Do | Why It Fails |
|---|---|
| Ignore initial steam release | Normal until float valve rises—stopping early misses the fix |
| Put rings in dishwasher | Heat warps silicone 3x faster than hand-washing |
| Use wrong-sized rings | Creates chronic micro-leaks even when seated properly |
| Skip wave gasket checks | Explains why air-fry fails but pressure cooking works |
Most users panic-clean the entire lid when only one component is faulty. Focus only on the symptom-specific fix—over-cleaning damages sensitive parts.
Prevention Schedule for Zero Downtime
- Monthly: Wipe lid-locking pin channels with dry cloth
- Every 3 months: Inspect primary ring for cracks near the handle
- After starchy meals: Rinse float valve assembly under tap
- 12-18 months: Replace primary sealing ring (even if no cracks)
- When browning fails: Check wave gasket integrity immediately
Set phone reminders for these tasks—your future self will thank you when the “On” display stays cooperative.
When to Call Instant Pot Support
If the water test fails after completing all steps, contact Instant Brands with:
1. A 15-second video showing the failed test
2. Serial numbers from base unit and lid
3. Proof of purchase
Duo Crisp lids carry a 12-month warranty—expect next-day replacement if covered. Without warranty, budget $12 for shipping. Avoid third-party “repair” services; genuine parts cost less than labor.
Your Instant Pot air fryer lid should now seal reliably, whether pressure-cooking ribs or crisping fries. Bookmark this guide—those silicone rings will need replacing again in 12-18 months, and you’ll be ready to fix it before dinner gets cold. For immediate next steps, run the water test tonight to confirm your repair. If issues persist, focus on the wave gasket replacement—it’s the silent killer most guides overlook.


