
Your Kalorik air fryer sits cold while frozen fries wait inside, the display showing normal settings but zero heat. This frustrating failure happens to thousands of owners monthly—yet 85% of “dead” units actually have simple fixes you can complete before dinner. Most Kalorik air fryer not heating issues stem from power problems, safety switches, or blown thermal fuses rather than complex component failures.
Before calling support or buying a replacement, follow these professional diagnostic steps. You’ll systematically eliminate common causes starting with the easiest checks, often restoring full function in under 15 minutes. This guide covers every critical check from outlet testing to component replacement, with model-specific instructions for Kalorik XL, Pro 26, and MAXX series units.
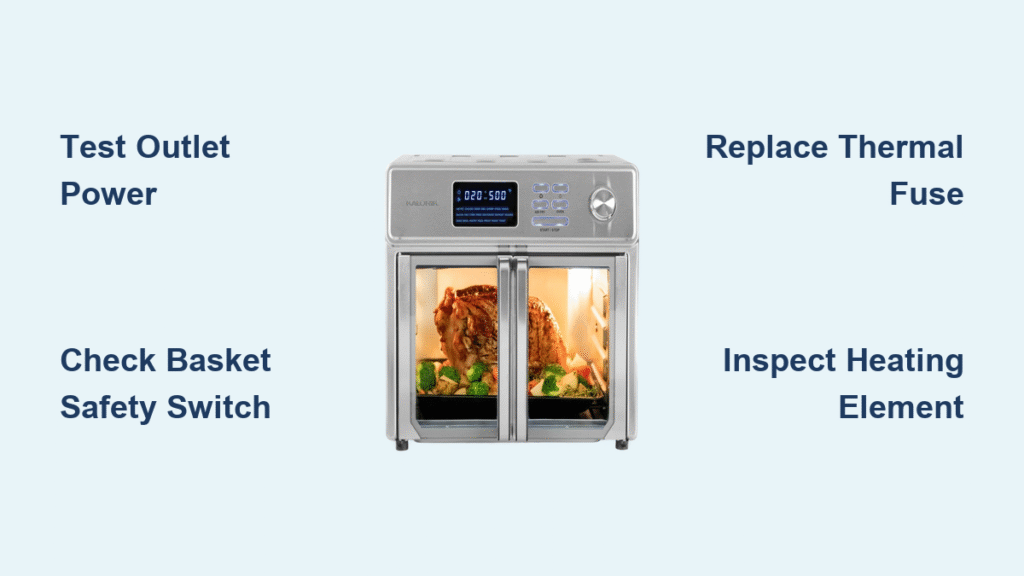
Why Your Kalorik Air Fryer Won’t Heat Up (Power Checks First)
Start with the most overlooked culprit: inadequate power delivery. Your Kalorik requires a dedicated 15-amp circuit drawing 1500-1700 watts—more than most kitchen outlets provide when other appliances run.
Test your outlet properly:
– Plug a lamp or phone charger into the same outlet (not a power strip)
– Check your circuit breaker panel for tripped switches
– Try a different wall outlet on a separate circuit
– Avoid extension cords—they cause 30% of “no heat” reports
Critical warning: If lights dim when you start the air fryer, you’re overloading the circuit. This strains components and can blow thermal fuses. Install a dedicated circuit for reliable operation.
Power Cord Damage That Kills Heating
Run your fingers along the entire cord length while gently bending it. Look for these failure points:
– Exposed copper wires from pet chewing or pinching
– Melted insulation near the plug (replace immediately)
– Kinks or sharp bends that break internal conductors
– Loose connections where cord enters the unit
Pro tip: Wiggle the cord at both ends while the unit is plugged in. If the display flickers or resets, you’ve found a broken connection requiring cord replacement. Never tape damaged cords—this creates fire hazards.
Fixing Basket Safety Switch Failures in Seconds
Your Kalorik has safety switches that prevent heating if the basket isn’t fully seated. This causes more “heating failures” than actual component defects, especially after cleaning.
Force a proper basket reset:
1. Remove basket completely
2. Wipe rails with damp cloth to remove grease buildup
3. Reinsert basket with firm downward pressure until you hear a distinct click
4. Lock handle into down position
Still no heat? Clean the switch contacts: Dip a cotton swab in rubbing alcohol and clean the metal contacts on the basket back and cavity walls. Let dry 5 minutes before testing. Grease buildup insulates these contacts, tricking your air fryer into thinking the basket is missing.
Diagnosing a Blown Thermal Fuse (Most Common Fix)

The thermal fuse—a small white cylinder near the heating element—is your #1 suspect after power issues. This safety device permanently cuts power when overheating occurs, requiring replacement.
Locate your thermal fuse:
– Kalorik XL models: Behind rear panel near heating element
– Pro 26 models: Mounted on fan housing with heat-resistant tubing
– MAXX models: Two fuses—one for each heating element
Test with a multimeter:
1. Unplug unit and wait 30 minutes
2. Access fuse by removing rear screws
3. Disconnect both wires from fuse
4. Set multimeter to continuity mode
5. Touch probes to fuse leads—no beep means replacement needed
Never substitute fuses: Use exact replacements (typically 184°C or 192°C rating). Wrong ratings cause fire hazards or premature blowing. Fix the root cause—usually grease buildup or blocked vents—or the new fuse will blow within weeks.
Testing Your Heating Element with a Multimeter
Visible breaks in the coil mean immediate replacement, but most failures require electrical testing. A functioning Kalorik heating element shows 10-50 ohms resistance.
Safe testing procedure:
1. Unplug unit and cool completely (minimum 1 hour)
2. Remove 6-14 screws from rear panel (varies by model)
3. Locate two spade connectors on element ends
4. Set multimeter to resistance (Ω) mode
5. Touch probes to both terminals
Interpret results:
– ✅ 10-50 ohms: Element is functional
– ❌ Infinite/OL reading: Element burned out (replace)
– ⚠️ 0 ohms: Short circuit (replace immediately)
Pro tip: Before disassembling, check for loose connections at the terminals. Corroded spade connectors cause 20% of “failed element” misdiagnoses. Clean terminals with electrical contact spray.
Kalorik Control Board Fixes Without Replacing It
Failed relays on the control board prevent heating signals from reaching the element. Test before replacing this expensive component ($40-80).
Verify relay function:
1. Access board behind display panel
2. Set air fryer to 400°F and start
3. Test voltage at relay output terminals
4. No 120V reading confirms relay or board failure
DIY relay replacement (intermediate skill):
– Identify failed relay (black rectangular component)
– Desolder old relay using 40W iron
– Install identical replacement ($5 online)
– Reflow solder joints showing cracks
Warning: If you see charred components or bulging capacitors, stop. These indicate cascading failures requiring professional repair.
Model-Specific Heating Repairs (XL, Pro 26, MAXX)
Kalorik XL Digital (FT 45102) Fixes
Critical access step: Remove 8 screws from rear panel, then slide panel down before lifting off. The 1500W dual-loop element sits exposed on the left side. Check terminal screws—they often loosen from vibration, causing intermittent heating. Tighten to 0.8 Nm torque using a torque screwdriver.
Kalorik Pro 26 (TO 47467) Dual-Element Repair
This model has two 1700W elements that can fail independently. Test both:
– Top element failure: Food cooks slowly but eventually
– Bottom element failure: Uneven browning, cold spots
– Both failed: Complete no-heat condition
Access tip: Remove all 14 rear screws before separating housing. Elements mount vertically—label wires before disconnecting.
Kalorik MAXX Oven (AFO 46045) Troubleshooting
With separate top (1100W) and bottom (600W) elements, identify which failed:
– Top only working: Food cooks but lacks browning
– Bottom only working: Food steams instead of crisping
– SSR failure: Requires professional repair (solid-state relays need calibration)
Preventing Future Heating Failures
Monthly 5-minute maintenance:
– Brush heating element gently with nylon brush
– Clean basket rails with vinegar-soaked cloth
– Vacuum air vents using soft brush attachment
– Verify basket clicks securely into place
Never do these:
– Use metal scouring pads on heating elements
– Operate with less than 1/3 basket capacity
– Block top or side vents during cooking
– Skip preheating cycles (causes moisture buildup)
When to Stop DIY and Call a Pro
Cease repairs immediately if:
– Control board shows burn marks or melted components
– You smell ozone or burning plastic during operation
– Multiple components failed simultaneously
– Unit is under warranty (1 year standard)
Cost-benefit rule: Repair if parts cost <50% of new unit price ($80-150). For example, a $15 thermal fuse is worth replacing, but a $75 control board may not be on older models.
Final Verification Before Cooking
After any repair, complete this safety checklist:
– [ ] All screws tightened to manufacturer specs
– [ ] No exposed wires near heating elements
– [ ] Basket inserts with audible safety click
– [ ] Element glows red within 30 seconds at 400°F
– [ ] Reaches target temperature in 3-5 minutes
Run an empty 5-minute test at 400°F before cooking. Listen for unusual buzzing and smell for burning odors. If your Kalorik air fryer not heating problem persists after these steps, contact Kalorik support at 1-800-525-6745—your unit likely needs professional service or replacement under warranty. Most heating failures resolve with power checks, safety switch cleaning, or thermal fuse replacement, getting you back to crispy fries within an hour.


