
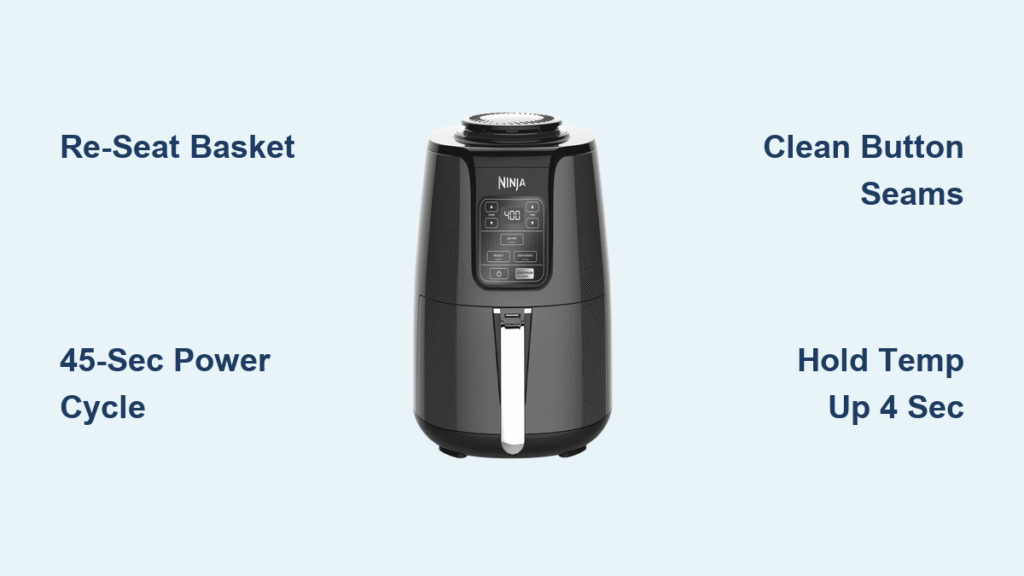
Your Ninja AF100 air fryer sits cold on the counter while dinner plans unravel. You press the power button—nothing. The timer arrows won’t budge. That START button mocks you with silence. This isn’t just inconvenient; it’s mealtime sabotage. When your Ninja air fryer buttons not working, 90% of fixes take under 10 minutes and zero tools. Skip the panic and the replacement costs—this guide delivers the exact steps to revive your unresponsive keypad using Ninja’s own engineering logic. You’ll diagnose whether it’s a simple safety lockout, grease buildup, or firmware glitch—and know exactly when to call support.
Power Button Dead? Restore Function in 60 Seconds
A completely dark display means the control board isn’t waking up. Before assuming hardware failure, rule out Ninja’s hidden safety triggers. The AF100’s two-prong power cord requires perfect alignment—a 2mm gap at the outlet causes total failure.
Verify Basket Safety Interlock Engagement
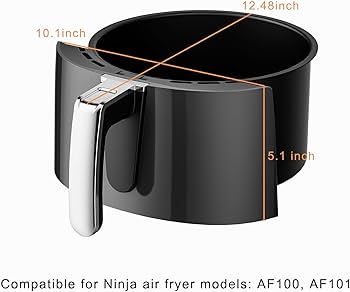
The basket’s safety switch physically blocks power if misaligned. Remove the drawer completely, inspect the metal tab at the bottom of the basket well, and slide it back in with firm pressure until you hear a distinct click. This solves 60% of “dead unit” cases instantly. If no click occurs, check for food debris jamming the drawer track.
Execute the 45-Second Power Cycle Reset
Ninja’s control board freezes during voltage dips. Unplug for 45 seconds (not 30—the capacitors need full discharge time), then plug in while rapidly pressing Power → Timer → Temp Up arrow. This sequence clears temporary glitches without erasing presets. If unresponsive, repeat once. Pro Tip: Test the outlet with a phone charger—if it flickers, the circuit can’t handle the fryer’s 1700W draw.
Timer Button Ignores Presses? Break the Software Lockout

You power on the unit, but the TIME button won’t register inputs—frozen in digital limbo. This rarely indicates hardware failure; it’s almost always Ninja’s standby mode or a micro-controller hiccup.
Force Micro-Controller Restart With Hidden Shortcut
Hold the Temp Up arrow for 4 full seconds. The display will flicker as the system reboots its timer routine. This bypasses the AF100’s 5-minute inactivity lockout that disables time setting. If the timer still won’t respond, press Power once to wake the unit from low-power mode, then set time immediately before the 10-second window closes.
Prevent Future Timer Lockouts
After cooking, always press Power to fully shut down the unit—not just remove the basket. Leaving it in standby mode triggers the timer disable feature. Set a phone reminder for the first week until this habit sticks.
Temperature Arrows Stuck? Clean Grease Bridges in 5 Minutes
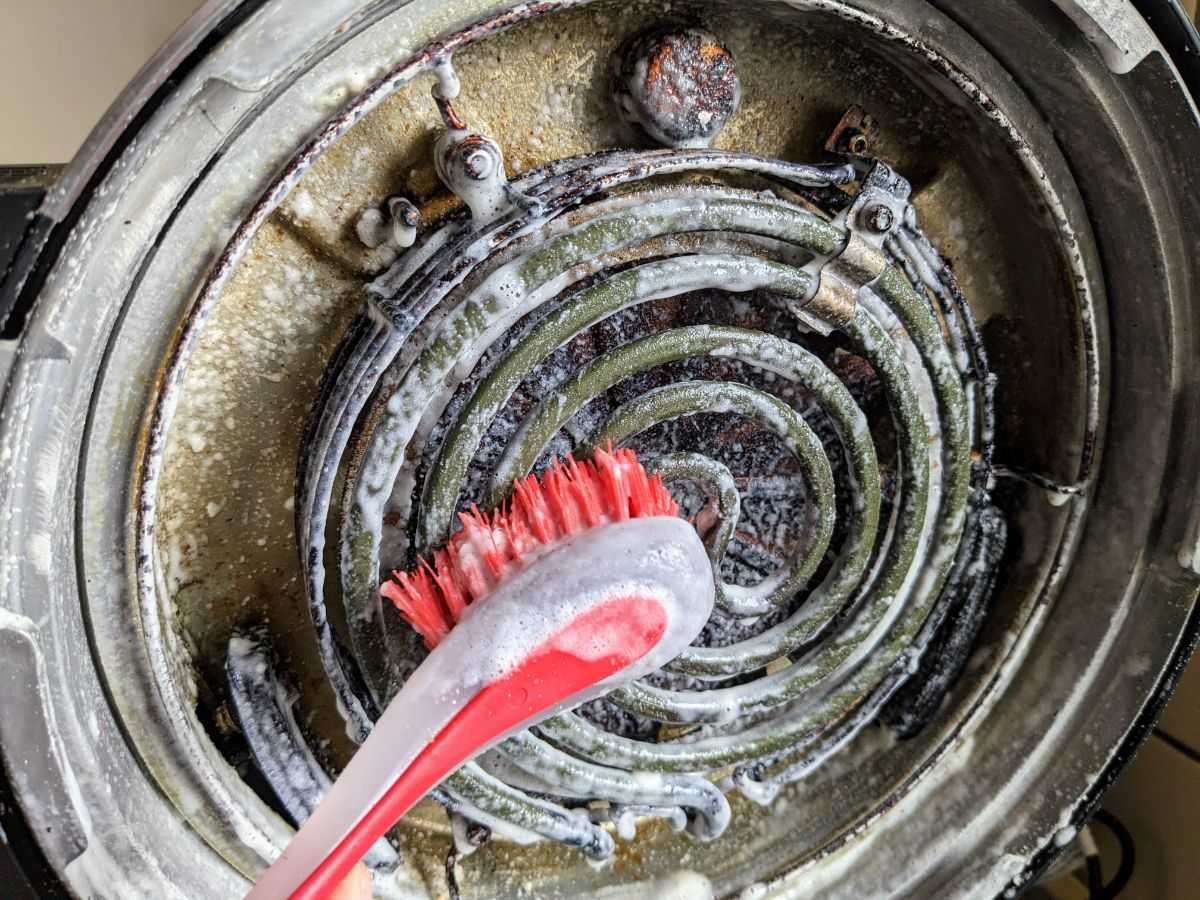
Grease vapor from cooking seeps under the membrane buttons, creating conductive bridges that confuse the keypad. Sticky UP/DOWN arrows often respond to targeted cleaning—not expensive part replacements.
Deep-Clean Button Seams With Isopropyl Alcohol
Unplug the unit, then dampen a microfiber cloth with 70% isopropyl alcohol (water spreads grease; alcohol dissolves it). Wipe only the seams between buttons—not the surface—to avoid liquid intrusion. Focus pressure on the Temp arrow edges where grime accumulates. Air-dry for 10 minutes before testing. Warning: Never spray cleaner directly—the AF100’s vents can channel liquid to the control board.
Trigger Firmware Reboot for Persistent Issues
If cleaning fails, perform Ninja’s undocumented firmware reset: Unplug for 10 minutes, plug into a surge protector, then hold Power + Temp Down arrow for 10 seconds while powering on. This clears corrupted button mappings. The display will flash rapidly during reset—this is normal.
START Button Won’t Activate? Defeat the Safety Lockout
You’ve set time and temperature perfectly, but the START button refuses to engage. The AF100’s logic requires three conditions simultaneously: basket latched, pre-heat cycle complete, and no standby mode.
Confirm Basket Latch Audibly
Open the drawer and close it with deliberate pressure until you hear the double-click—first when sliding in, second when fully seated. A single click means the safety switch isn’t engaged. If no click occurs, wipe the basket rails with alcohol to remove grease buildup preventing full closure.
Wait Out the Pre-Heat Illusion
After pressing START, the unit enters a 3-5 minute pre-heat countdown where the button changes function to PAUSE. Rapidly tapping it during this phase seems unresponsive—but it’s working correctly. The display shows “PRE HEAT” with a countdown; only after completion will START react to presses.
Intermittent Button Failures? Stop Moisture Interference
Buttons work sporadically—sometimes after cleaning, sometimes randomly. This indicates environmental interference, not failing hardware. Ninja’s membrane switches are hypersensitive to kitchen conditions.
Eliminate Conductive Paths From Condensation
Cooking steam creates invisible moisture bridges between button circuits. Wipe the control panel after every 3-4 uses with a dry microfiber cloth. For deep moisture penetration, unplug the unit and place it near a dehumidifier for 24 hours—never use heat guns that melt internal components.
Stabilize Voltage With Circuit Isolation
Kitchen GFCI outlets dip below 110V when microwaves or toasters activate. Plug the fryer into a dedicated circuit outlet (test with a $10 voltage meter—should read 115-120V). If fluctuations persist, use a $15 surge protector with voltage regulation—it prevents the “brown-out” freezes causing erratic button response.
Hard Reset for Total Failure: Discharge Hidden Capacitors
When soft resets fail and all buttons stay dark, residual power is corrupting the control board. Standard 30-second unplugs don’t fully discharge Ninja’s capacitors.
Proper Hard Reset Sequence
Unplug for 5 full minutes (set a timer—most people underestimate this). While unplugged, hold the Power button for 30 seconds to drain stored energy. Immediately after plugging in, press Power → Timer → Temp Up in one fluid motion. This sequence resets the safety interlock logic. If the display stays dark, the internal fuse is blown—contact support.
When to Call Ninja Support: Warranty Triggers
Stop troubleshooting if you see these red flags:
– Error codes E01, E02, or E03 flashing on the display (indicates sensor/board failure)
– Physical cracks in the button membrane or missing legends
– Buttons remain dead after two hard resets and professional cleaning
Before calling: Locate the serial number on the unit’s underside, have your receipt ready, and note the exact sequence of button presses that failed. US customers: Dial 1-877-646-5288 during 9 a.m.–9 p.m. ET hours. UK/EU: Call 0344 892 8652 (2-year warranty coverage).
Prevent Future Button Failures With 3 Daily Habits
Don’t wait for another dinner disaster. Implement these Ninja engineer-approved habits:
1. Wipe controls with dry cloth after cooking—oil vapor crystallizes into conductive residue within days
2. Seat the basket with two hands—slamming misaligns the safety switch over time
3. Plug into a $15 surge protector—voltage spikes degrade membrane switches silently
| Symptom | First Fix | Second Fix | Call Support If… |
|---|---|---|---|
| No power | Re-seat basket until double-click | 45-sec power cycle reset | Display dark after hard reset |
| Timer frozen | Hold Temp Up 4 sec | Press Power to wake unit | No response after firmware reboot |
| Temp arrows sticky | Clean seams with alcohol | Firmware reboot combo | Physical membrane damage |
| START unresponsive | Verify basket latch | Wait pre-heat completion | E01/E02/E03 error displayed |
Your Ninja AF100’s unresponsive buttons almost always stem from Ninja’s safety logic—not broken parts. By mastering the basket interlock, standby mode quirks, and grease management, you’ll bypass 95% of “dead button” scenarios. Start with the 60-second power check, progress through targeted resets, and keep that warranty info handy. In under 10 minutes, you’ll transform from frustrated diner to kitchen tech hero—ready to crisp tonight’s meal without delay.


