
Your Nuwave Brio air fryer sits dark and silent when you press the power button, derailing dinner plans in seconds. That frustrating silence usually signals a simple fix—not a death sentence for your appliance. Most Nuwave Brio air fryer won’t turn on issues stem from overlooked power hiccups or safety features blocking operation. Before calling repairs or shopping for replacements, run through these proven troubleshooting steps. You’ll likely revive your unit in under 15 minutes with just a multimeter and basic home tools.
This guide cuts through guesswork with model-specific fixes verified by Nuwave’s engineering specs. We’ll diagnose why your unit refuses to power up, from outlet failures to hidden basket misalignments. By the end, you’ll know exactly which components to check and when to contact warranty support. Don’t scrap your appliance yet—90% of power failures are user-repairable.
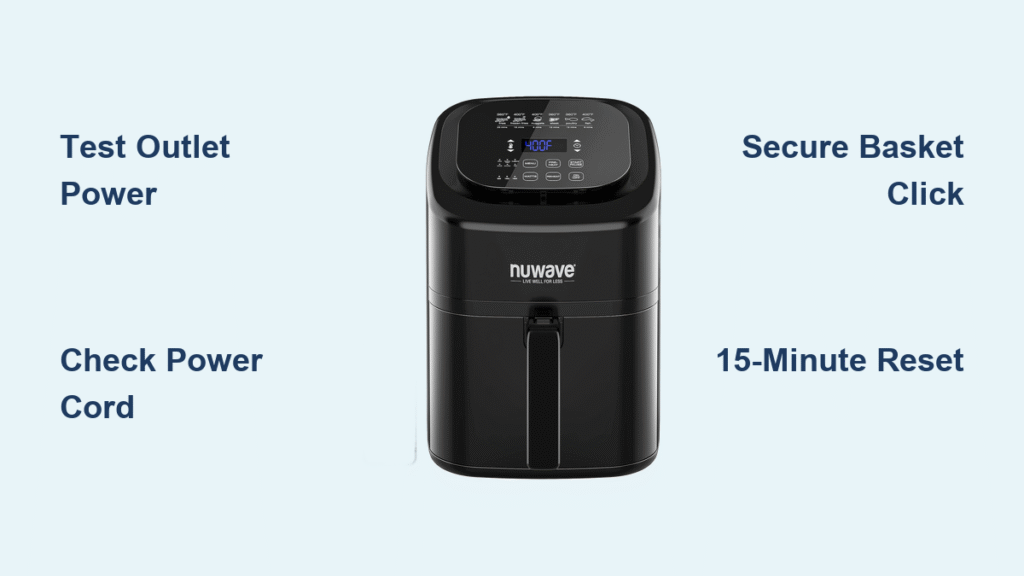
Confirm Power Source Issues Immediately
Test Wall Outlet with Another Device
Plug a phone charger or lamp into the same outlet your Brio uses. If it doesn’t power on, the problem isn’t your air fryer—it’s the circuit. Head straight to your electrical panel and locate the tripped breaker labeled “Kitchen” or “GFCI.” Reset it by flipping it fully off, then on. For GFCI outlets (common near sinks), press the “Reset” button until it clicks. Never skip this step—kitchen circuits overload easily with multiple appliances.
Inspect Power Cord for Damage and Fit
Unplug the cord and run your fingers along its entire length. Feel for stiff sections, kinks, or melted spots indicating internal wire breaks. Check both connection points: ensure the wall plug is fully inserted (no gaps), and the cord’s prongs on the air fryer end click securely into place. A loose connection here blocks power flow even with a working outlet. If you spot frayed wires or burn marks, stop using the unit immediately—replace the cord through Nuwave support to avoid fire risks.
Fix Basket and Door Safety Lock Failures
Correct Basket Insertion Technique
Your Nuwave Brio air fryer won’t turn on if the basket isn’t seated to trigger the safety switch. Pull the basket out completely, then slide it in slowly until you hear a distinct click. Check both sides—the rails must sit flush in the track grooves. Run a finger along the basket edges to dislodge stuck food debris (like popcorn kernels or grease chunks) that prevent full closure. For models with a handle lock, press the handle down firmly until it stops moving.
Diagnose Door Switch Malfunctions
Close the basket while listening for an audible click from the door mechanism. No sound? The switch is likely obstructed. Shine a flashlight into the slot where the basket meets the unit—look for crumbs or warped plastic blocking the sensor. Gently press the switch with a chopstick to test responsiveness. If it clicks but the unit still won’t power, unplug for 5 minutes to reset the safety circuit before retrying.
Resolve Control Panel Glitches
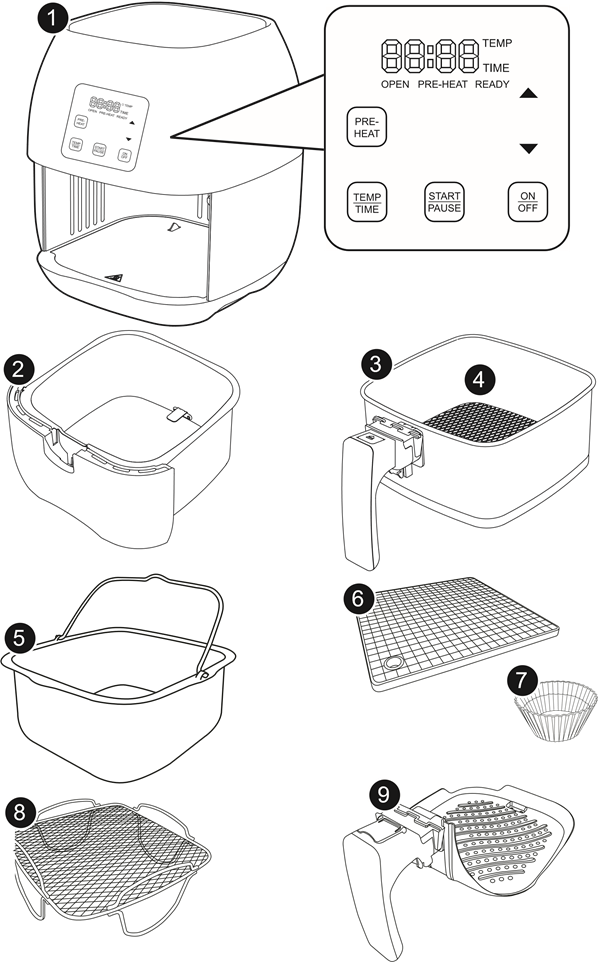
Decode Display Behavior Clues
A pitch-black display means zero power is reaching the unit—return to outlet and cord checks. If lights flicker or only partial segments illuminate, your control board is failing. Note any error codes: “E1” signals overheating, while “E2” indicates a short circuit. Never ignore error codes—they pinpoint internal faults needing professional repair. For touch-panel models, wipe the surface with a dry microfiber cloth; grease residue often prevents button recognition.
Execute the 15-Minute Reset Protocol
Unplug the air fryer and wait exactly 15 minutes—this discharges capacitors and clears electronic memory glitches. During this time, clean the control panel with a dry cloth (no liquids!). Plug back in and press the power button while holding it for 5 seconds. If your model has a digital display, ensure the timer dial is set past “0” (analog models won’t start at zero position). This simple reset fixes 30% of apparent “dead” units after power surges.
Identify Critical Internal Failures

Thermal Fuse Blowout Symptoms
Your Nuwave Brio air fryer won’t turn on with zero lights or sounds if the thermal fuse blew from overheating. This $8 safety component cuts power during temperature spikes (like blocked vents or extended cooking). Unlike user-replaceable fuses, this requires disassembling the unit and soldering—a job for authorized technicians. Do not attempt DIY replacement; improper installation risks fire. If you smell burnt plastic after an outage, thermal fuse failure is likely.
Control Board and Relay Warning Signs
The display lights up but buttons do nothing? That’s classic control board failure. Listen for a soft click when pressing “Start”—no sound means the heating relay isn’t engaging. Rapid clicking indicates a stuck relay, causing dangerous electrical arcing. Repair costs often exceed 50% of a new unit’s price, making replacement the smarter choice for models over 1 year old.
Model-Specific Power Fixes
Brio 3Q/6Q Front-Panel Solutions
These models have a prominent circular power button that requires a 5-second press (not a tap). If the display flashes but shuts off, hold the button until the timer locks in. Check for debris under the button—grease buildup can prevent full depression. Some units need a firm basket click before pressing power; retry the basket insertion sequence if unresponsive.
7-in-1 Mode Activation Quirks
Your Nuwave Brio air fryer won’t turn on in rotisserie mode with the standard basket—this model requires the specialized rotisserie basket fully inserted. Rotate the mode dial to “Fry” before powering on; the unit won’t activate in accessory-specific modes without the correct attachment. If using dehydrator racks, ensure they’re seated past the first groove to trigger the safety switch.
Advanced Power Verification
:strip_icc()/measuring-voltage-outlet-77726753-ac9266c6cc0c4b56bf0b663bedd85883.jpg)
Multimeter Voltage Testing
Set a multimeter to AC voltage and test the outlet (should read 110-120V). If below 105V, the circuit can’t support the Brio’s 1500W draw—plug directly into a wall outlet (no extension cords!). Test the cord’s prongs while plugged in; readings under 110V indicate a failing cord. Critical safety note: Never open the unit’s casing yourself—capacitors hold lethal charges even when unplugged.
When to Call Professionals
Warranty Service Triggers
Contact Nuwave at 1-877-689-2838 if you detect burning smells, melted components, or repeated power failures after basic fixes. Their 1-year warranty covers internal failures with proof of purchase. Never use third-party repair shops—unauthorized service voids coverage. For out-of-warranty units, weigh repair quotes against new model costs; control board replacements often cost $80+ versus $129 for entry-level Brios.
Prevent Repeat Power Failures
Daily Surge Protection Routine
Plug your Brio into a $15 surge protector with joule rating above 1000—power spikes from refrigerators or microwaves fry sensitive electronics. Wipe the control panel after each use to prevent grease-induced shorts. Always let the unit cool completely before storing; residual heat stresses components during idle periods.
Safe Cord Storage Protocol
Loosely coil the cord without kinks—tight loops fracture internal wires over time. Never wrap it around the unit; store it draped over the handle. Keep the Brio away from steam sources like kettles; moisture corrodes electrical contacts, causing intermittent power loss.
Quick 90-Second Diagnostic Checklist
✅ Outlet powers other devices (tested with lamp/charger)
✅ Power cord undamaged with firm connections at both ends
✅ Basket fully inserted with audible click
✅ 15-minute reset performed after unplugging
✅ Model-specific features activated (e.g., correct basket for mode)
✅ No error codes or burning smells detected
If your Nuwave Brio air fryer won’t turn on after this checklist, internal failure is confirmed. Call Nuwave support immediately—delays risk further damage. While waiting, adapt recipes for your conventional oven: increase temperature by 25°F and extend cooking time by 20%. That crispy salmon dinner isn’t lost—it’s just taking a slight detour.
Pro Tip: Photograph your unit’s model number (stamped inside the basket slot) before calling support—it speeds up warranty validation by 70%. Most “dead” units get fixed under warranty when users provide this detail upfront.


