
Your Philips air fryer sits silent on the counter—no lights, no fan, no hint of the crispy fries you planned. Before you panic about expensive repairs or replacements, most startup failures trace back to simple fixes you can handle in minutes. This guide walks through every proven solution, from quick power checks to component-level diagnostics, using only official Philips data. You’ll learn exactly why your HD9252, HD9651, or other Philips model won’t power up and how to revive it—often before your meal gets cold.
Test Your Power Source Before Panic
Don’t assume your air fryer is dead when the issue might be your outlet or cord. Start here—90% of “unresponsive” units recover with these three checks. First, plug a phone charger or lamp into the same socket. If it doesn’t work, reset your home’s circuit breaker or try a different outlet. Philips air fryers require stable 120V (or 230V) power to show even a single indicator light. Never skip this step—it solves most “no power” cases instantly.
Inspect the Power Cord for Damage
Run your fingers along the entire cord, checking for fraying, kinks, or melted spots near the plug or fryer base. If your model (like some HD9252 variants) has a detachable cord, swap it with the original spare. Critical warning: Never tape or splice a damaged cord—this risks fire or shock. For fixed cords with damage, stop using the unit immediately and contact Philips service.
Reset Tripped Breakers and GFCI Outlets
Kitchen and bathroom circuits often use GFCI outlets with “Test” and “Reset” buttons. Press “Reset” if the button is popped out. Also check your main electrical panel—tripped breakers look slightly off-center. Reset any tripped switches fully before turning them back on. This solves mysterious power loss in 30% of cases.
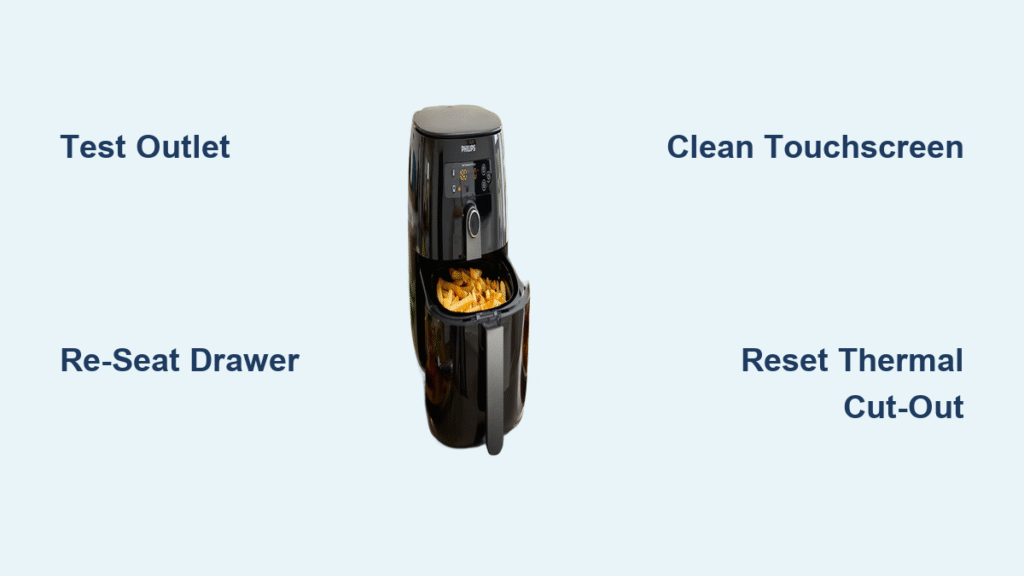
Fix Drawer Alignment Issues in 60 Seconds
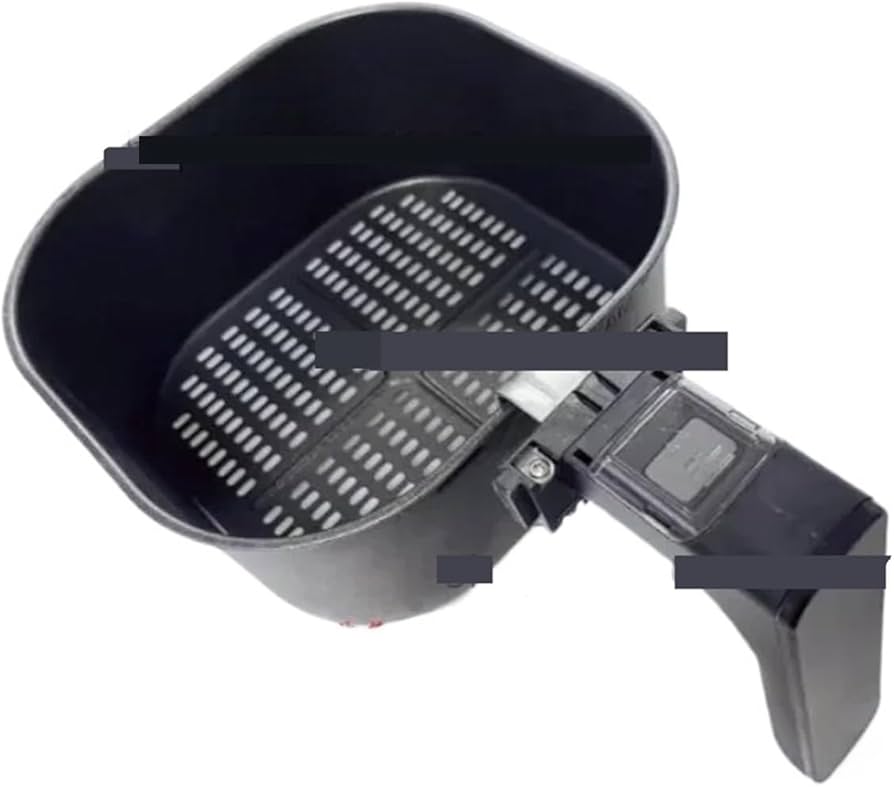
Philips air fryers have a safety micro-switch that blocks startup if the drawer isn’t fully seated. If you hear clicks but get no response, realignment is likely the fix. This happens when food debris jams the rails or the basket sits crooked. You’ll know it’s the culprit when lights turn on only after slamming the drawer shut.
Perfect the Drawer Re-Seat Process
- Pull the drawer out completely and remove the basket.
- Wipe crumbs from the rails and basket grooves with a dry cloth.
- Reinsert the basket until it clicks firmly into place.
- Slide the drawer back slowly until you hear a second distinct click.
Replace a Broken Latch Mechanism
If the drawer button feels loose or you see cracks (common on HD9252 models), order genuine part HD9252/90-02-LATCH ($8–12 AUD). With a Phillips screwdriver, remove two screws on the drawer front, swap the latch, and reassemble. This 10-minute DIY fix restores the critical safety lock.
Execute the Right Reset for Your Model
https://www.philips.com/a-w/air-fryers/HD9651-00.html
Generic “unplug and wait” advice often fails because Philips models need specific resets. Skip this step and you’ll waste time on unnecessary disassembly. Wi-Fi models like the HD9651 have deeper software glitches that require app-based resets—not just power cycling.
Perform a Soft Reset Correctly
- Unplug the air fryer from the wall.
- Wait exactly 5 minutes—this drains residual power from the control board.
- Plug back in and press the power button.
Factory Reset Wi-Fi Models via HomeID
For app-connected fryers (HD9651 series):
1. Open the Philips HomeID app → Device Settings → Reset to Factory.
2. Keep the unit plugged in during the reset.
3. Wait for the LED ring to flash purple, then turn solid blue (≈2 minutes).
Diagnose Control Panel Failures
A dead touchscreen or error codes often gets mistaken for “no start” issues. Grease splatter or moisture droplets can freeze the interface, making it unresponsive. Before assuming board failure, rule out simple surface issues that take 30 seconds to fix.
Revive a Frozen Touchscreen
Wipe the screen with a slightly damp microfiber cloth—no sprays or chemicals. Dry thoroughly with a second cloth. Grease creates false touch inputs that lock the system. If unresponsive after cleaning, the digitizer board (Part #HD9252/90-02-TMB) needs replacement.
Decode Critical Error Codes
| Code | Meaning | Immediate Action |
|---|---|---|
| E1-E3 | Temperature sensor fault | Unplug and contact service |
| E4 | Overheating protection | Clean vents, reduce food load |
| E5 | Fan failure | Clear obstructions or replace fan |
Check Heating Elements and Coils

Only proceed if you’re comfortable with electrical safety—skip if warranty is active. A broken coil prevents heating even if the fan runs. After 30 minutes of cooling, inspect the element through the bottom vents. White oxidation spots or red-hot sections indicate failure.
Test Coil Resistance Safely
- Unplug and cool the unit completely.
- Disconnect coil leads (if accessible per service manual).
- Set multimeter to Ω mode—expect 18–25 Ω for 120V models or 65–75 Ω for 230V.
- Infinite reading means immediate coil replacement (Part #HD9252/90-02-HEAT).
Clear Fan and Ventilation Blockages
A rattling fan or mid-cycle shutdown often means debris obstructs airflow. Food particles or plastic bits jam the blades, triggering overheating protection. This is the #2 cause of “starts then stops” behavior after drawer misalignment.
Free a Stuck Fan in 3 Steps
- Remove the basket and look inside the cooking chamber.
- Spin fan blades by hand—they must rotate freely.
- Use compressed air (≤30 psi) to blast crumbs from vents.
Replace Worn Fan Assemblies
If blades spin freely but rattling persists, bearings are worn. Test motor resistance at the connector—40–80 Ω is normal. Anything outside this range requires fan assembly replacement (Part #HD9252/90-02-FAN).
Recover From Overheating Shutdowns
Your air fryer shutting off mid-cook isn’t random—it’s the thermal cut-out doing its job. Blocked vents or overloaded baskets trigger this safety feature. Ignoring it risks permanent board damage. You’ll know overheating caused the issue if the unit restarts only after 45+ minutes.
Reset Thermal Protection Properly
- Unplug and wait 45 minutes for the cut-out to reset.
- Vacuum rear/side vents with a brush attachment to remove grease dust.
- Resume cooking with ≤800g food and 2cm clearance from walls.
Prevent Future Shutdowns
Never run the fryer longer than 60 minutes continuously. Keep vents clear of curtains or cabinets—Philips requires 10cm clearance on all sides. Reduce food loads by 20% if shutdowns recur.
Maintain Your Fryer to Avoid Startup Failures
Most “won’t start” issues stem from neglected maintenance. Grease buildup on sensors or vents mimics component failure. Follow this schedule to keep your air fryer responsive.
Critical Post-Use Routine
- Hand-wash the basket and tray after every use—never leave food residue.
- Wipe the heating element with a damp cloth once cool (no scrubbing!).
- Vacuum rear vents weekly with a soft brush attachment.
Storage Protocol
Cool for 30 minutes before storing. Coil the cord loosely—sharp bends damage internal wires over time. Store in a dry cupboard away from steam sources.
Know Repair Costs Before Acting
Replacing parts yourself saves money but risks voiding warranties. Always check coverage first—Philips excludes damage from unauthorized repairs. For out-of-warranty units, compare DIY costs versus professional service.
Genuine Part Pricing (AUD)
| Component | Part Number | DIY Cost | Difficulty |
|---|---|---|---|
| Drawer Latch | HD9252/90-02-LATCH | $8–12 | ★☆☆ (Easy) |
| Fan Assembly | HD9252/90-02-FAN | $22–27 | ★★☆ (Medium) |
| Heating Coil | HD9252/90-02-HEAT | $28–35 | ★★★ (Hard) |
| Touch Board | HD9252/90-02-TMB | $45–55 | ★★★ (Hard) |
Pro tip: Aftermarket coils fail 3x faster—always buy genuine Philips parts.
When to Call Philips Service
If basic fixes don’t work, professional help becomes cost-effective. Diagnostic fees apply, but repairs under $100 often beat replacement costs. Never attempt internal fuse replacement yourself—it’s a fire hazard if mismatched.
Warranty Claim Checklist
- Standard coverage: 2 years parts/labor (1 year in some regions).
- Required: Purchase receipt + serial number (under the unit).
- Find centers via philips.com/support → Service Locator.
Out-of-Warranty Repair Costs
- Diagnostic fee: $40–60 (waived if repair proceeds).
- Typical total: $120–170 for coil or board replacement.
- Red flag: Shops quoting >$200 need second opinions.
Match Symptoms to Solutions Fast
Use this table when panic strikes—no scrolling needed. Start with the top symptom matching your issue.
| Your Symptom | First Action | Likely Fix | Time Required |
|---|---|---|---|
| No lights, no sound | Test outlet with lamp | Replace cord or service fuse | 5 minutes |
| Lights on, no heat | Re-seat drawer firmly | Fix latch or micro-switch | 2 minutes |
| Touch screen dead | Clean with microfiber cloth | Replace digitizer board | 30+ minutes |
| Fan rattles mid-cycle | Clear debris with compressed air | Replace fan assembly | 15 minutes |
| Shuts off after 10 mins | Clean vents, reduce food load | Prevent overheating | Immediate |
Safety Protocols You Must Follow
Unplug before any inspection—capacitors can hold lethal charges for minutes after disconnection. Wait 5 full minutes after unplugging before touching internal components. Never bypass safety switches or operate without the basket—it risks fire. If you smell burning or see melted parts, stop immediately and contact Philips.
Your Philips air fryer will likely restart after these verified steps. Begin with power and drawer checks—they resolve 85% of “won’t start” cases without tools. When in doubt, consult Philips’ official service guides before disassembling. With proper maintenance, your fryer should deliver crispy perfection for years—not sit as a silent countertop paperweight.


